
My beautiful and talented wife was complaining that her sewing materials, needles, zippers, pins, thread, etc… were stored in a myriad of work boxes and every time she needed anything she had to search five places. I suggested that I could make a wall cabinet to go above her sewing table, in the same style, that would provide storage for all of those things and more. She loved that idea and so I designed the cabinet and after approved drawings I got to work on it.
I decided to make it out of maple to match her sewing table which would be right below it. I wanted to add some interesting details to dress it up so I decided to do a marquetry pattern on the door fronts, a herringbone pattern of 1 1/2” wide slices of the same maple as the case. It would provide an interesting texture and pattern without contrasting too much.
I also decided to use dovetail joints for the cabinet to give the side view some features as well. I made a practice project from some scrap to practice making dovetails since I’d never used them before.
The overall size of the cabinet was 36” x 24” and 9” deep including the doors. I chose to make the doors bi-folding because 18” doors would be cumbersome next to the wall on the left and the door opening on the right. Also, the sewing table has bi-folding doors and I wanted to repeat that feature.
I put a divider up the center of the cabinet so that there would be six independently adjustable shelves inside.
After acquiring all the maple that I needed for the project I cut the blanks for the sides and laid out the dovetail tails on the sides so that the bottom and top would have the pins. I cut the tails manually using my gents saw and then traced them onto the corresponding ends and cut the pins. I removed the waste using a coping saw, chisel, and rasp. After fine tuning the fit, I cut grooves in the panels to receive the back and a top batten and bottom batten to give me something to attach the wall mounting hardware to.


I built the frame of the doors as one big panel with the vertical frame parts for the doors centered at 9” intervals. I made split tenons on the three vertical frame parts that went into double mortices with a 1/2” space between them. This was so when the frame was assembled I could cut it into 9” ( or so ) panels and not show the mortices in the side frame. I assembled the frame and glued it up.


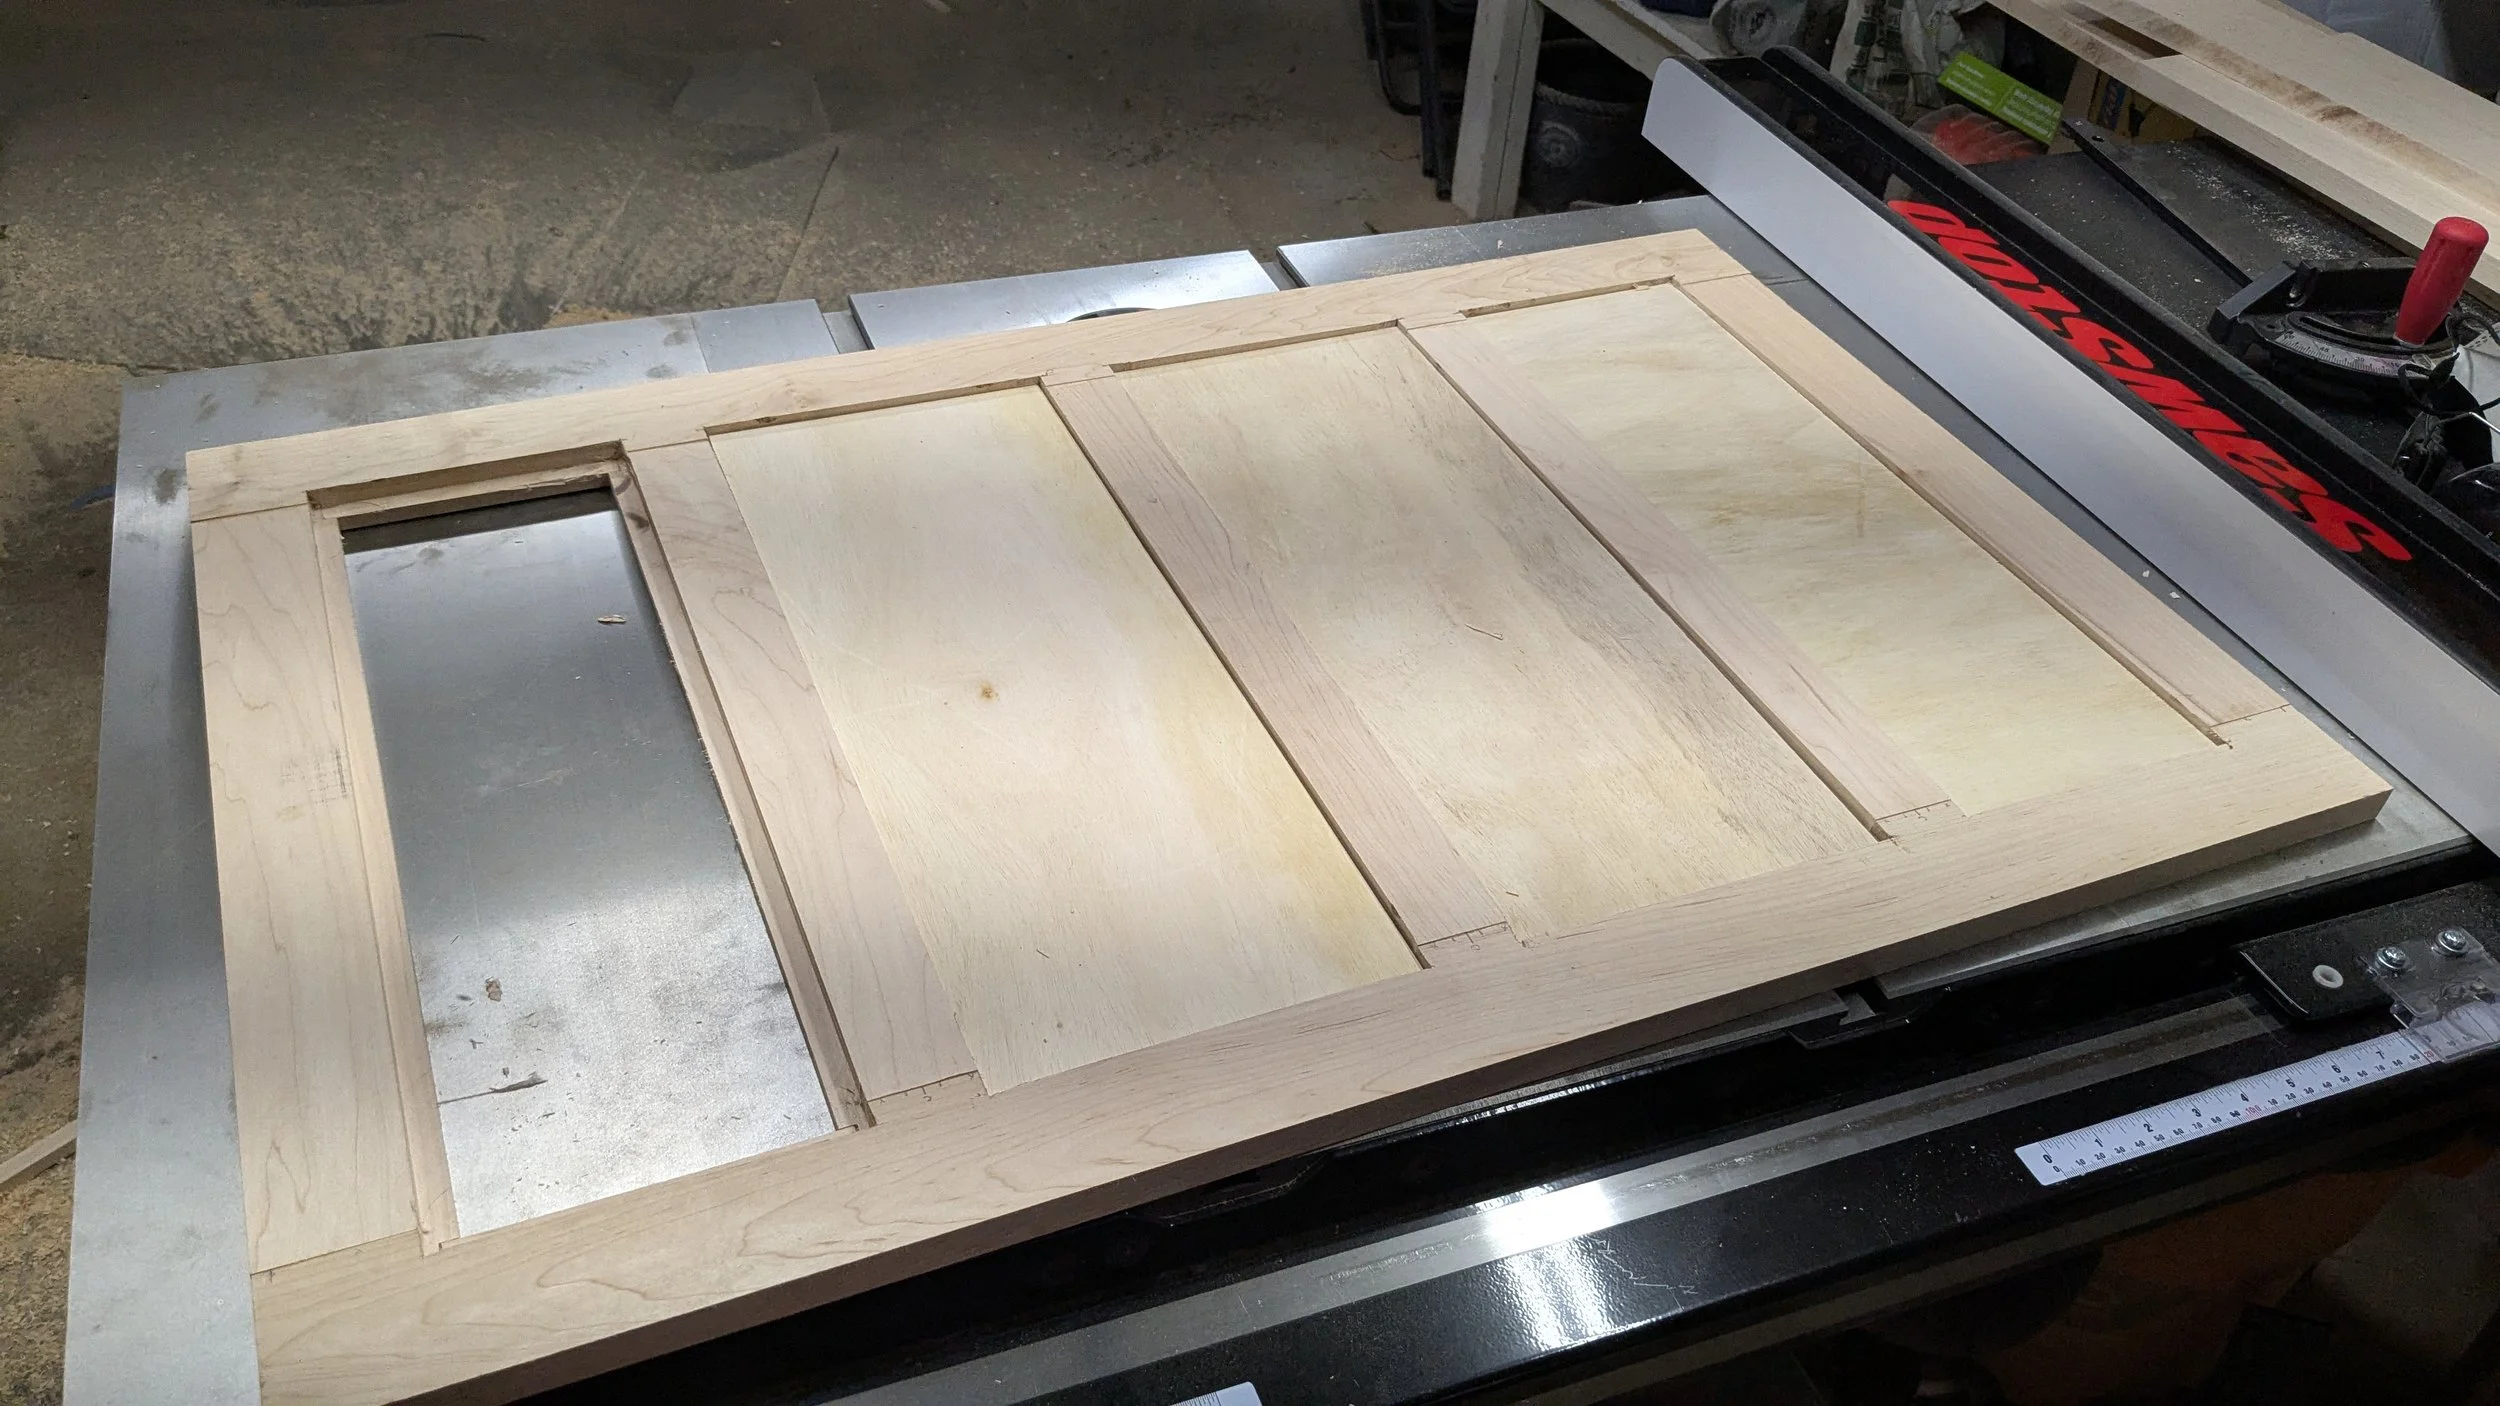
I routed a 1/2” W x 5/8” D rabbet around the inside edge of the back of the frames to hold the marquetry panels. I found that my Milwaukee trim saw was great for quickly cutting the waste out of the corners.
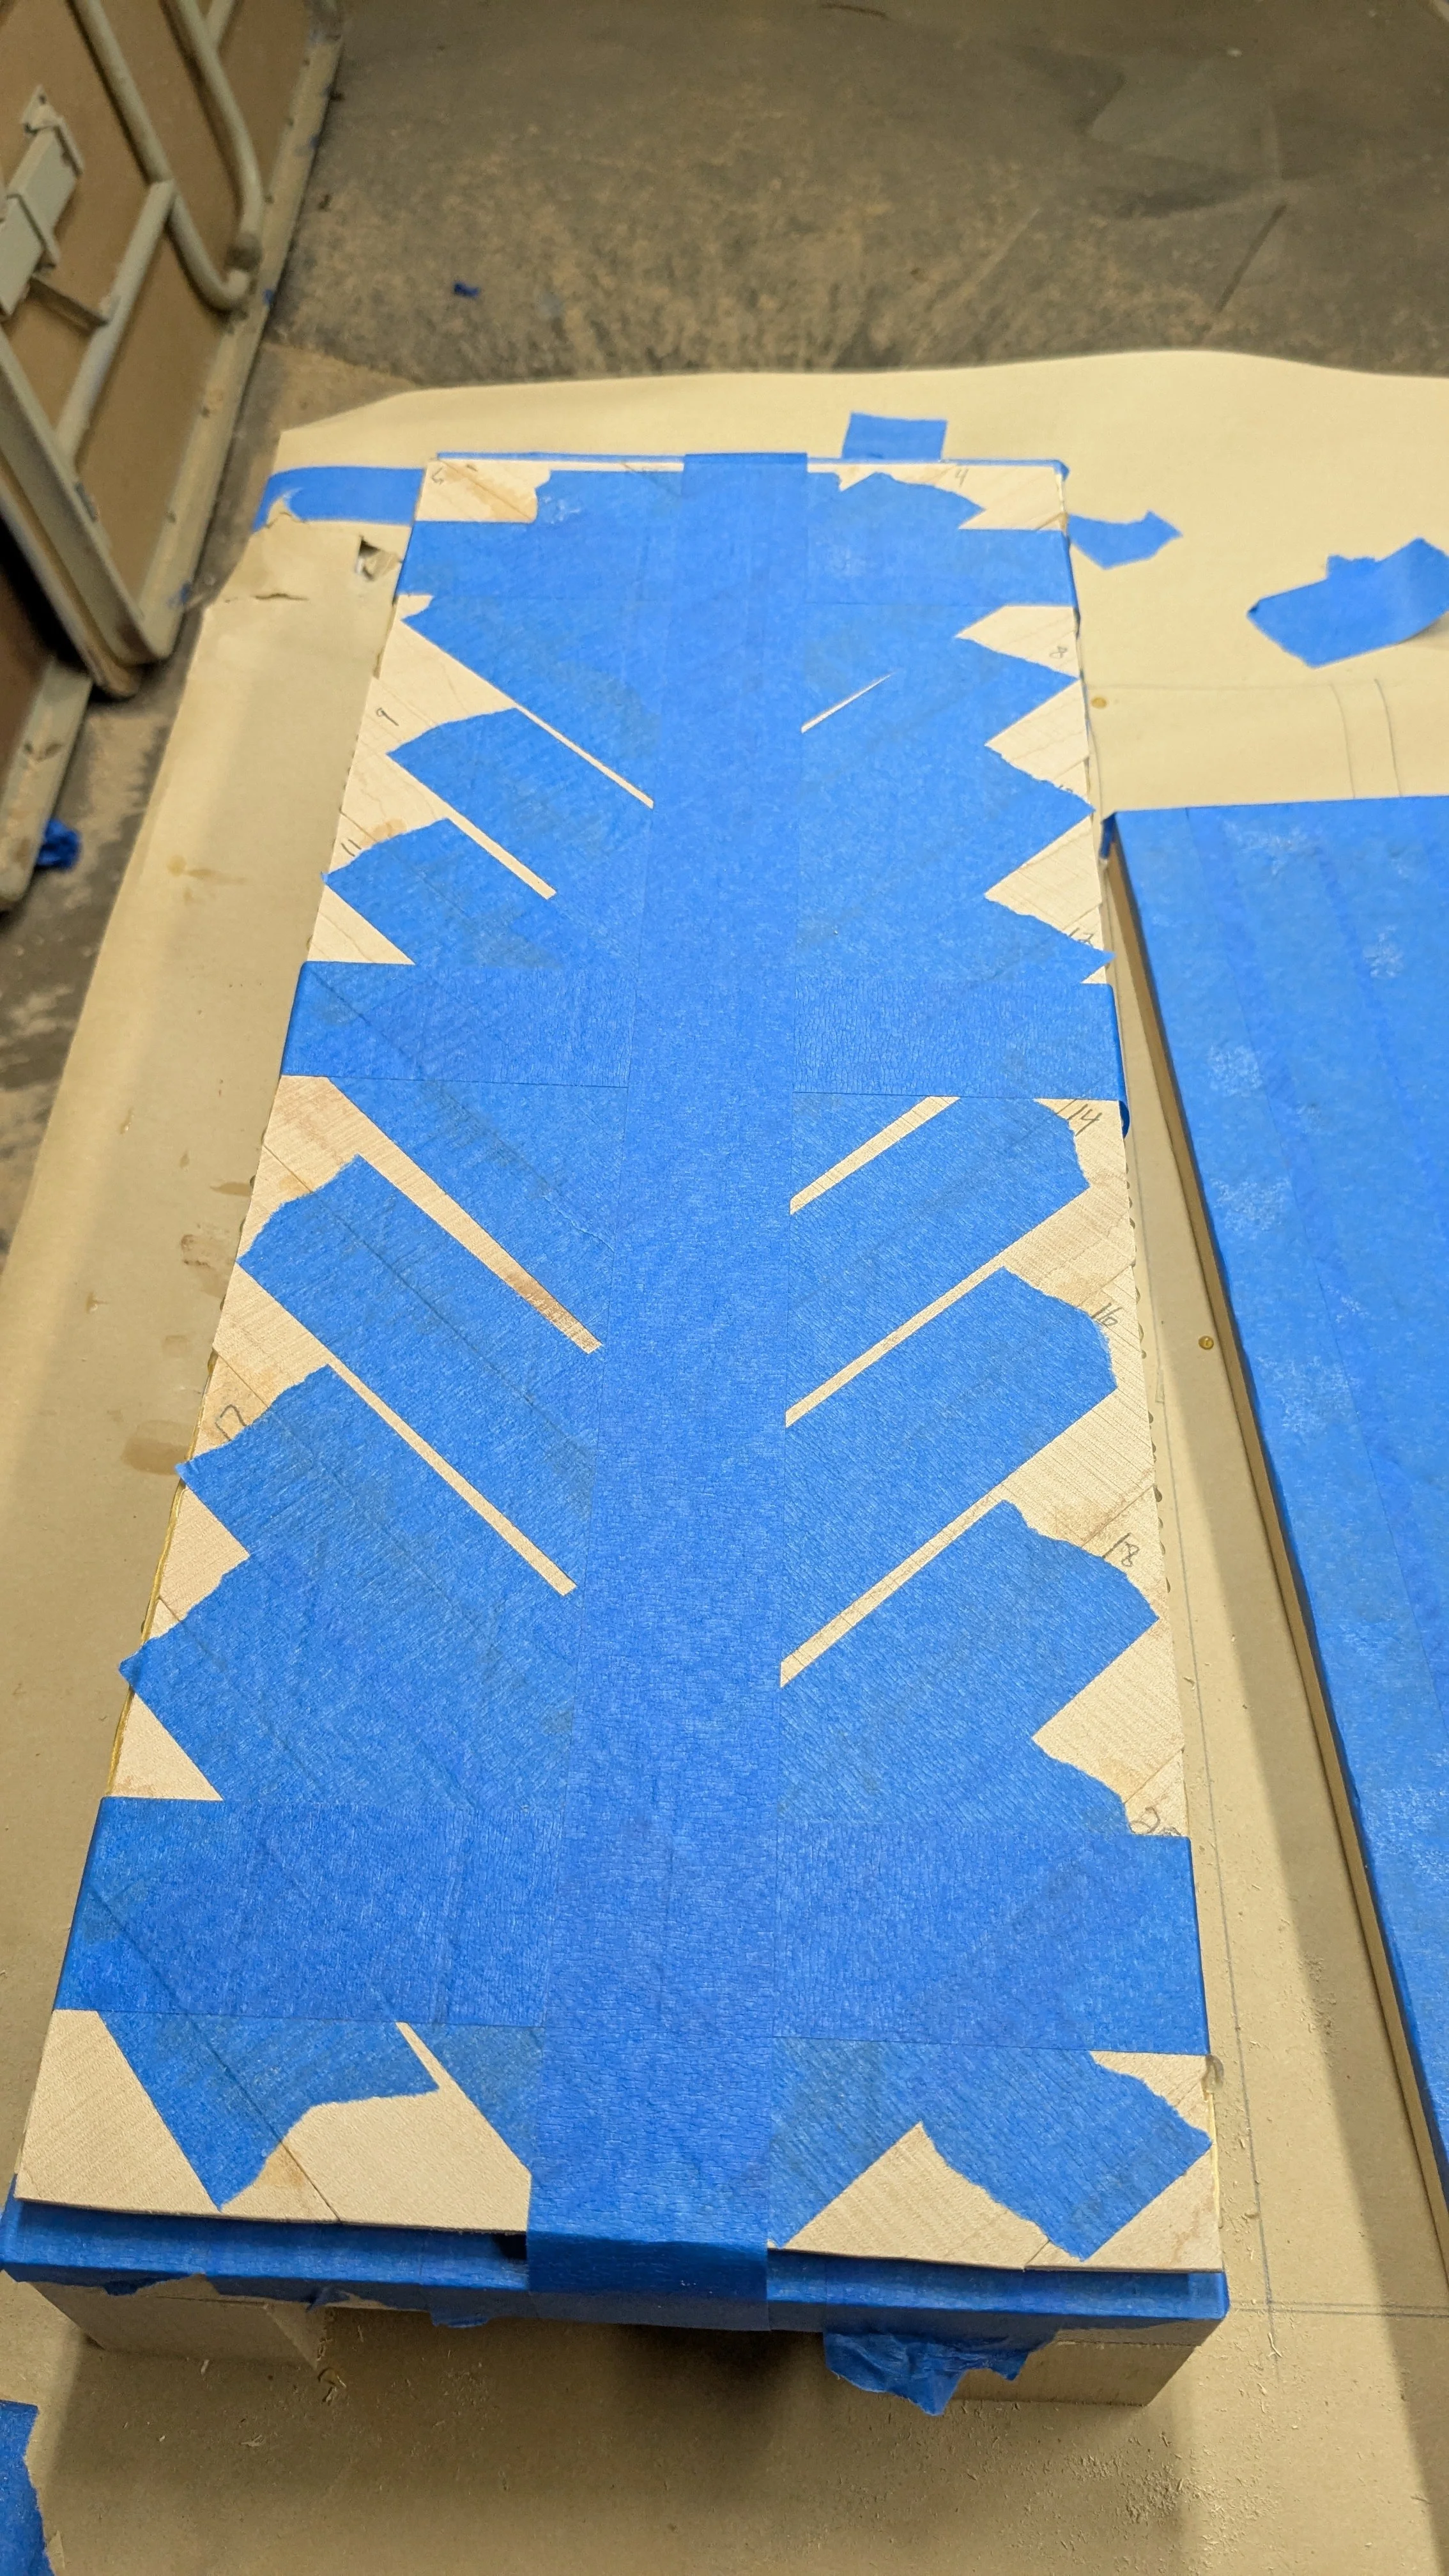
I cut 1/4” panels to fit and to be the backing for the marquetry. I laid out the marquetry and then traced the panel onto the slices of veneer and then numbered them and cut them to final shape on my scroll saw. After sanding the edges of each marquetry piece I coated one side of each panel with glue spread with a silicone grooved spreader to an even depth. I then assembled the marquetry on the glue and taped the pieces together with blue painters tape. I built a caul out of two pieces of 3/4” pine, one side I put 2” high legs in the corners and the top piece was just cut to size. I put blue tape on the inner faces. I put the panel on the lower section and taped it down to the caul so it wouldn’t drift around during clamping. Then I put the top of the caul on, and then a curved caul down the center to distribute pressure from the top to the bottom. I clamped all around the edges at even intervals. This made the marquetry come out really nicely.


I smoothed each panel starting with a 60 grit diagonal pass to level everything and then going through the grits to 320 then spraying each with water and letting it dry and sanding it again at 320 to get a really nice smooth surface.
I then trimmed the edges of the panels so they fit nicely in the recesses in the back of the doors. I then mounted the piano hinges on the door sides with them all spaced out using plastic 1/8” spacers to give an even gap and to make them span exactly the 36” cabinet.


Then using my adjustable shelf hole drilling jig I drilled all the shelf pin holes on the inside of the cabinet and both sides of the divider. With that done I sanded all the parts to 320 grit and then assembled and glued up the cabinet.
The first part of the finish was natural danish oil. Then after 72 hours two coats of wipe on polyurethane. This matches the finish on the sewing table.


After that had dried for 24 hours I reassembled everything and I secured the marquetry panels in the doors using framing points ( so if I wanted to change them out in the future that would be possible.)
My talented and beautiful wife helped me mount the case on the wall, remount the doors, install the knobs, install the magnetic catches, shelf pins, and shelves. She then had a great time putting things into the cabinet using the containers from ULINE that I had based the dimensions of the cabinet on.


I really like how this cabinet came out. I like how the marquetry and the dovetail details look on the cabinet. And it is an excellent storage solution for lots of sewing materials.