So I’m about twelve days into the build and things are going well. I started out cutting all the stock for the frame of the TV Lift Case and the Side Table to length. Then I used my new tenoning jig for the table saw to cut all of the tenons. Fortunately all of the tenons were identical and on the same thickness stock so it went very quickly. I really like the jig, once it is dialed in on a scrap piece of stock it is very consistent and repeatable.
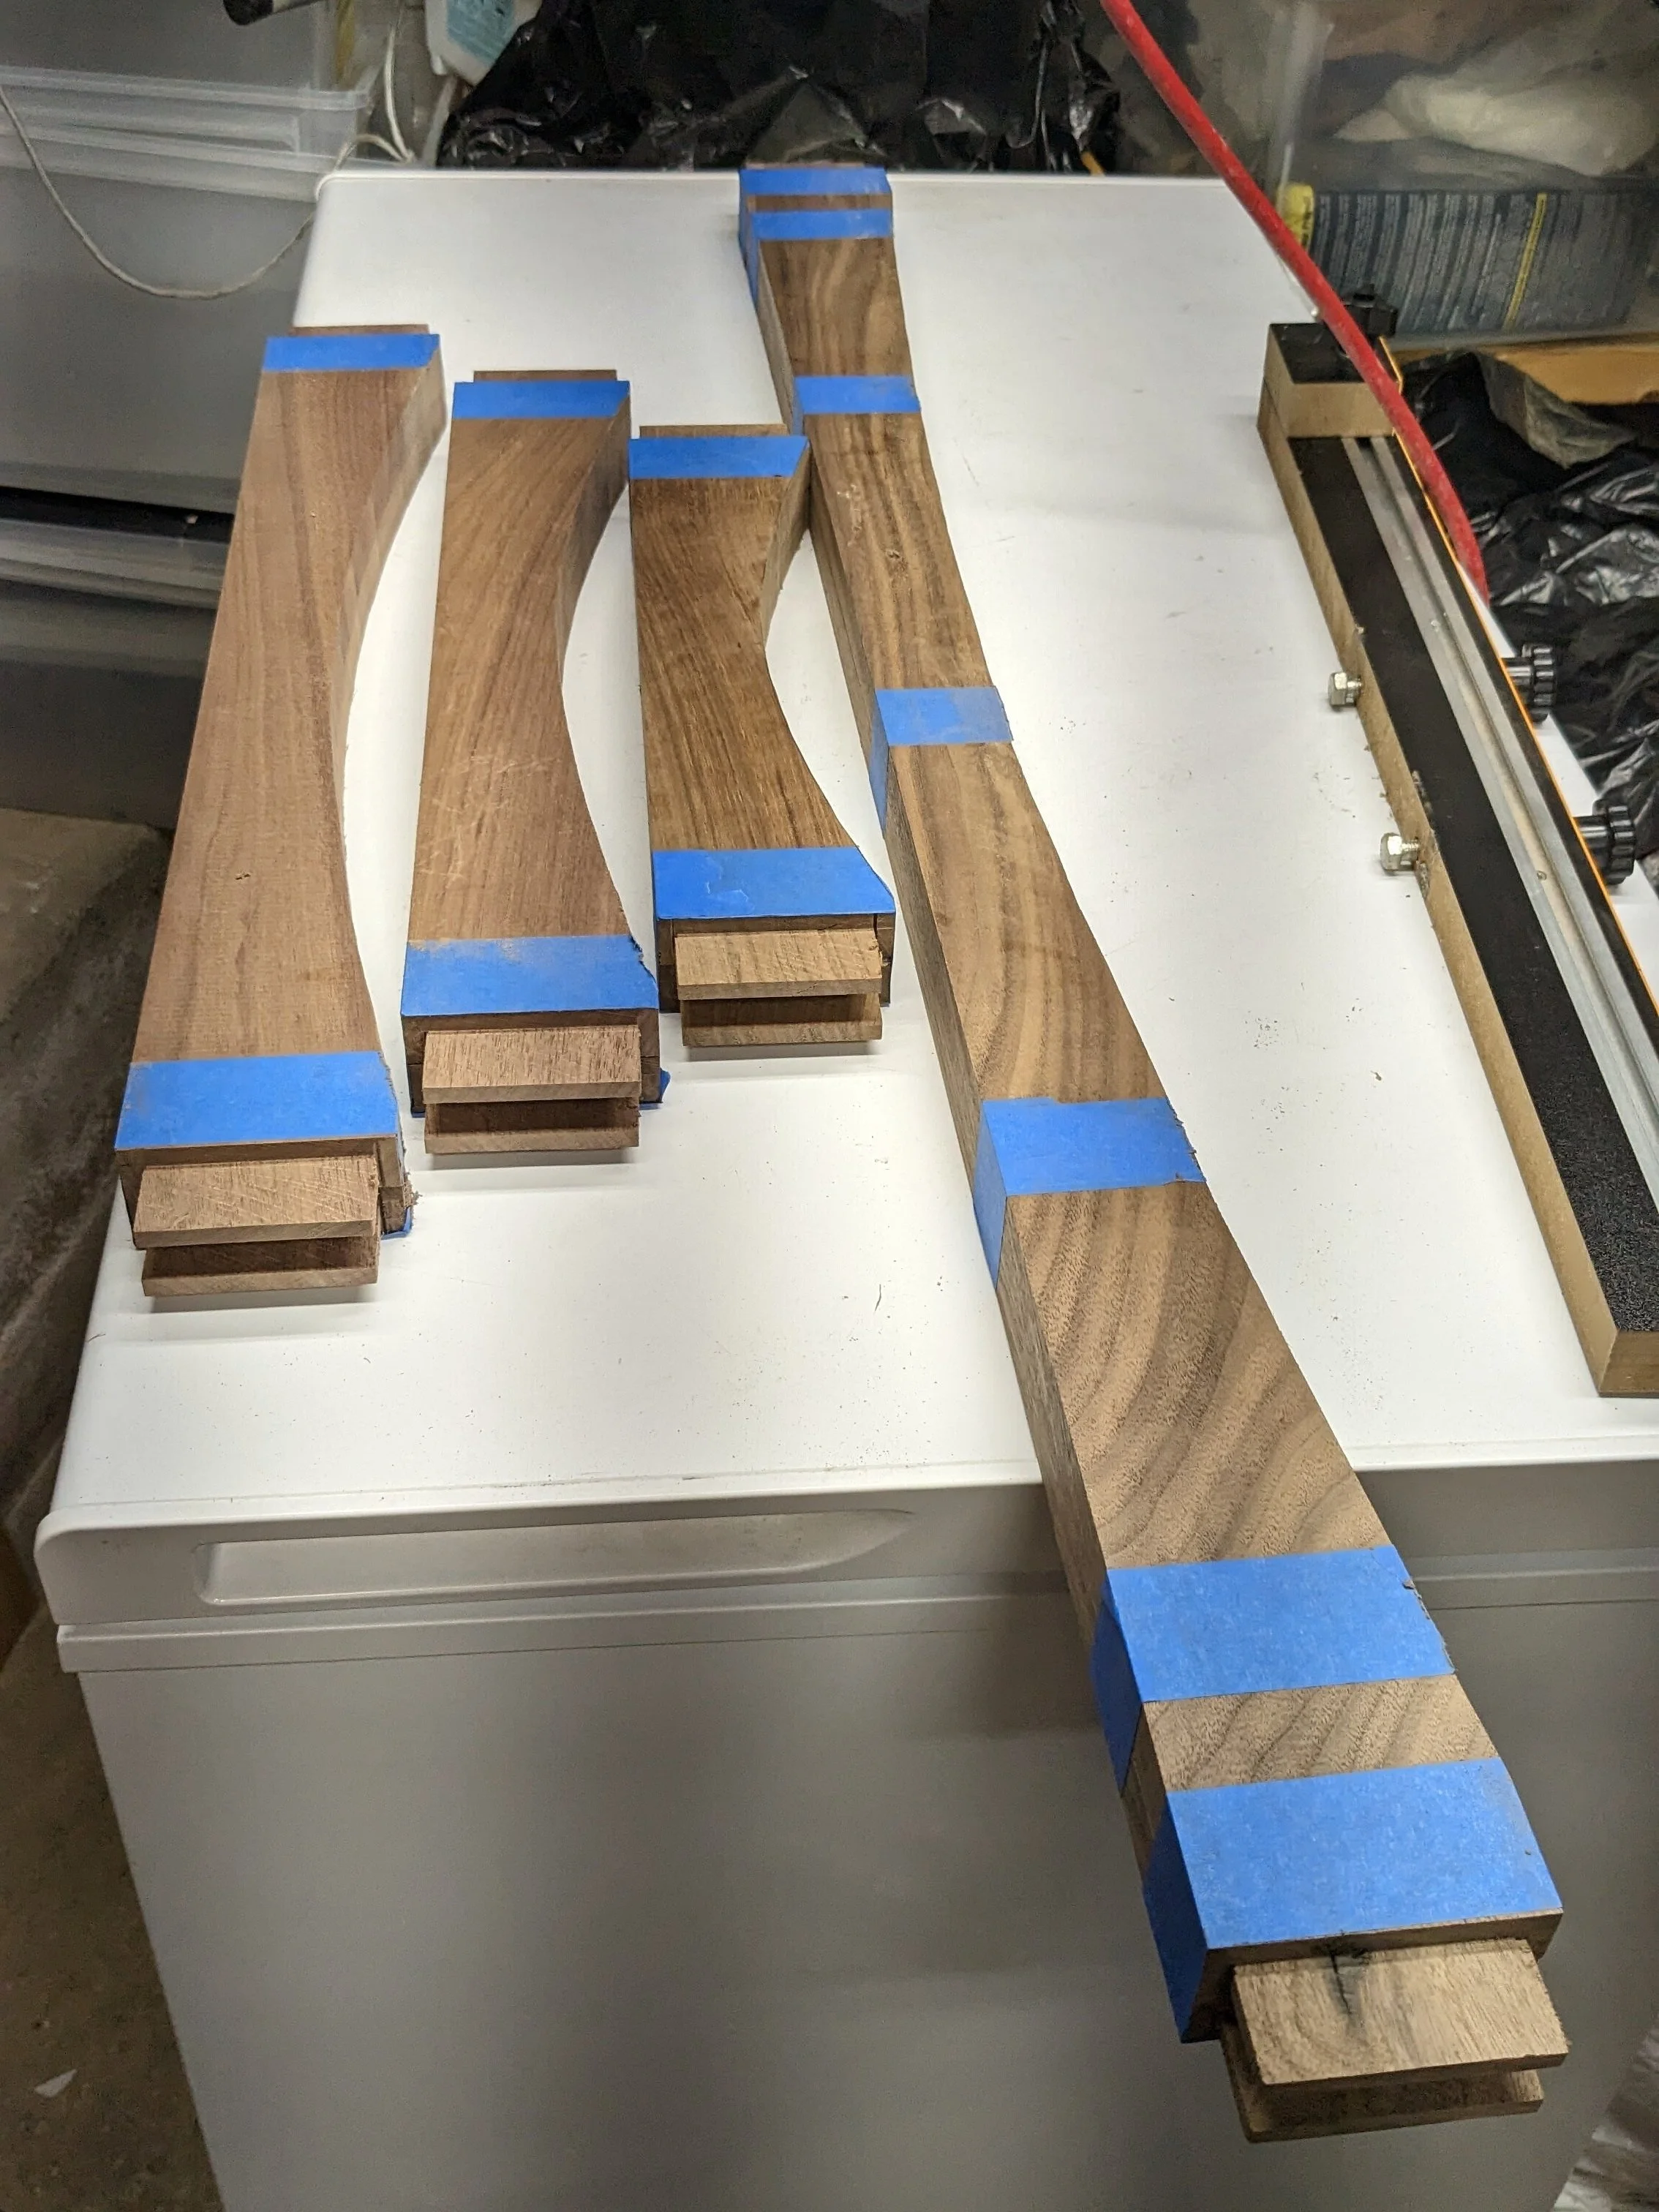
Then I had to also process the skirt boards for the cases which have an arch detail on the bottom. I ended up having to run to Lowes to get a 48” metal ruler so I could use it to scribe the arch. I clamped two pencils at either end of the skirt board and then with the ruler pressed upward against them I pulled it’s center to the peak of the curve and then scribed a line along it. I did this on pairs of skirt boards of the same size that I had taped together. I cut the curve following the line just a bit on the outside with the band saw and then cleaned up curve with the sanding station and a sanding tube on the drill press. I also ripped about 1/2” off of the width of the skirt boards and adjusted the tenon to keep the 1/4” shoulder at the top because the stock I got was 3 1/2” and I needed 3” to have the inside of the case match the height of the TV Lift mechanism.
At this point I moved on to cutting all of the mortises. I used my new x-y vise on the drill press for this and it really helped both the speed and accuracy of removing the bulk of the material in the mortises using a 1/4” Forstner bit. There’s a little bit of slop in the ways on this Harbor Freight vise so I had to tweak the position and use a square reference to verify it vs. the layout but once it was set it stayed very true through each cut and there was a lot less clamping and re-clamping and less error in general. Also the tweaking was easy since the fine adjustments in x-y were trivial. I also invested some time in re-sharpening my 1/4” chisel and as anyone who has put off sharpening their chisel will say “What a difference!”


Then there was a lot of cleaning up mortises and tenons and dry-fitting them and dry-fitting them again. The front of the case has a flush face and the rest of the case is recessed so I had to be really careful with the layout. The skirt board distance to the top of the case was also critical because the lift needs to be mounted against the top of the case and so we need enough room for it.


Next, I wanted to confirm that the TV Lift was going to fit so I cut the bottom panel and got it fitted. I used some spacer blocks to hold it up flush with the top of the skirt boards. I test mounted the lift in the case and it fits just fine. I realized that I hadn’t ordered the right bracket for the top of the lift so I ordered that and it’s on it’s way. Also I’m going to have to make a lower bracket because I want to mount it to the floor of the case, not to the back as it was designed. This is why you test fit everything before you go too far.
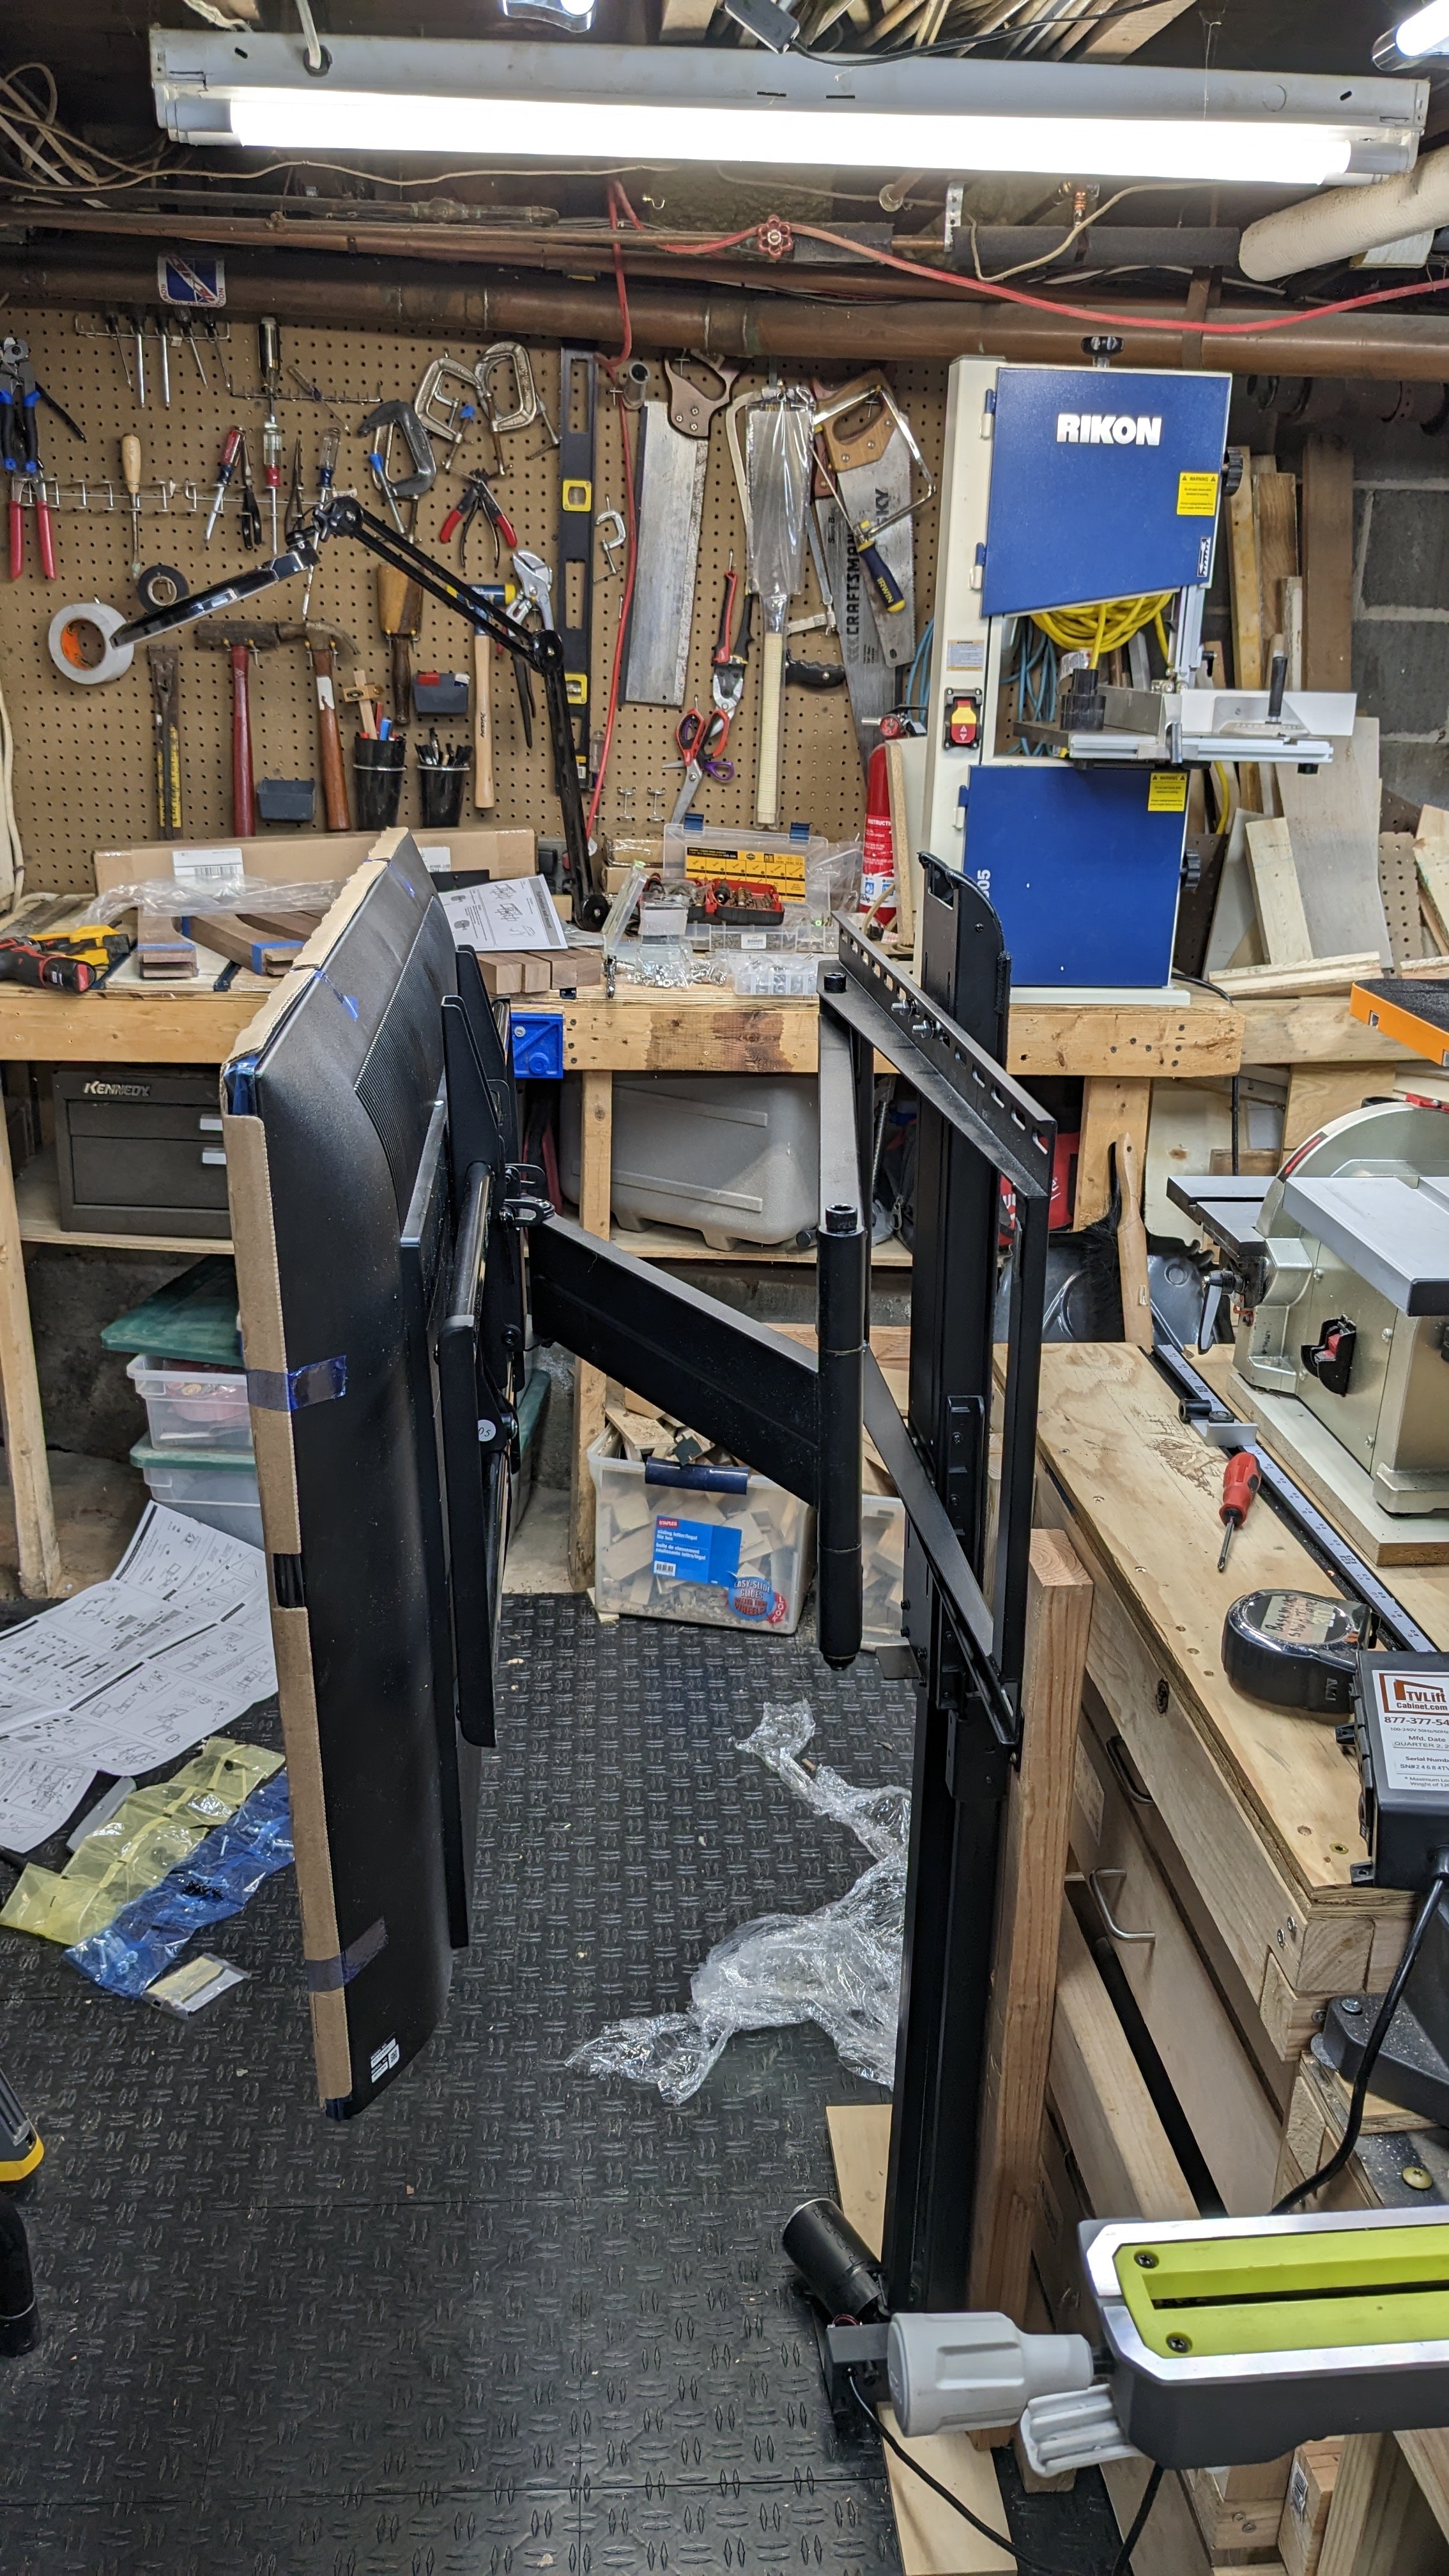
After this I took a brief break to see if my idea to mount the TV on a swing arm on the lift was going to work. So I built a bench test rig in the shop so I could run the lift with everything attached. This went quite well, I was able to remove some of the original TV mounting hardware on the lift and bolt on the swing arm without having to drill any holes or modify any of the parts. Then the TV mounted up nicely to the swing arm and the lift seems to manage both of them easily. It is well within the 120 lb limit of the lift mechanism.


After confirming that was all good it was on to doing the side panels of case. I carefully marked where all the panel grooves would be on all of the frame parts. It really does make you nervous performing possibly destructive operations on parts that you’ve invested a lot of time into where you have limited replacement stock as well. Fortunately my new set of precision setup blocks made setting the blade height and distance on the table saw much easier and more accurate. I’ve also adopted the process of always performing cuts on a scrap first and confirming all of the dimensions before proceeding to final cuts. All the grooves went very well. I had to do some of the panel cuts with my hand held circular saw because the panel dimension was too big for my table saw. I developed a good method of clamping the panel to a table or two tables and using a nice straight piece of maple as a saw guide. Next time I order panels I’m going to have the supplier at least cut them in half, I had to have my lovely and talented brother come over and help me with the 3/4” thick panels which were just too unwieldy for me to even move around without bashing everything in the vicinity.
I also installed the cleats made from the off cuts of the skirt boards to hold up the floor of the case. I’m going to hold the floor in place with screws and clips on the bottom.


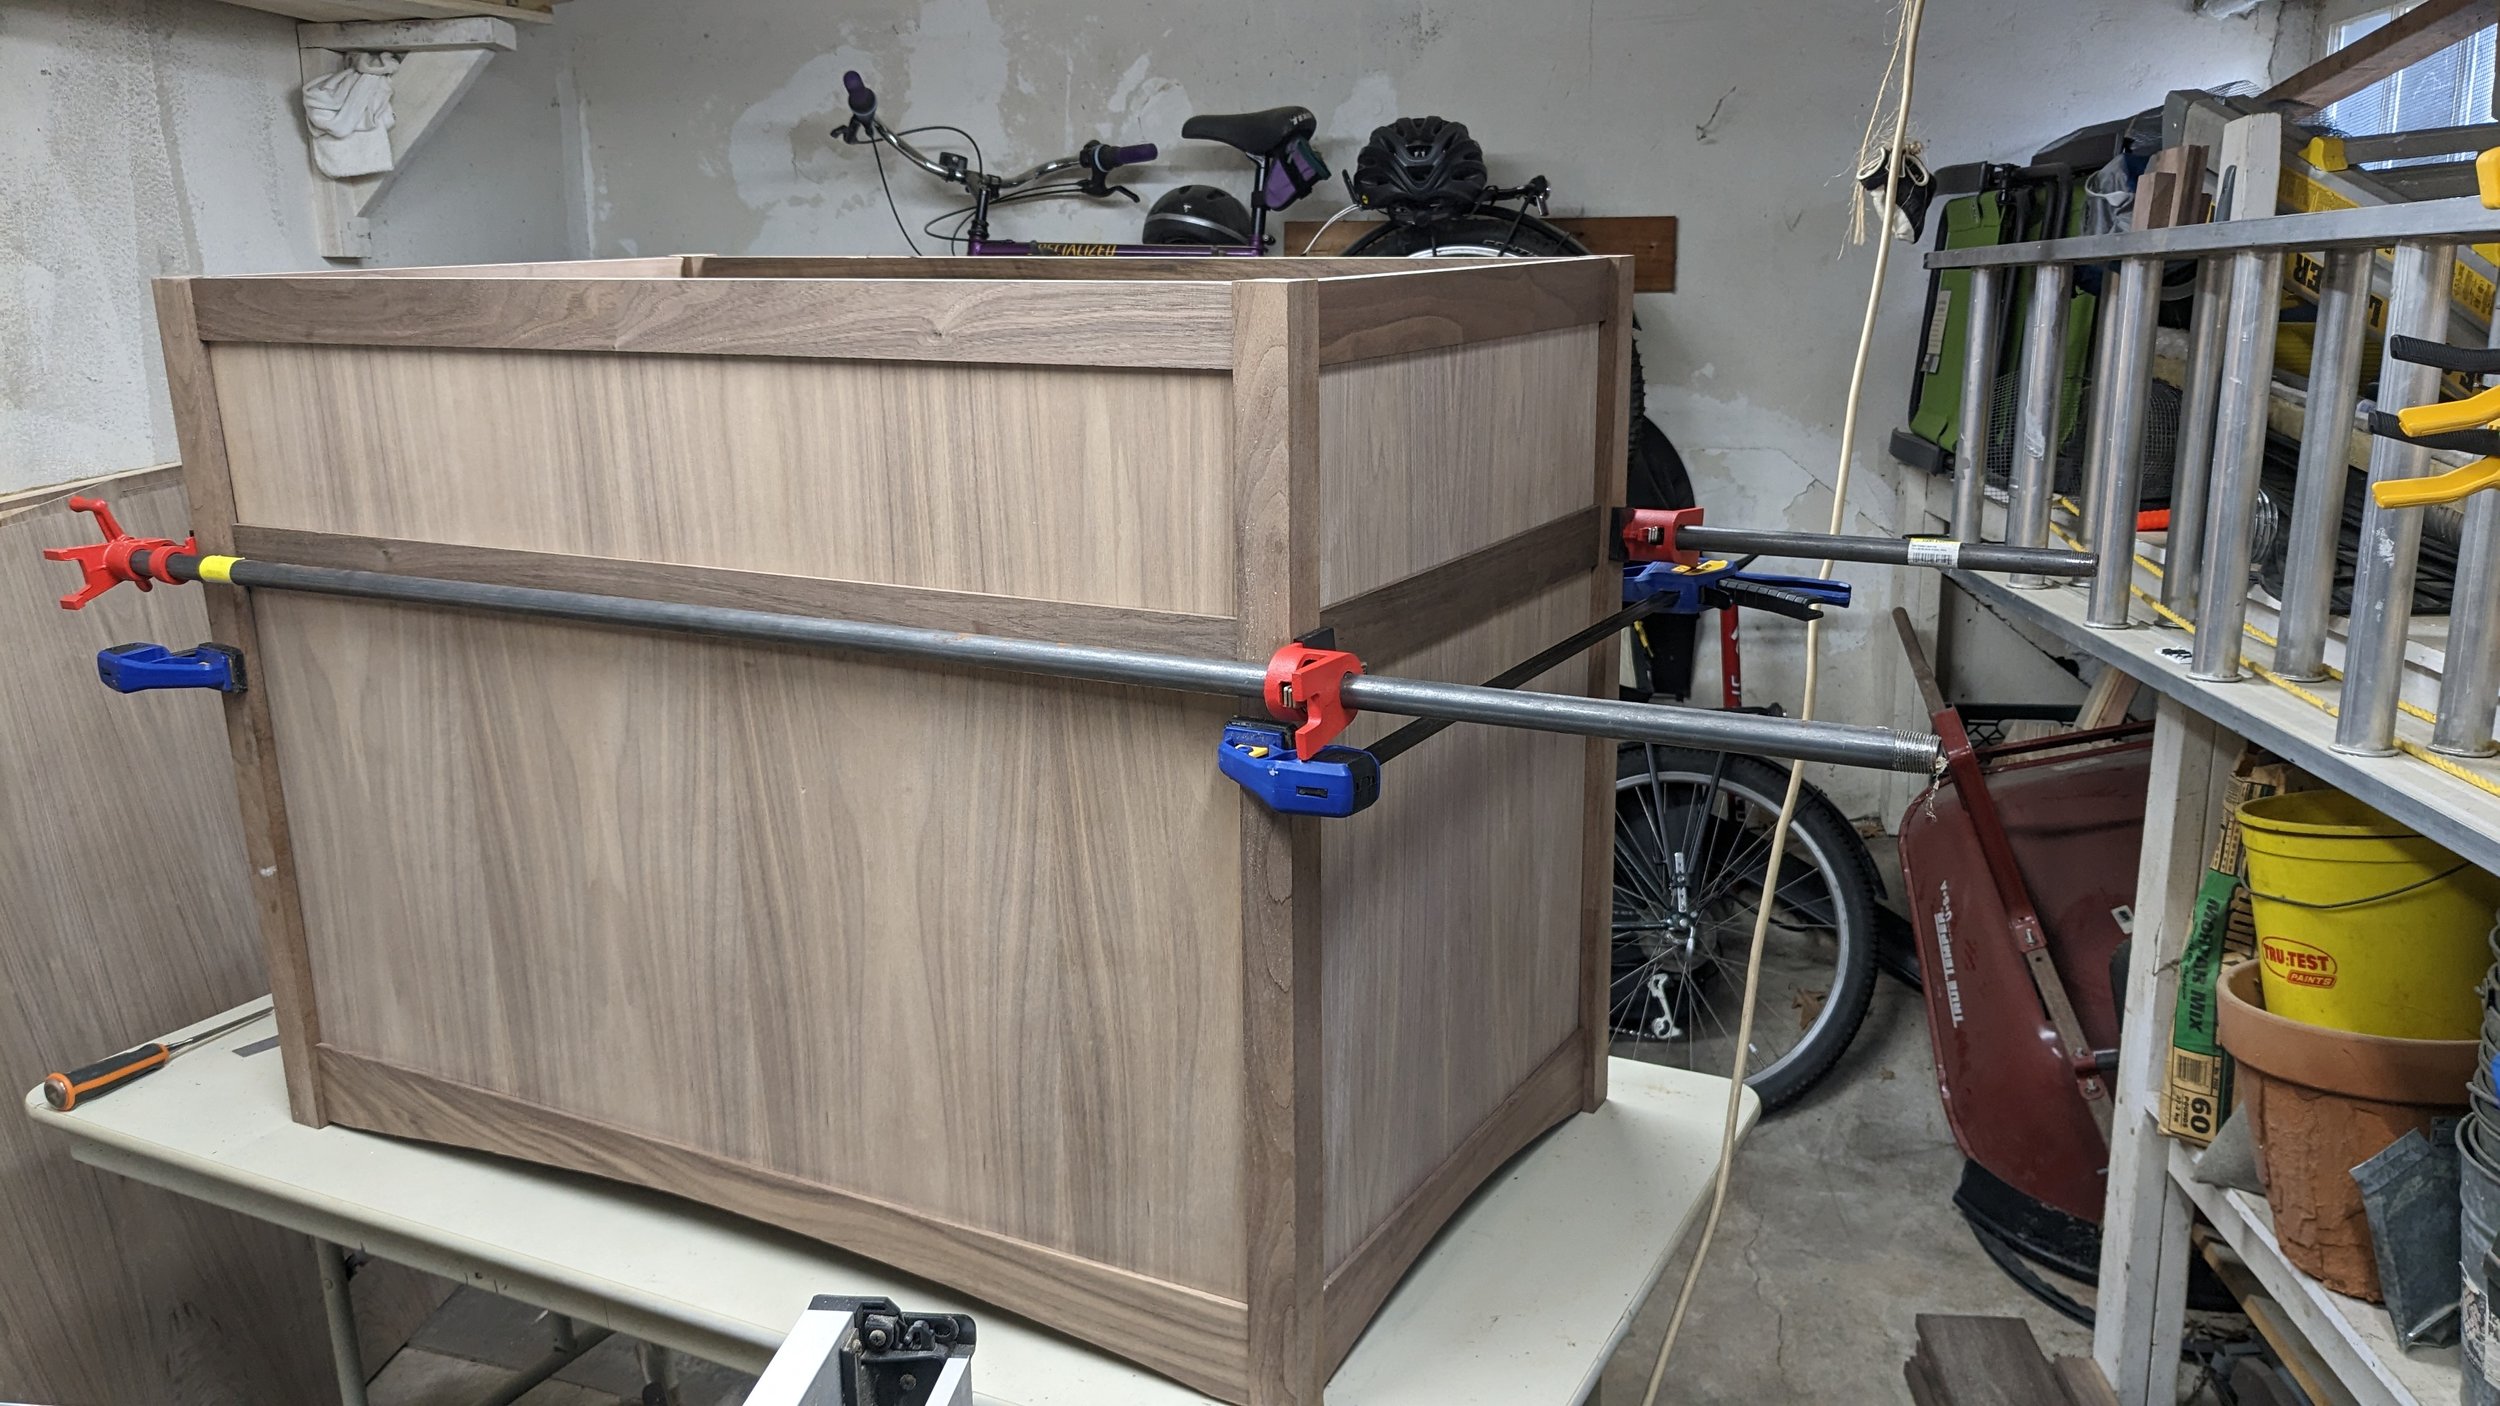

So, you’ll notice that the interior sides of the cabinet are the “bad side” of the one sided 1/4” walnut plywood. And since this is going to have glass doors, you’ll see them. I know, and I have a plan. The next step, now that I’ve confirmed the size of the whole TV assembly is to build the removable divider between the front and back of the cabinet. Once that is fitted where it’s going to go, I’ll cut inset panels for the interior of the cabinet sides which will get glued onto the back of outside panels and then finished. This will make the inside front that you’ll see look perfect.
That’s all for now, I’ll keep y’all posted with new updates as I go.