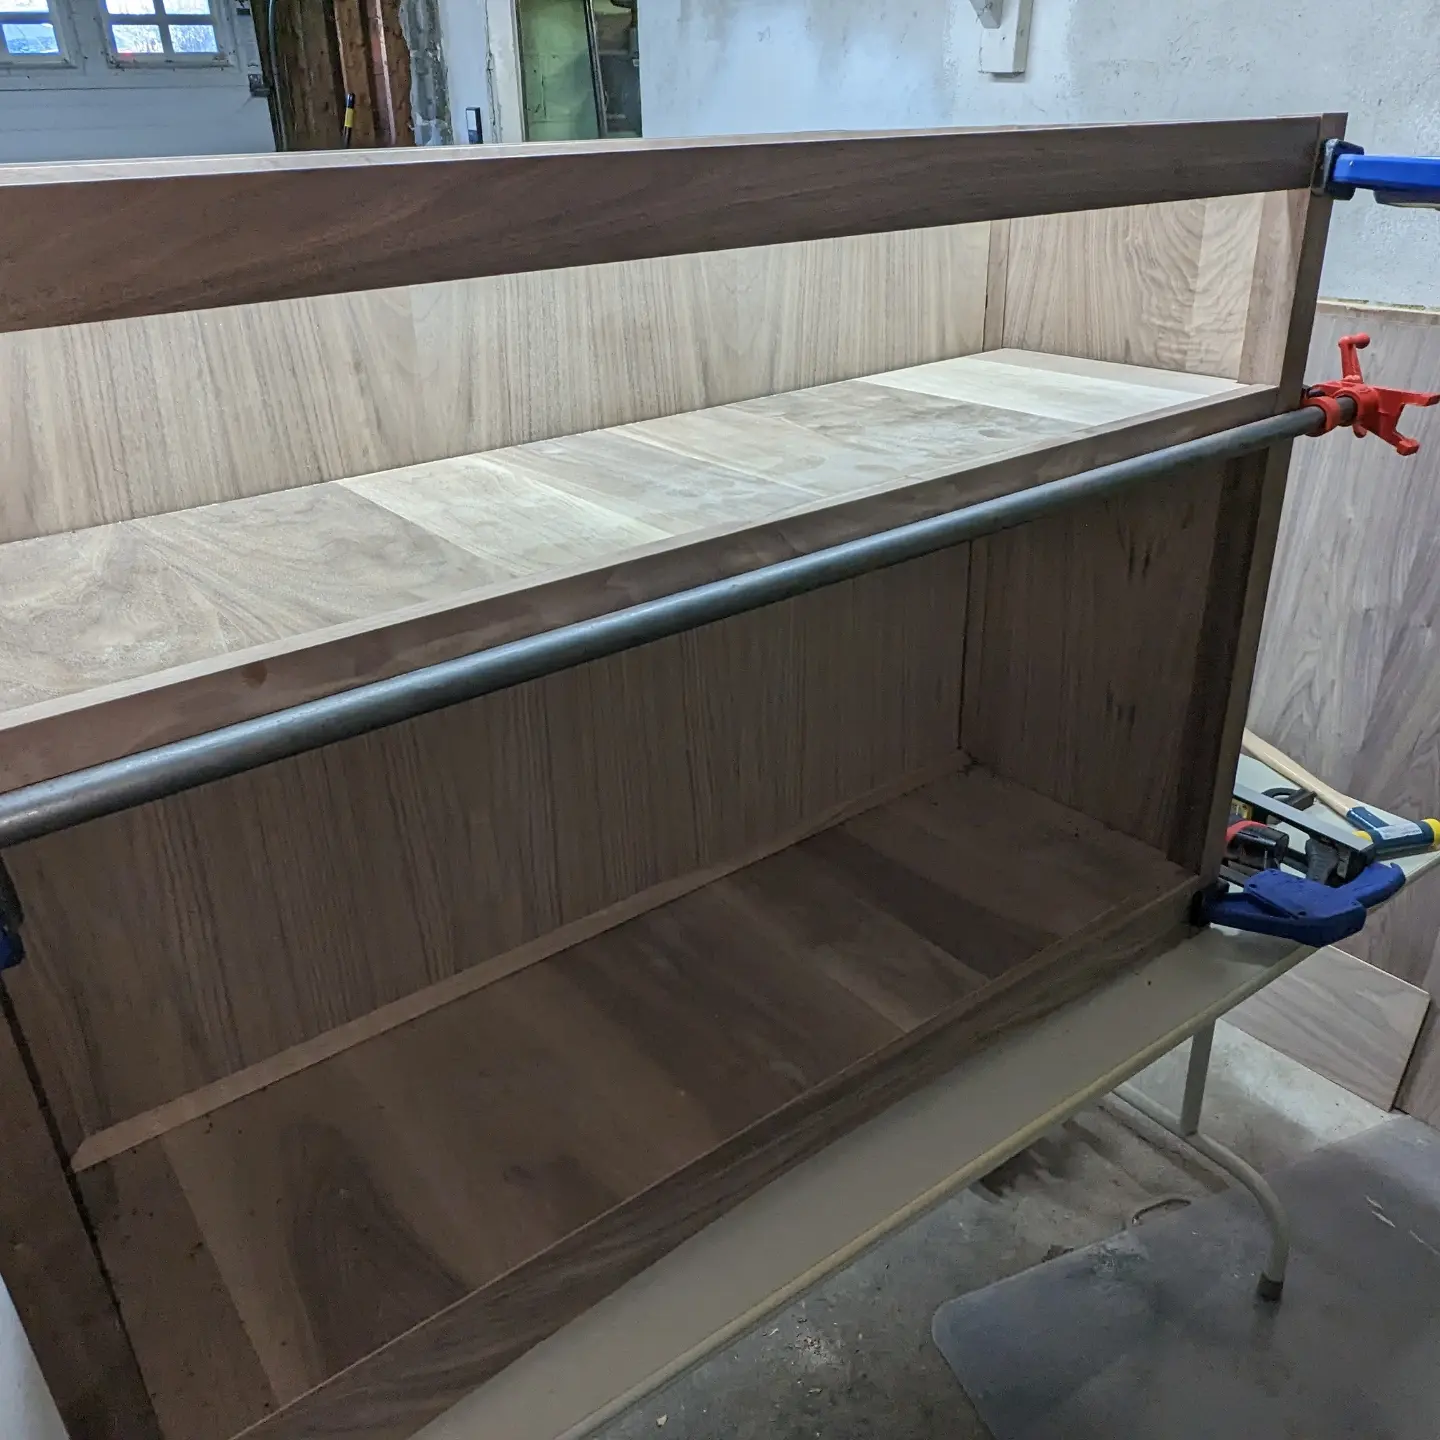
Another twelve days on the project and I’m done with major fabrication. After the last update I built the false back that divides the front of the case where things will be displayed from the back where the TV and the TV lift mechanism will live. I essentially built a floating frame for the removable plywood panel that forms the false back of the case. I cut a 1” by 3/8” rabbet around the inside of the frame and cut really nice miter joints for the corner. I glued it up and then for strength ( since it is a large frame ) I added a counter sunk screw at each corner. I had some nice hook and loop fastener and I cut eight squares and secured the plywood panel in the recess with them. It looks great like a very fancy cabinet back and yet it is removable in case I ever need to get at the lift or TV.
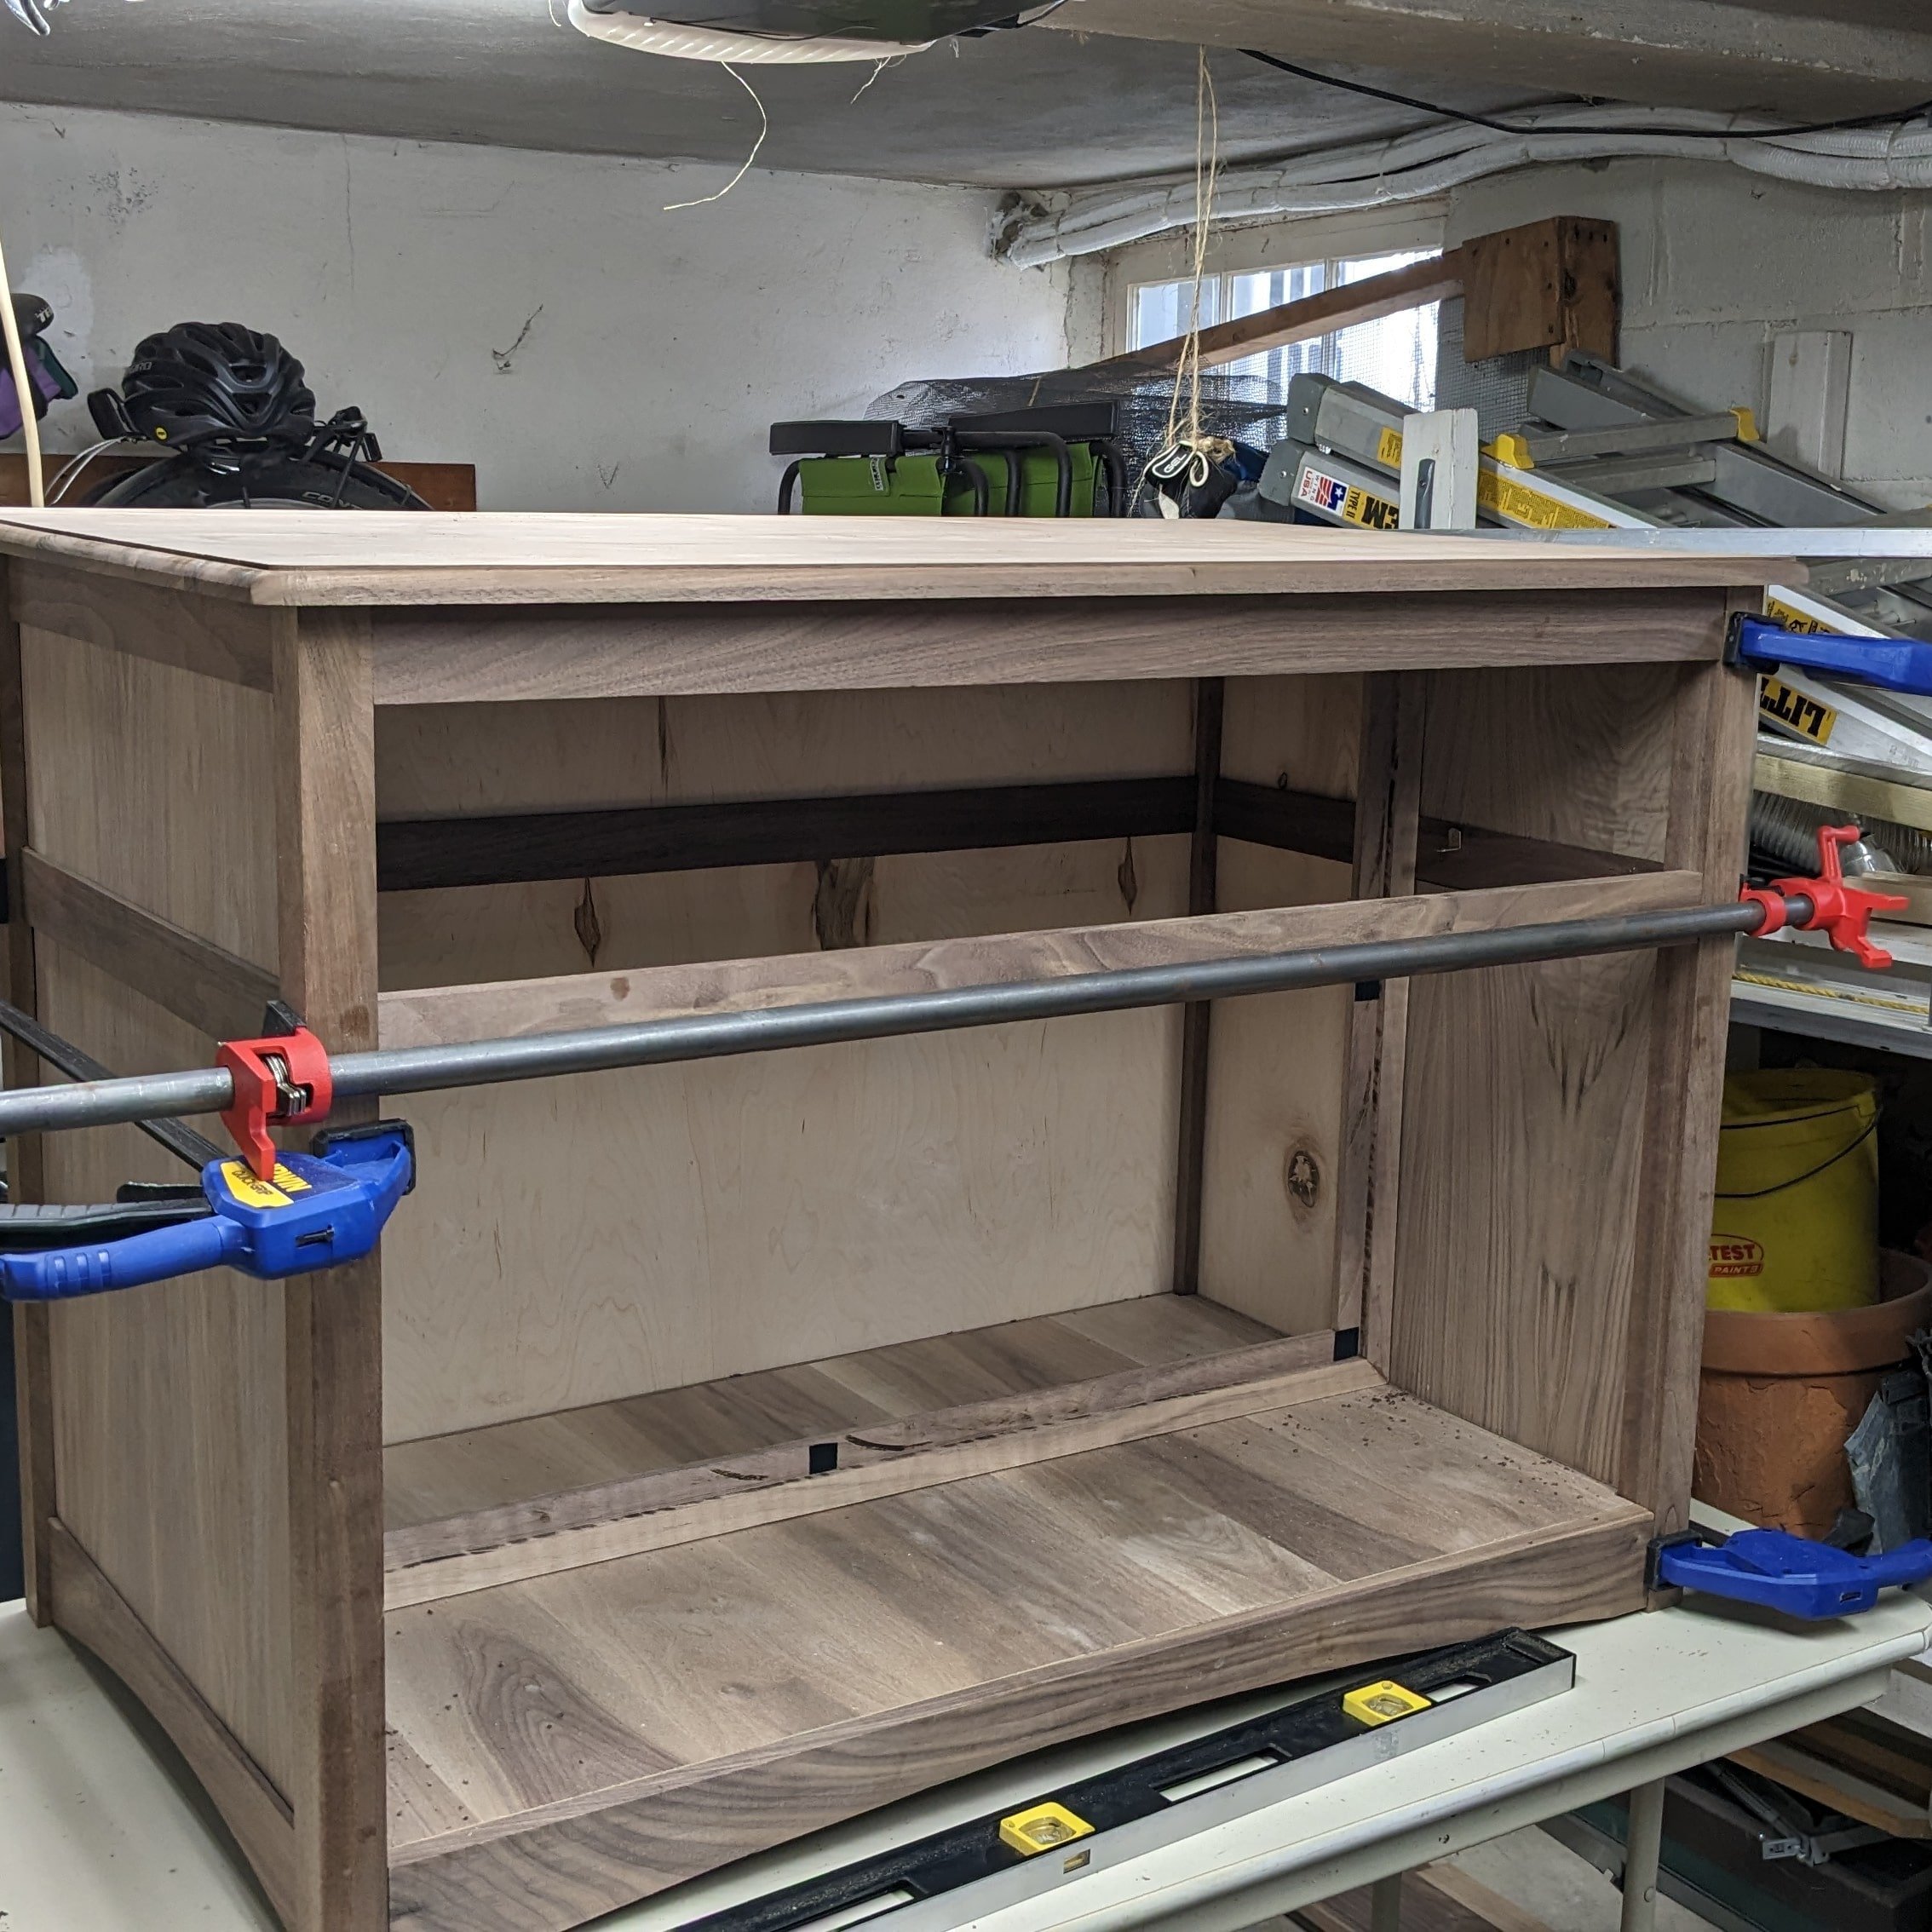

I made some small panels that will get glued to the inside of the cabinet on the sides to hide the back of the side panels making the interior look completely finished. The plywood I’m using is a bit under 1/4” so there’s even a bit of reveal next to the frame members which helps the illusion. I cut them a bit long so they slide behind the divider making a very nice look.


Next I made the electronics shelf for the cable box, dvd player, Roku etc… to sit on. The trick here was to make it removable so that the panel could be removed behind it. I remembered that I had some shelf pins left over from another project and they were just the thing. I cut the shelf out of 3/4” walnut plywood and set the pins to have it be flush with the top of the middle rail of the cabinet. It’s pretty easy to get in and out of the cabinet.
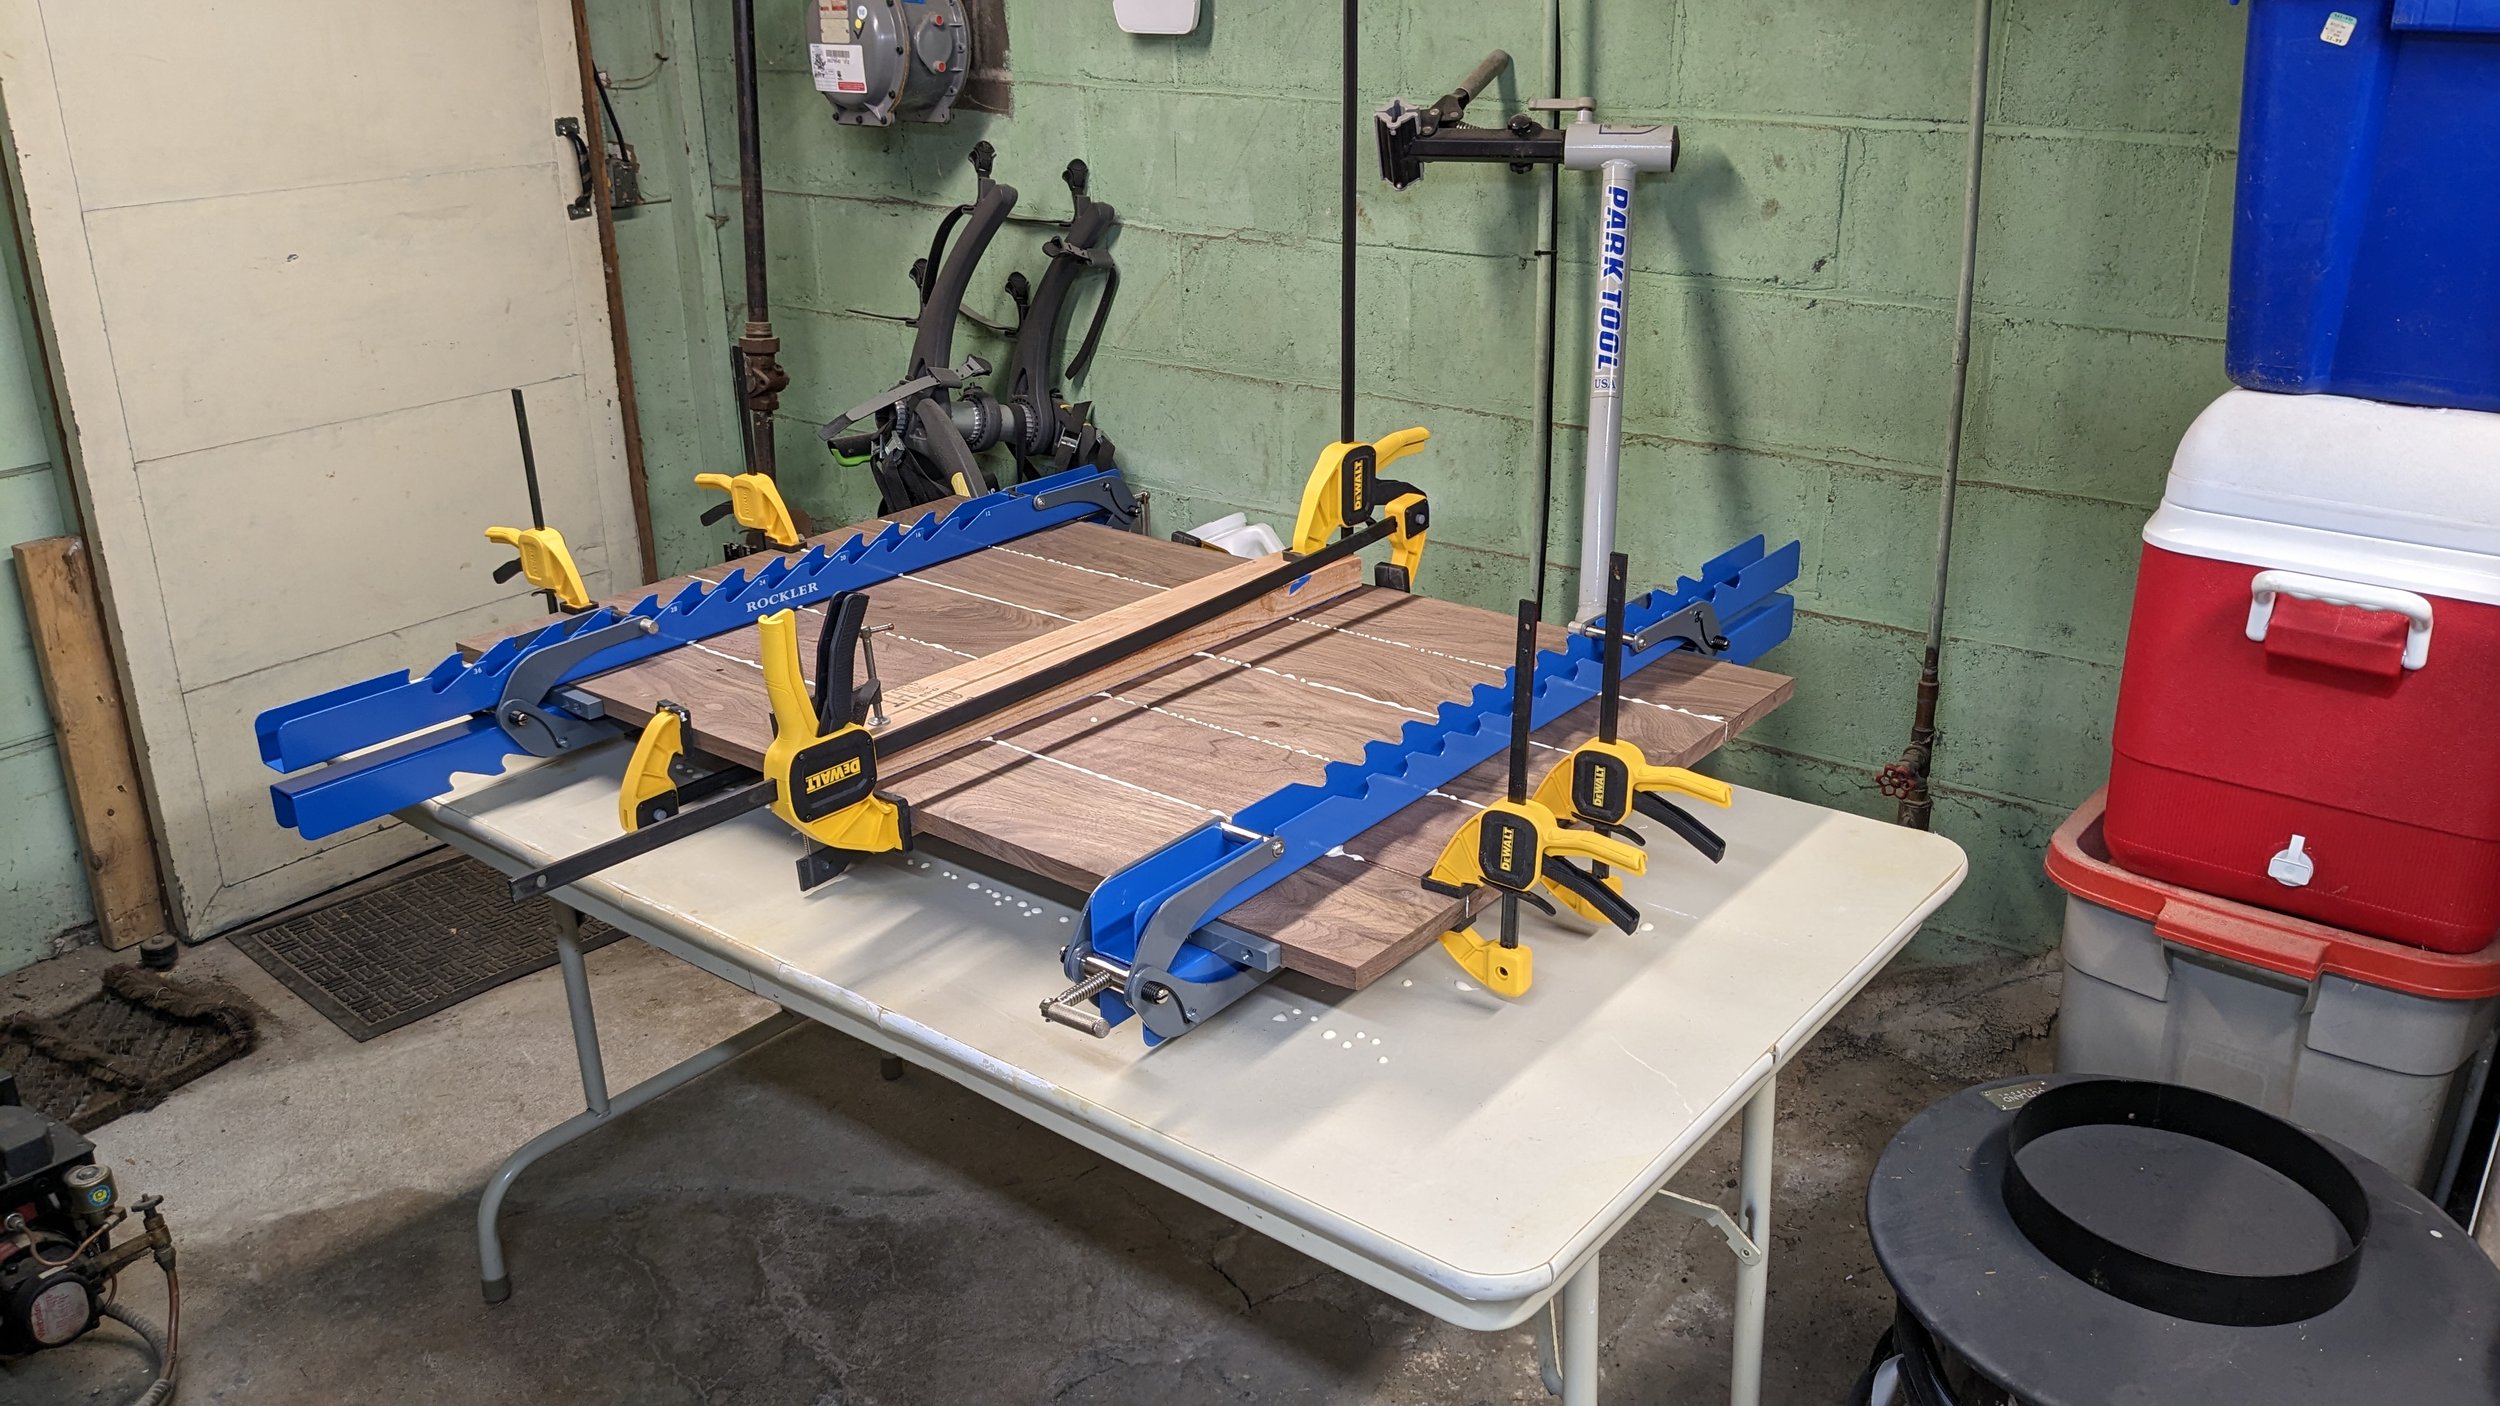
After this I built the top of the cabinet. I rough cut the 5 1/2” walnut boards to one inch over the final dimensions of the top. After some sorting and arranging to get the best general alignment of the boards I glued them up. I used my new Rockler Panel Clamps and one additional home made clamp made from some center tapered 2x4’s cut to the width of the panel and covered in masking tape. The Rockler clamps worked extremely well. The resulting panel was super flat with no twist in it over all and only some local issues at the seams. I didn’t clean up the glue thinking I could just snap it off with a panel scraper later… won’t do that again. It took scraping, planing, and sanding to get rid of it. I used my new jack plane for the rough smoothing then 80 grit sanding. All in all it looks flatter and better than my last panel glue up.


I cut the panel to final dimension on my table saw for the sides and with my circular saw with an edge guide for the end cuts. I used a coping saw to round the front corners of the top. I then routed the edge detail on with my small router and a 3/8” round over bit with a bearing. The top edge has a 1/8” shoulder before the round-over just like the other furniture in the living room. At this point I needed to do a full test installation of the TV Lift, swingarm, and TV in the case so I could figure out the brackets I’d need to make or modify and to plan where to cut the top into two pieces so one of them could rise up with the TV.
I created a couple of brackets to attach the lift to the bottom of the cabinet and I modified the top lift bracket to fit my setup. All I can say is my cheap RIKON 10” band saw keeps impressing me, I was able to saw through 1/8” steel to trim the bent sides of the top bracket off. It wasn’t comfortable, but with a little cutting oil and some smoky moments it worked. I got the lift mounted and attached to the top. I did all of this with the top in one piece because I realized I would get more precise positioning this way. I then cut the top that I’d just laboriously glued up into two pieces. It came out great and it turned out that my modified connecting plate could just stay on providing a perfect alignment guide for re-installation on the lift.
I installed the swing arm and the TV, I had to adjust the height of the TV’s adapter bracket but it just fit… I may actually have to rout out relief in the bottom of the lid so I can raise the TV another 3/8” of an inch because it is just clearing the top of the case when the swing arm is extended. We’ll see.


After confirming all of that would work and that the lift can handle it going up and down I drilled the wire port in the back with my 2” hole saw. I drilled another wire port in the false back on the right side of the electronics shelf. I got some 2” black grommets to dress up the wire ports and help control the wires.
Next it was on to build the doors. I cut all the frame members out of 2” x 3/4” stock and ripped some 1” x 3/4” stock for the mullions. I laid out all the mortises that I would need and cut all of the tenons that I required using my new mortising jig. I drilled out the rough mortises as before and cleaned them up with a chisel. I have 1/8” acrylic for the “glass” in the doors so I put in a 1/8” x 1/4” groove along the inside of the frames and mullions to receive it.
The doors came together quickly and my only mistake was cutting one of the acrylic panels 1/16” too small, I’ll have to remake it before final assembly.


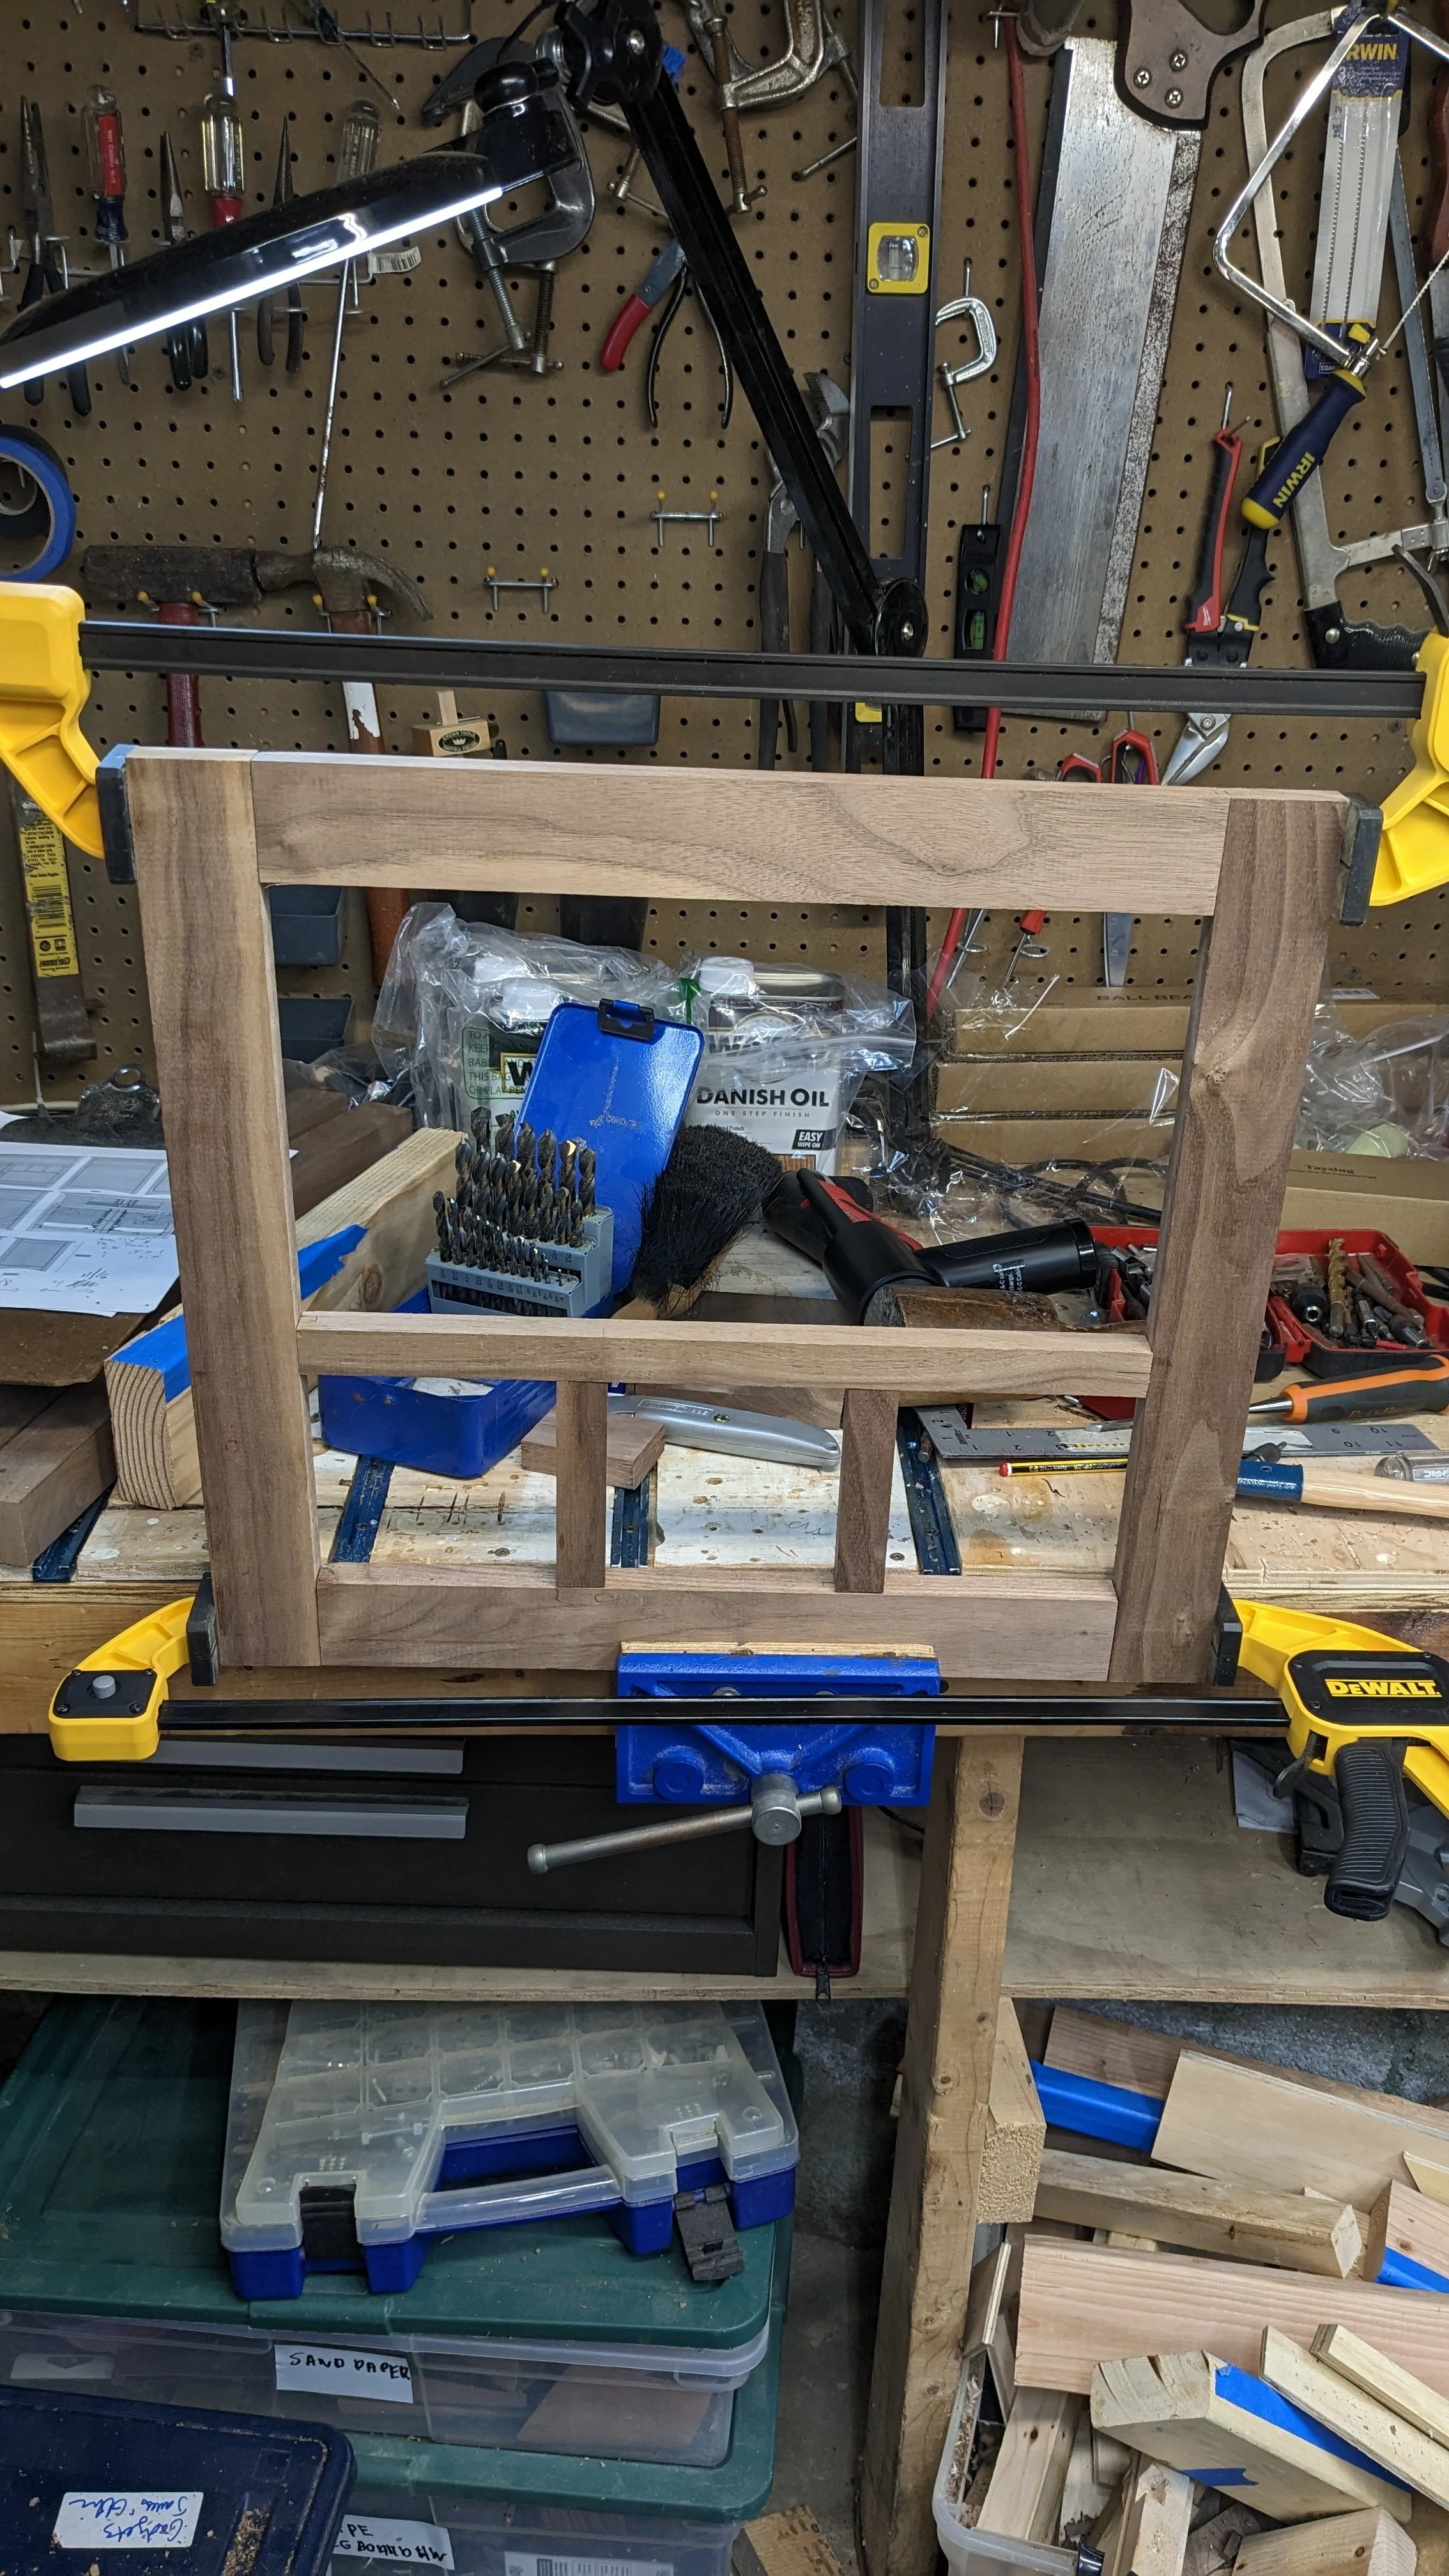

I mocked up the doors and they fit perfectly and I also verified that the hinges will work, fit and look good.
The next step is going to be a lot of sanding and then finishing and then glue up. Some parts like the doors I am probably going to finish them before gluing them up to keep the finish off the acrylic.
I’ll post another update soon.