Back in 2022 I built a blanket rack to store and display the lovely blankets my beautiful and talented wife had spun and woven. We don’t super heat our house and so in the winter I like to have a blanket while we’re watching TV. The rack worked fine for making them available and displaying them.
However, we have two evil tabby cats who think that nice woolen blankets are something that they should claw and eat. This is not good. Finally we had to hide the blankets away in a closet to prevent further damage to them or the cats. Shortly after that we came up with an idea for a storage ottoman that would keep them handy and safe. Also my wife uses the ottoman to sit on when she is threading her loom and so something that moved around easily would also be great. I also wanted to make the ottoman only partly upholstered to limit evil tabby claw damage.
This is the design I came up with:
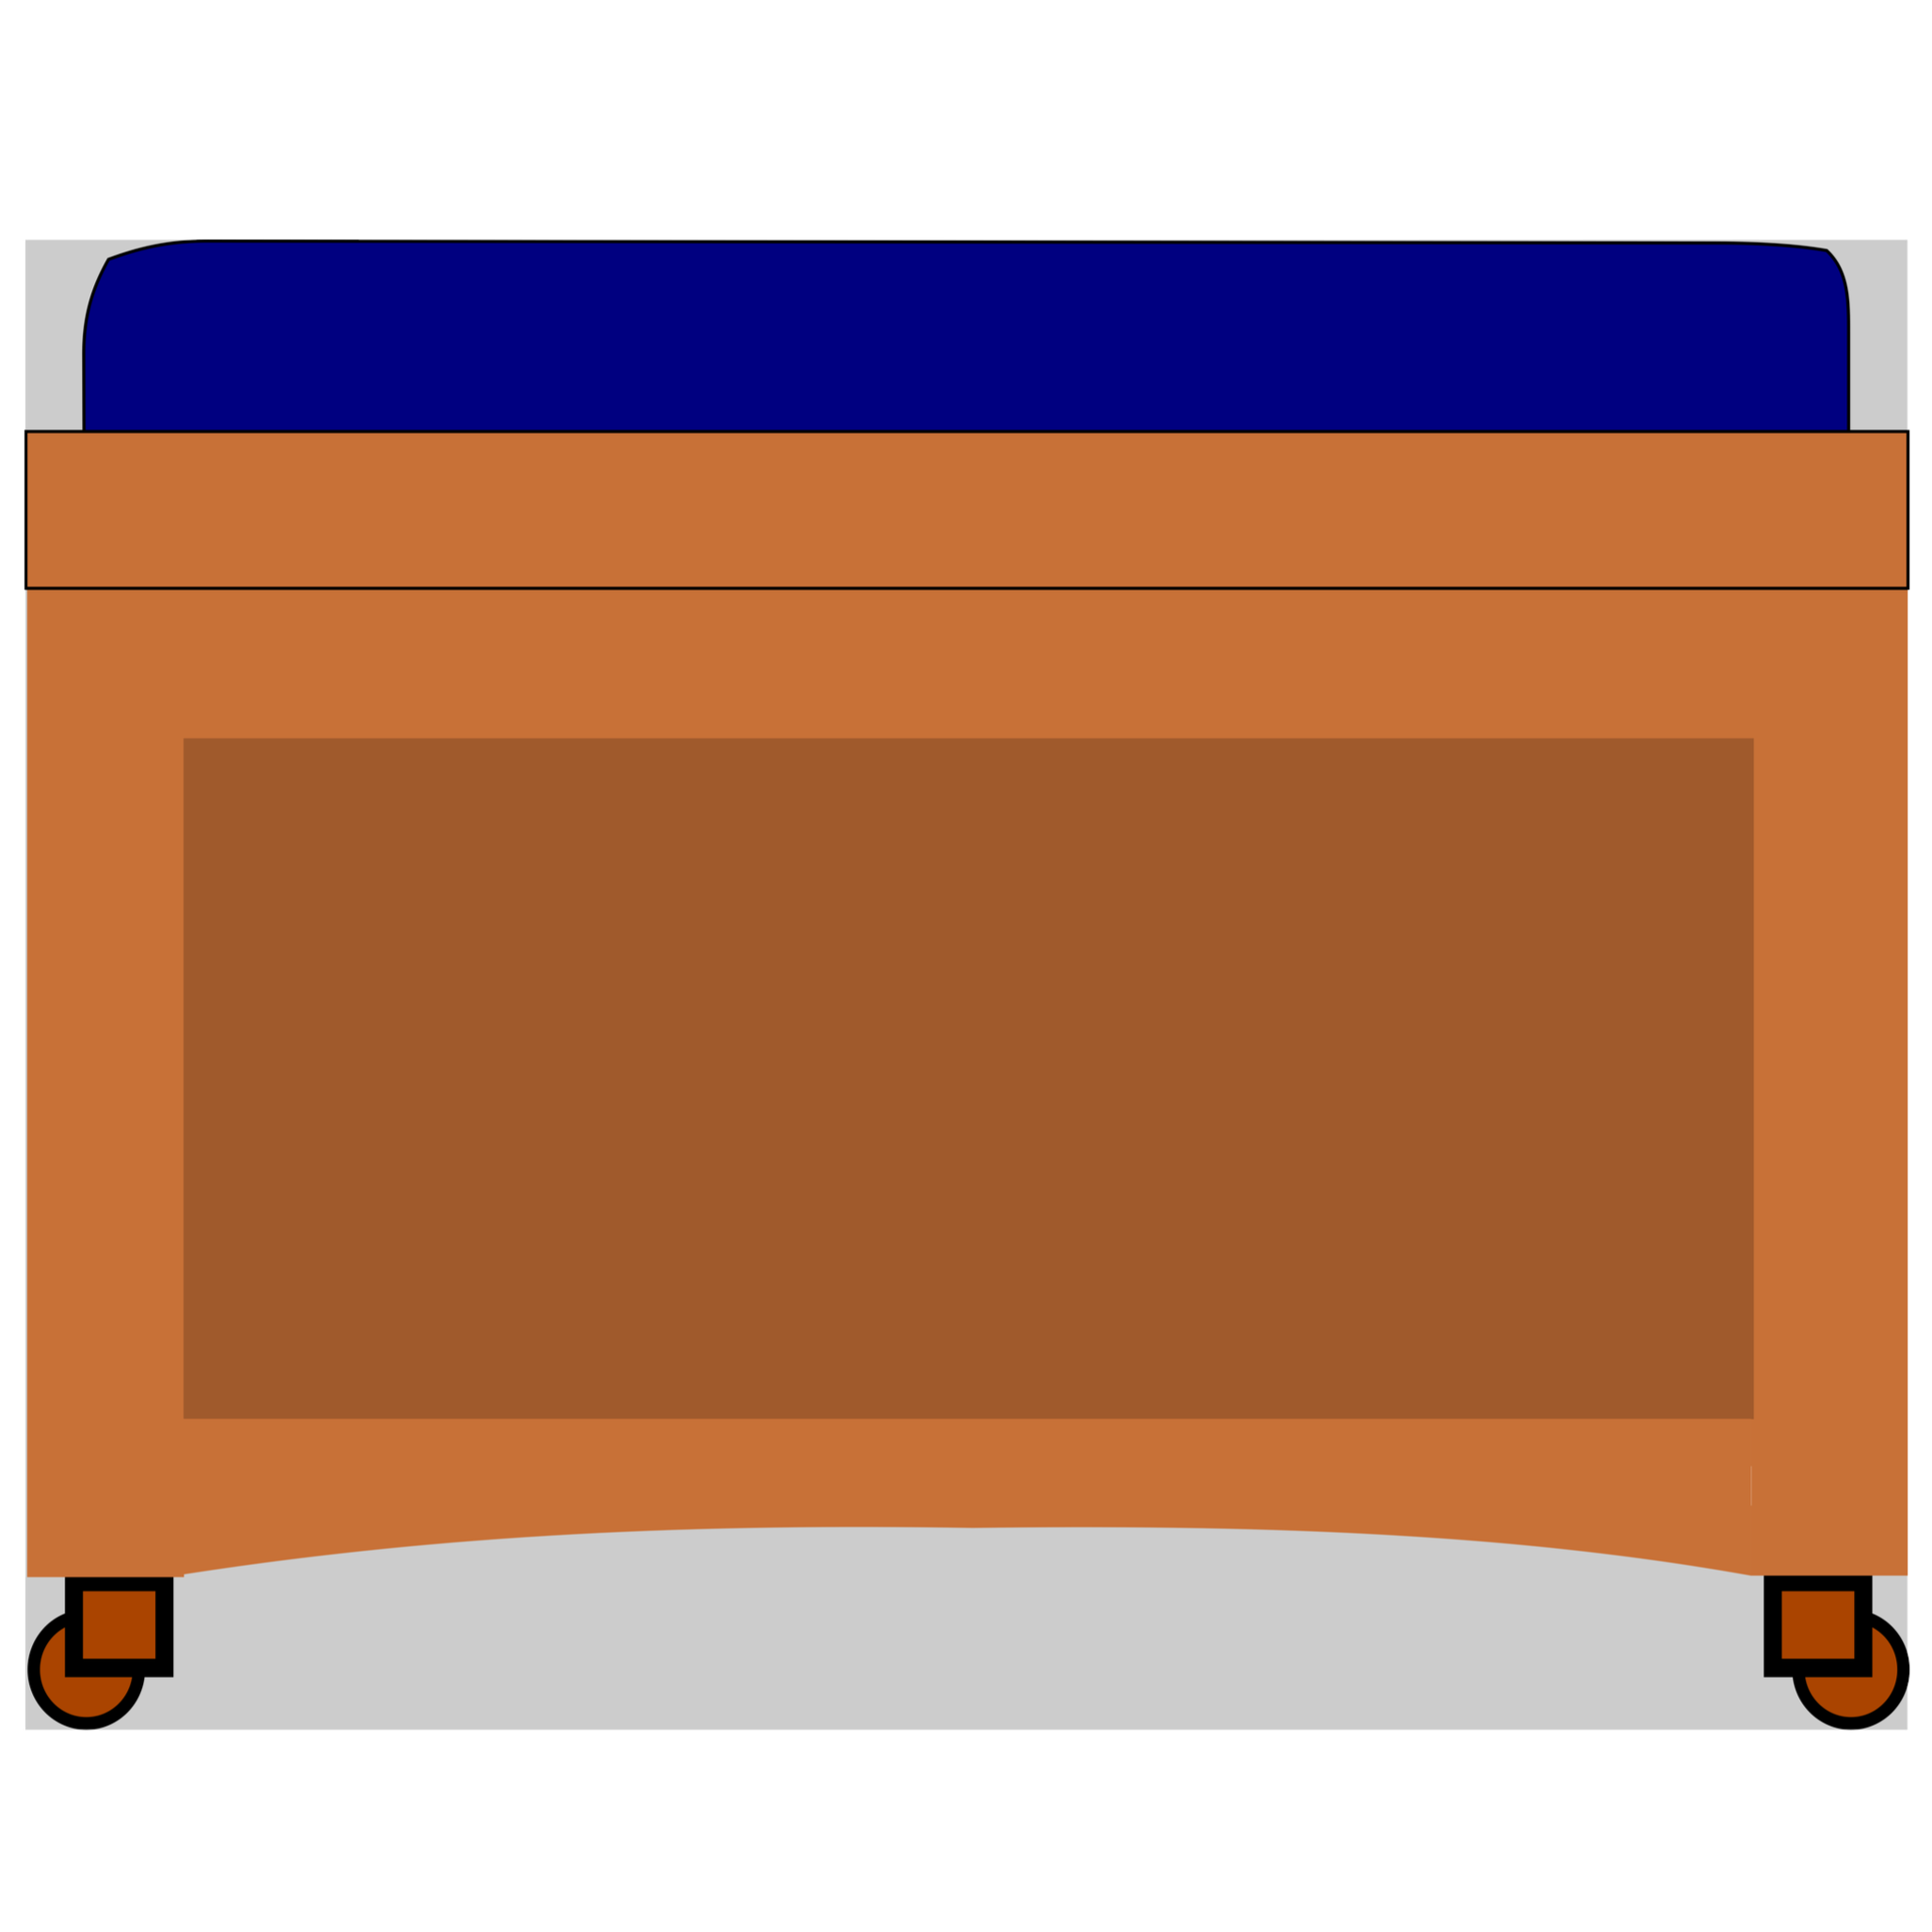
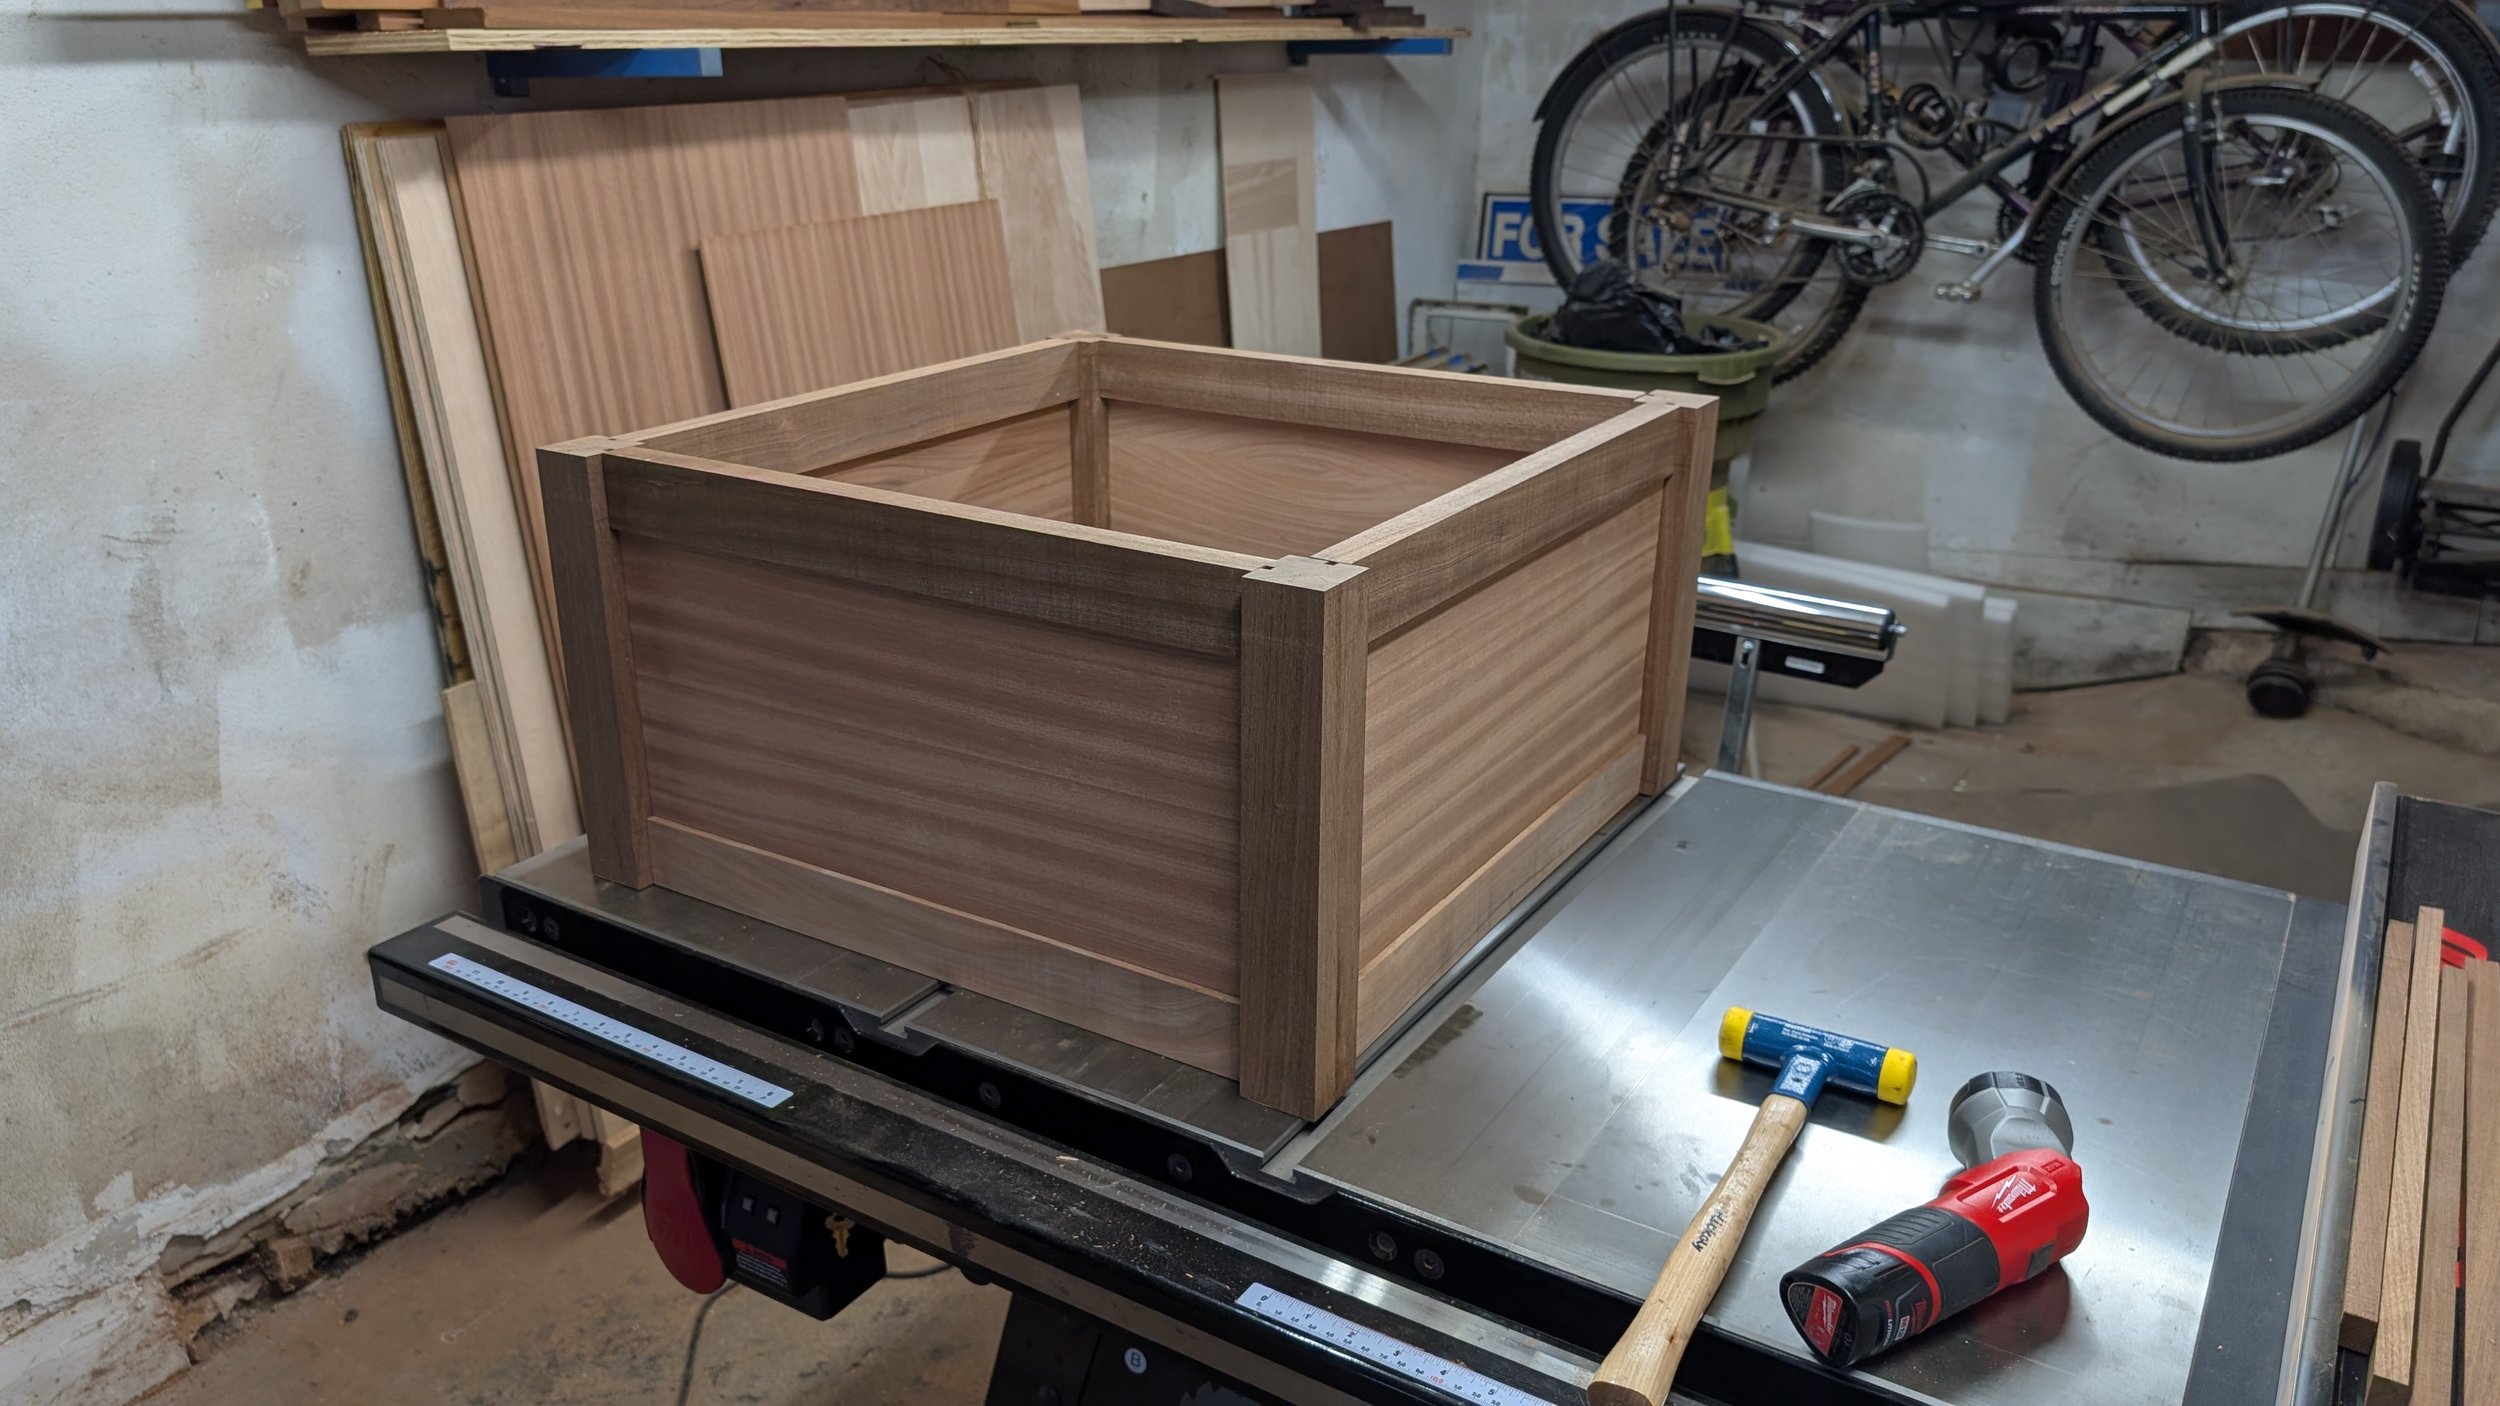
Storage ottoman on casters 19” tall by 24” wide by 24” deep with a hinged lid under the seat
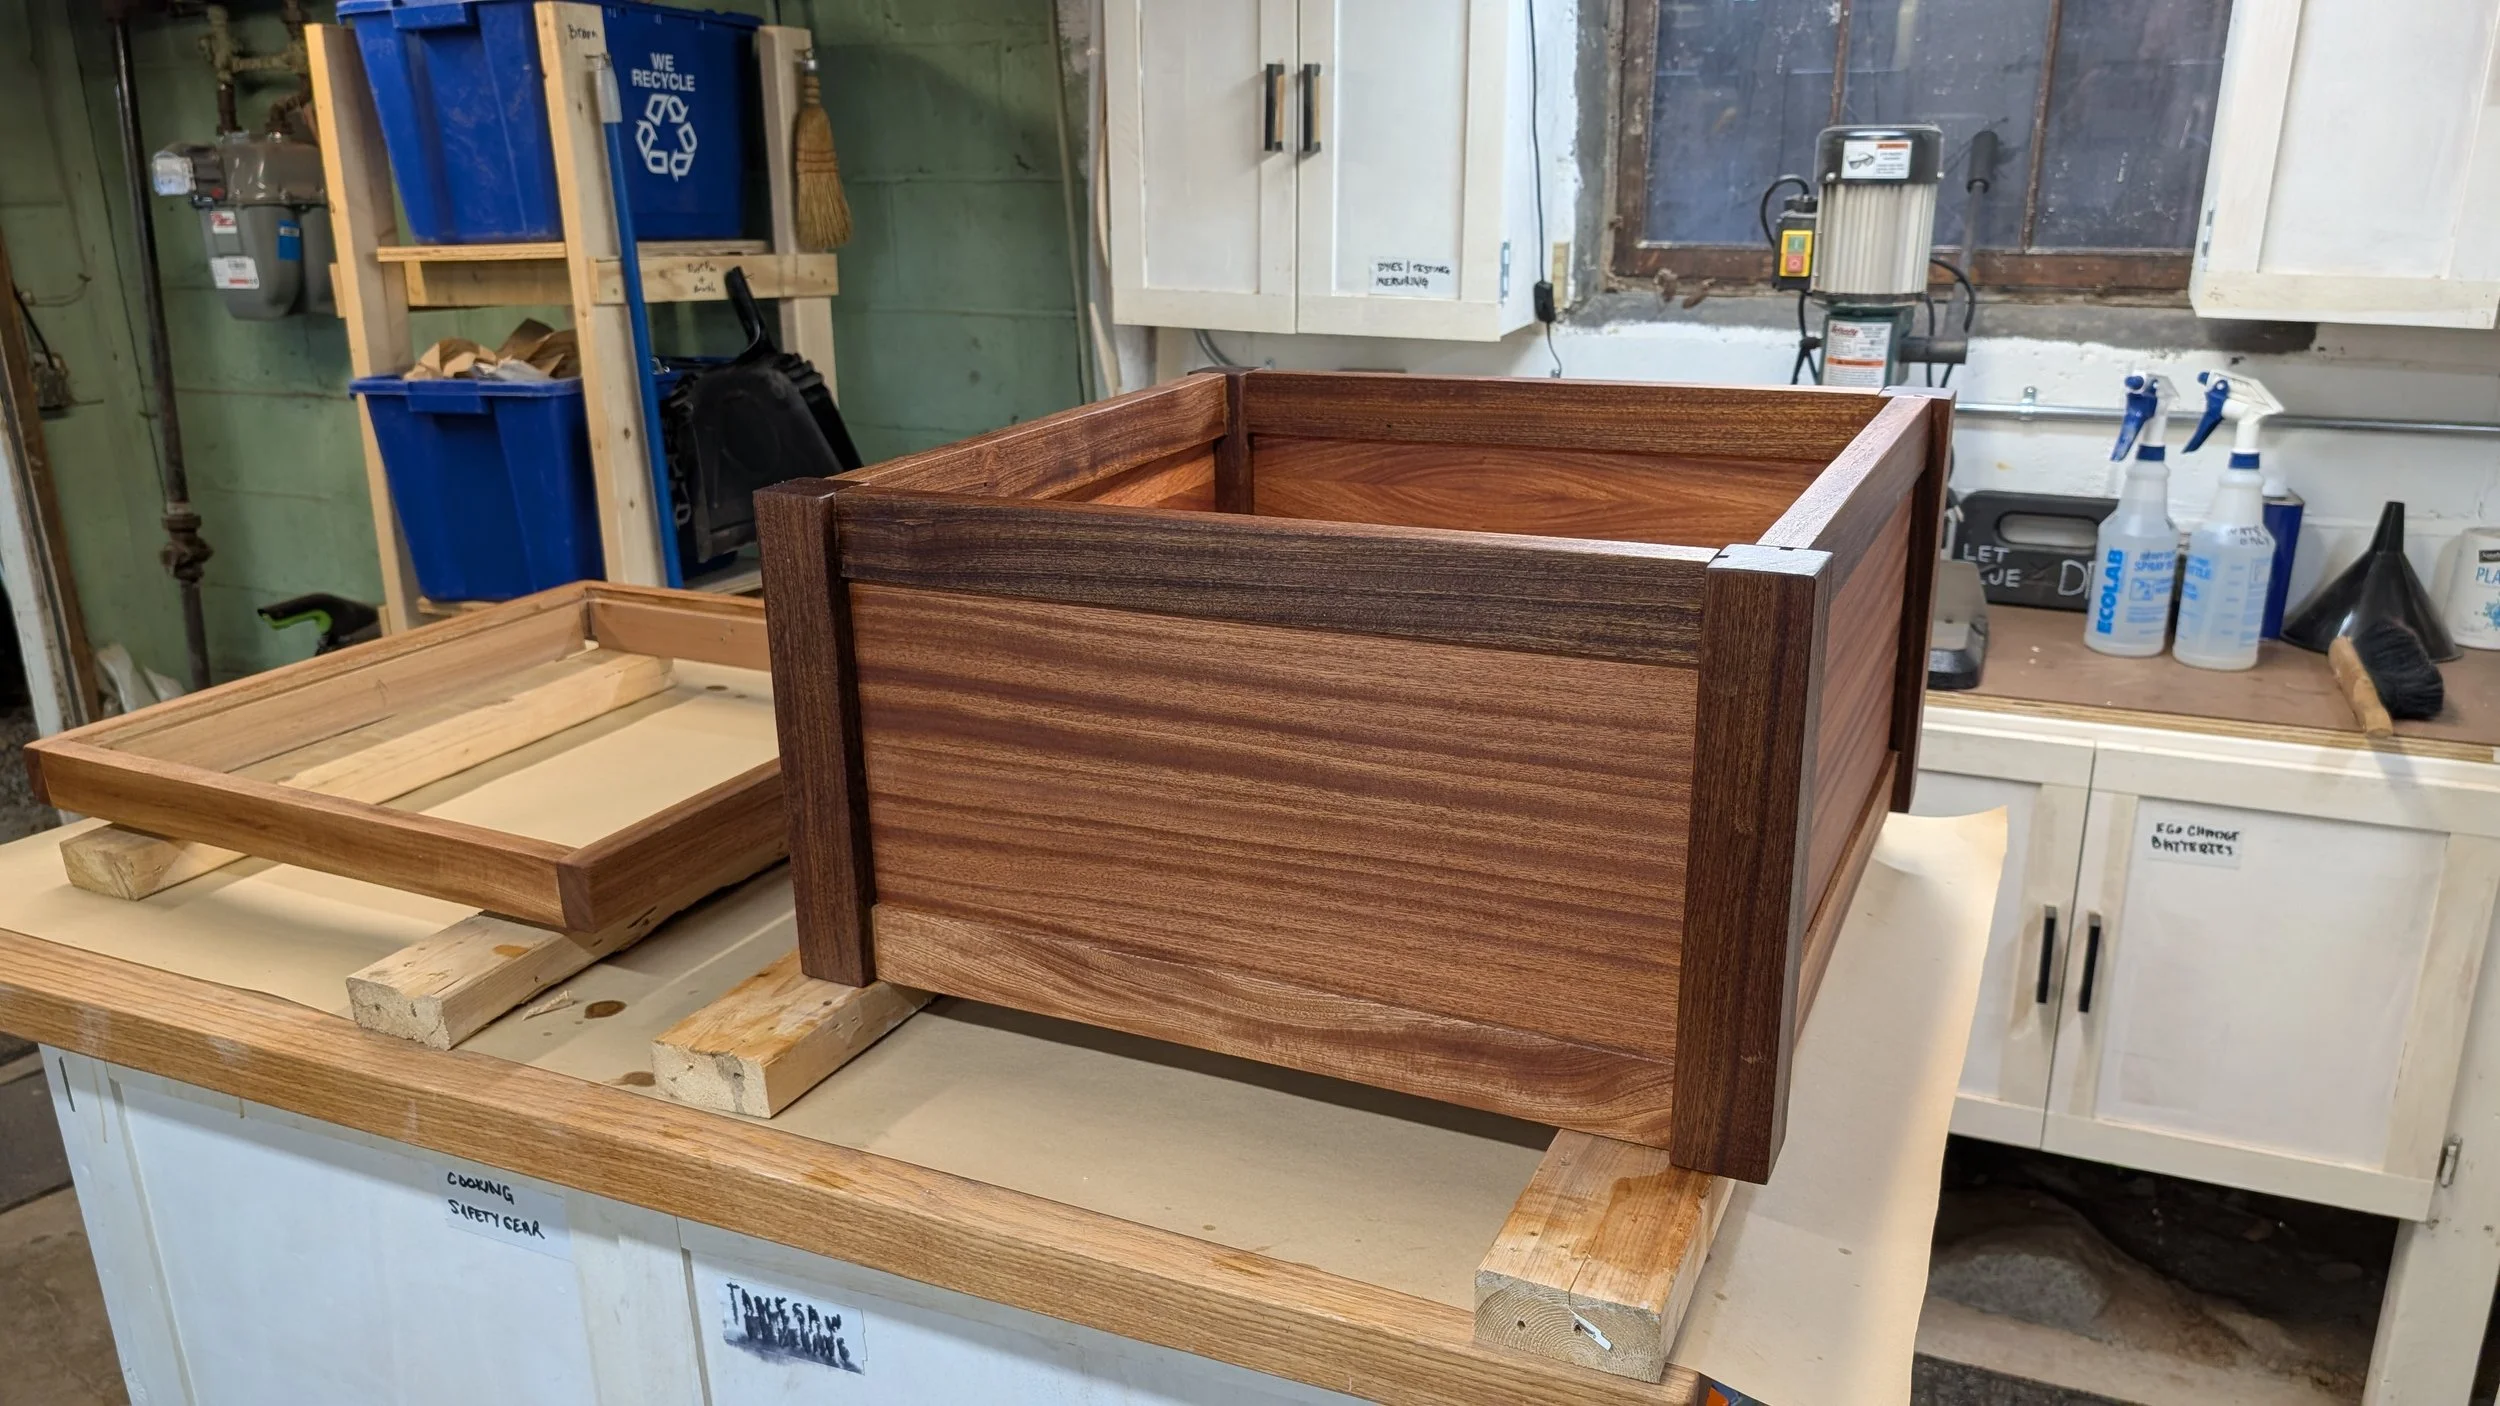
I designed a 19” x 24” x 24” ottoman on casters, it would be slightly larger than the original ottoman and use fabric that was left over from when we had our couch re-upholstered. I had a bunch of left over Sapele lumber from the new Fire Table Chairs so I only had to pick up some nice 1/4” Sapele veneer plywood that was veneered on both sides since I would be finishing the inside as well as the outside.
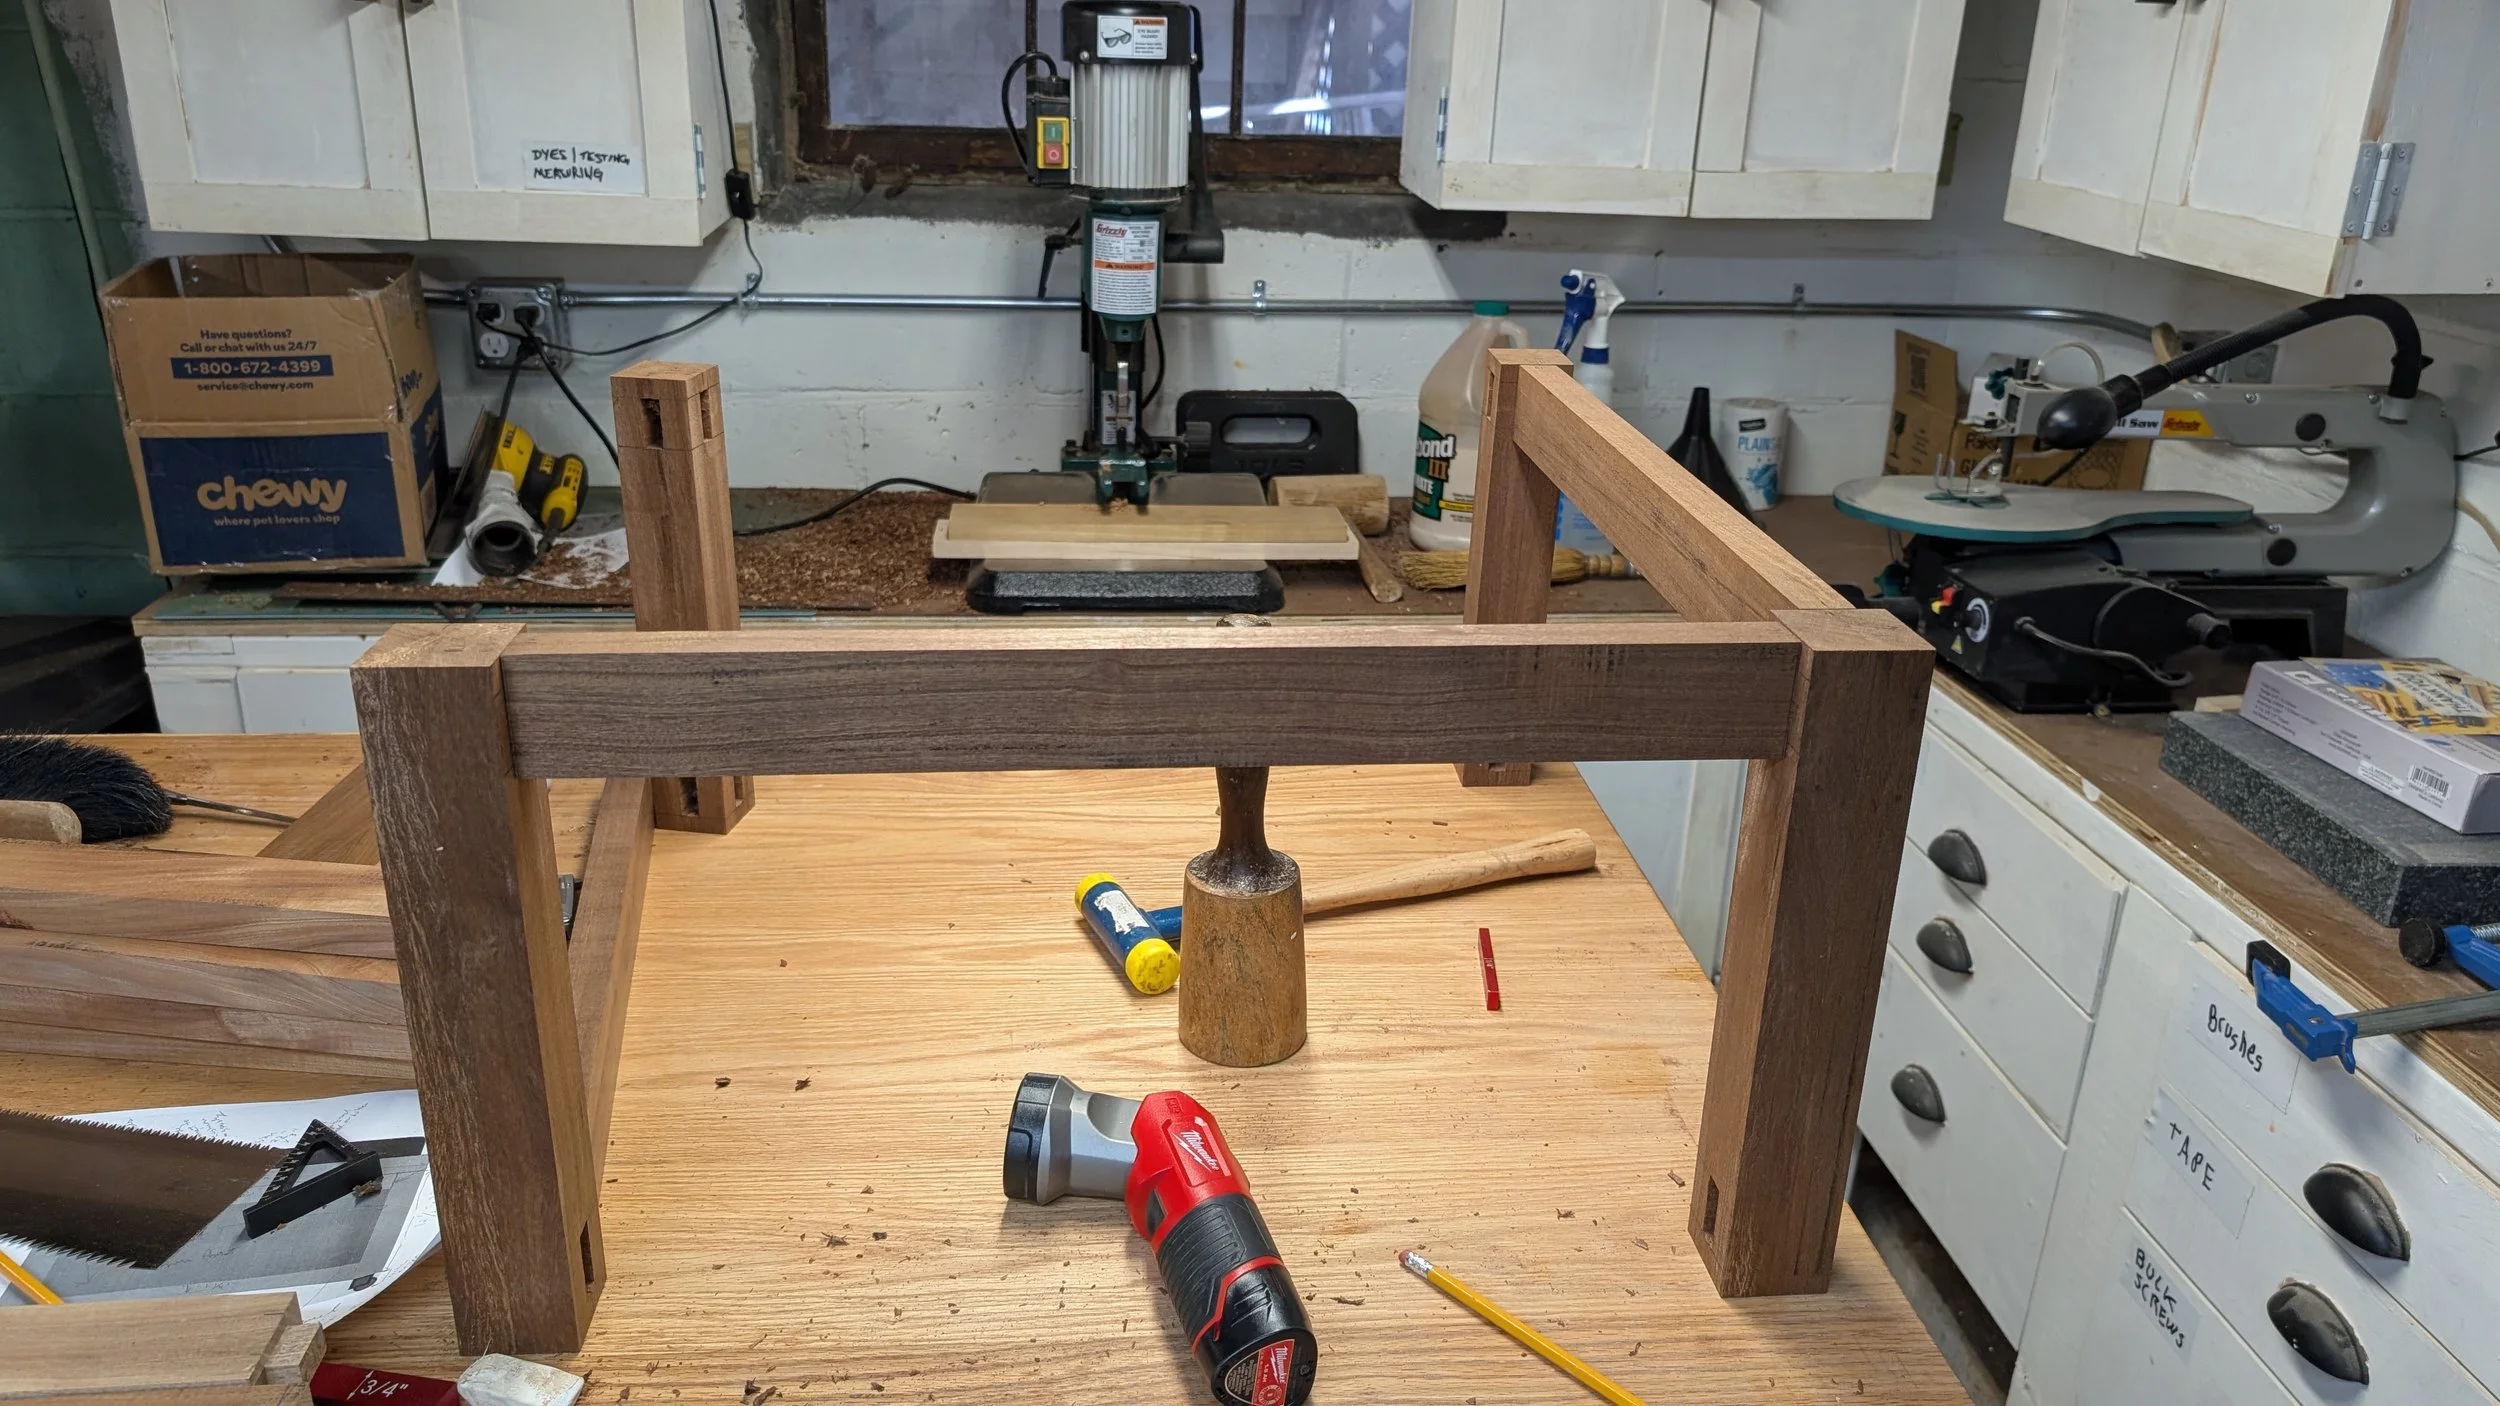
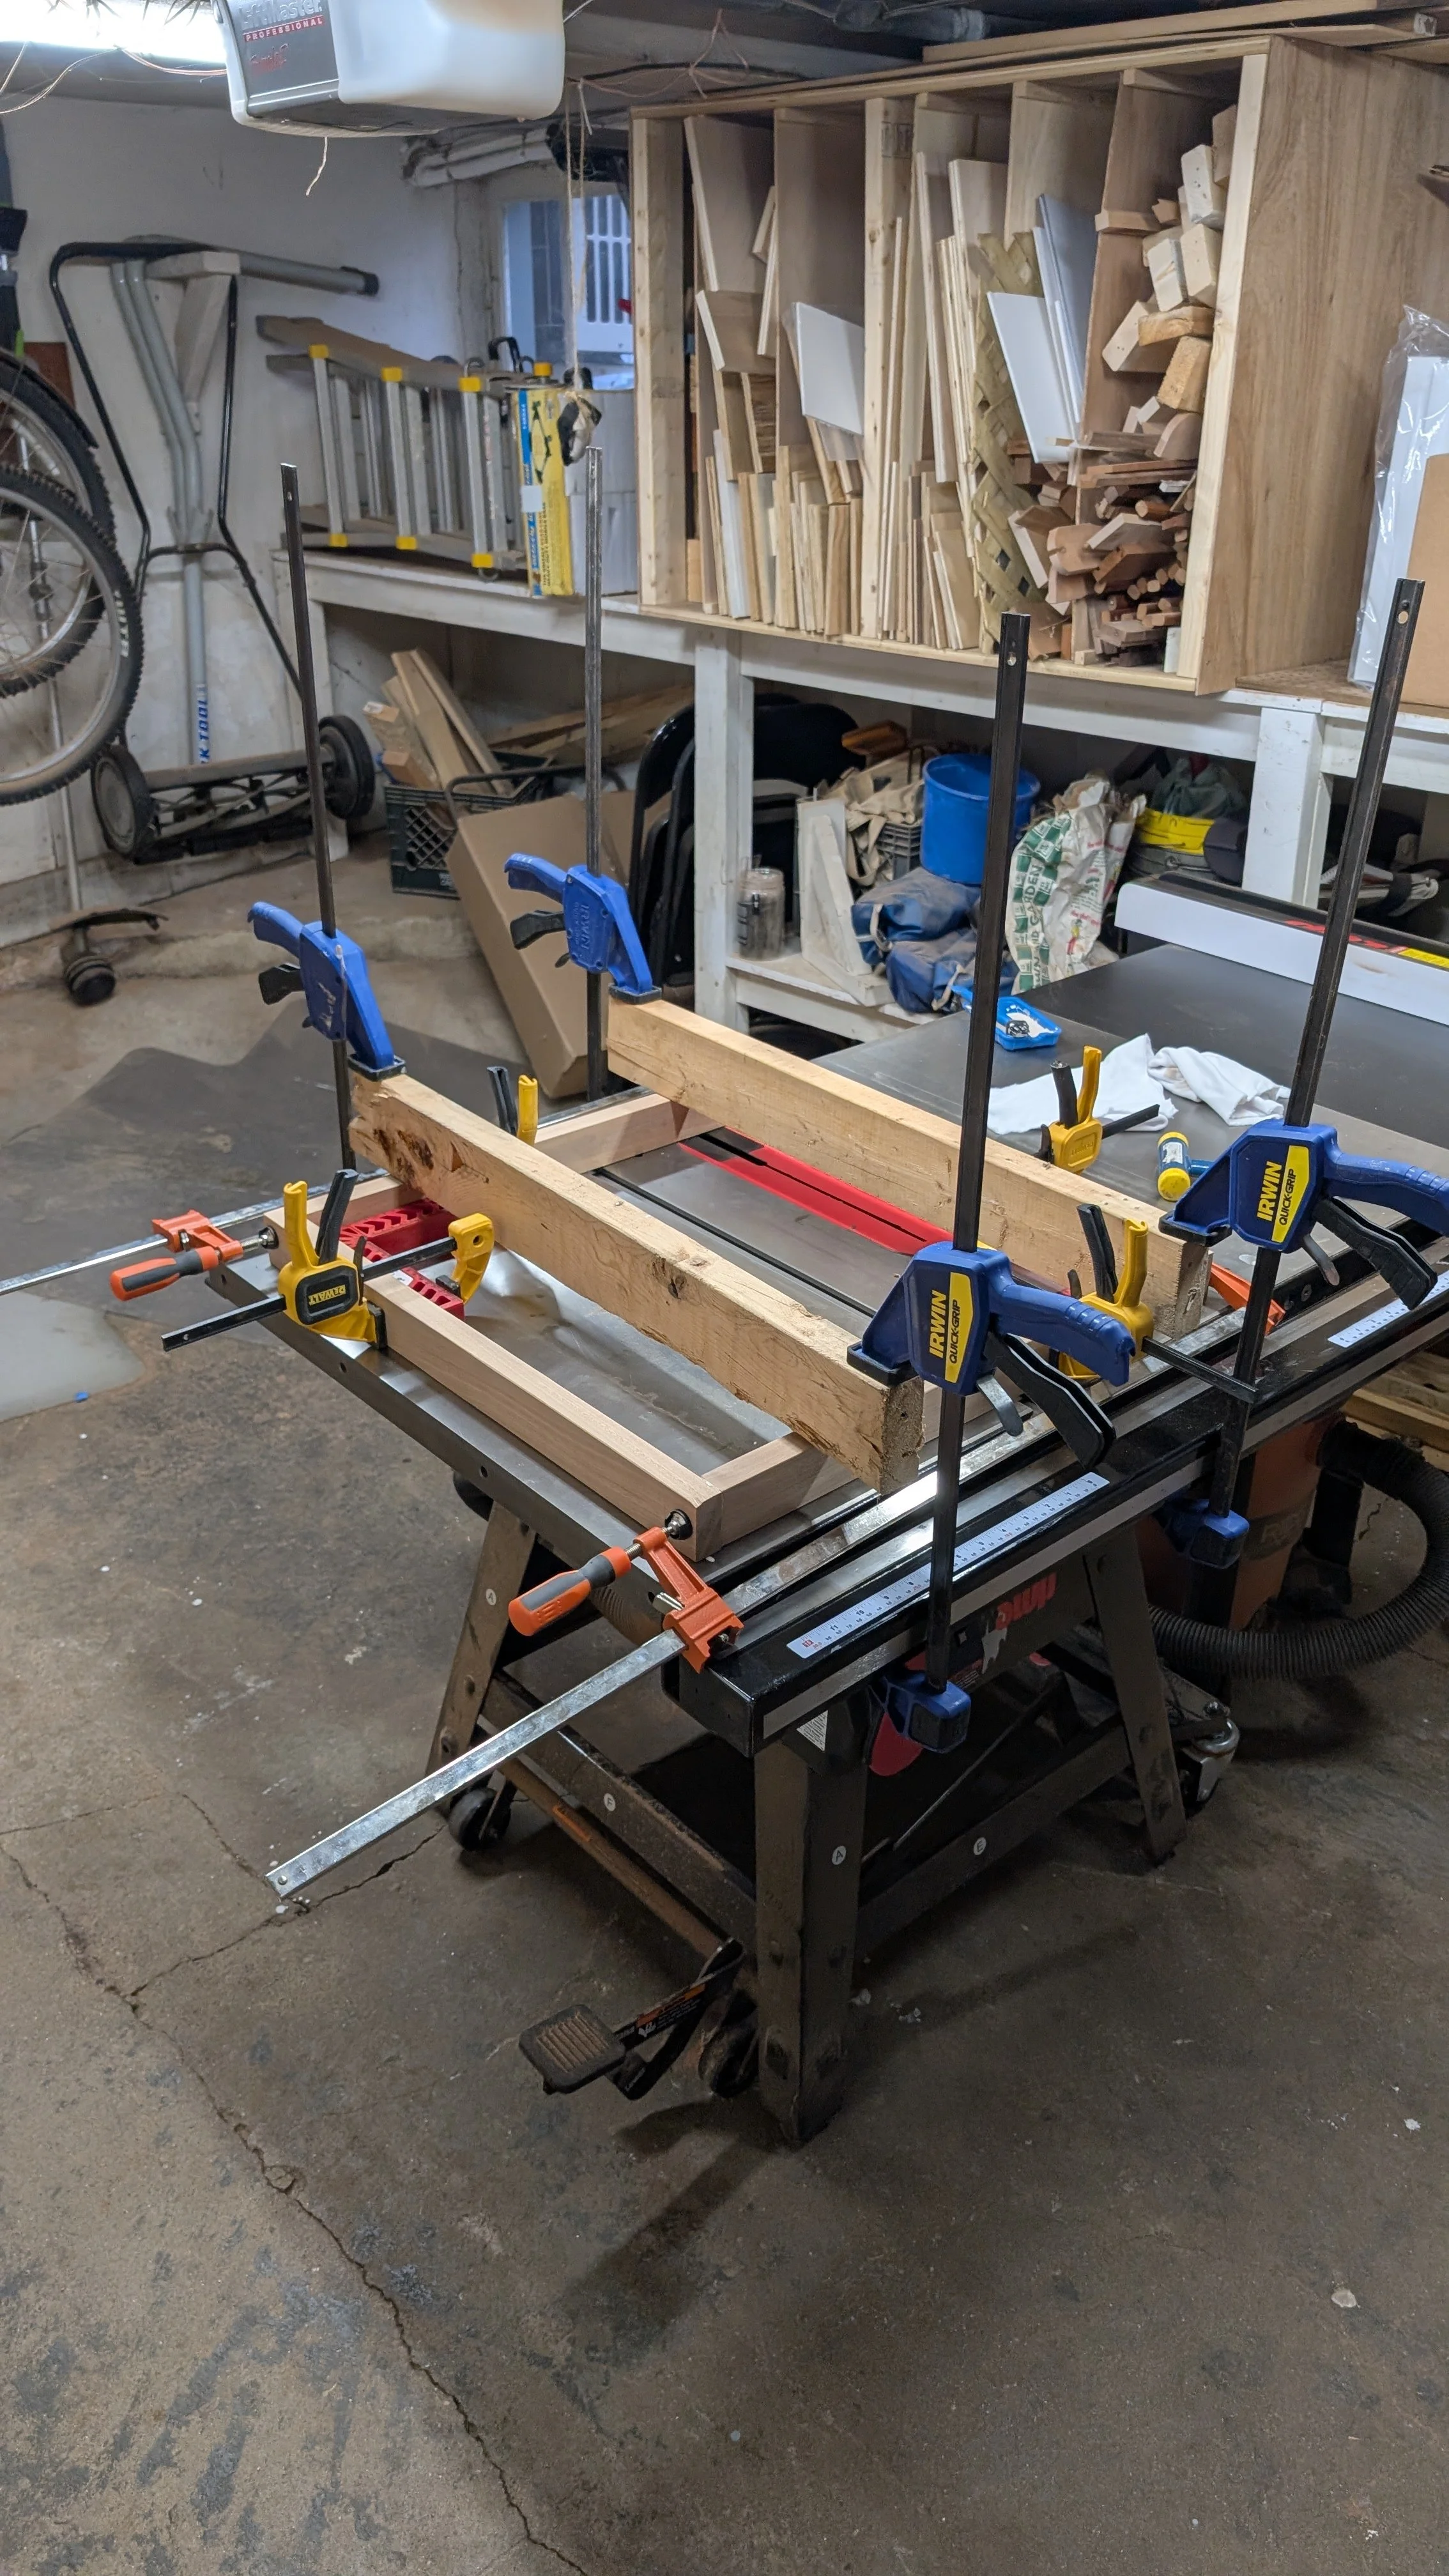
Because this would be seating as well as storage I made the corner posts actual 2” x 2” posts and all of the frame members were 1” x 2”. I used my new jointer/planer to dimension all of the parts exactly and to remove all of the saw marks.
Once I milled all of the frame and seat frame parts to size I cut all of the mortices in the corner posts. I deliberately offset the tenons so that there would be extra material at the top and bottom of the posts to help give the frame extra support. I also centered them in the posts for the same reason. I made them 1” deep which which would require notching the tenons so they wouldn’t collide.
Then I switched my Sawstop table saw to dado mode, the first time I’ve done this, it turned out to be much faster and easier than I imagined. I used the dado stack and my table saw sled ( modified for dado usage ) to cut all of the tenons.
After that I cleaned up and dry fitted all of the mortices and tenons.
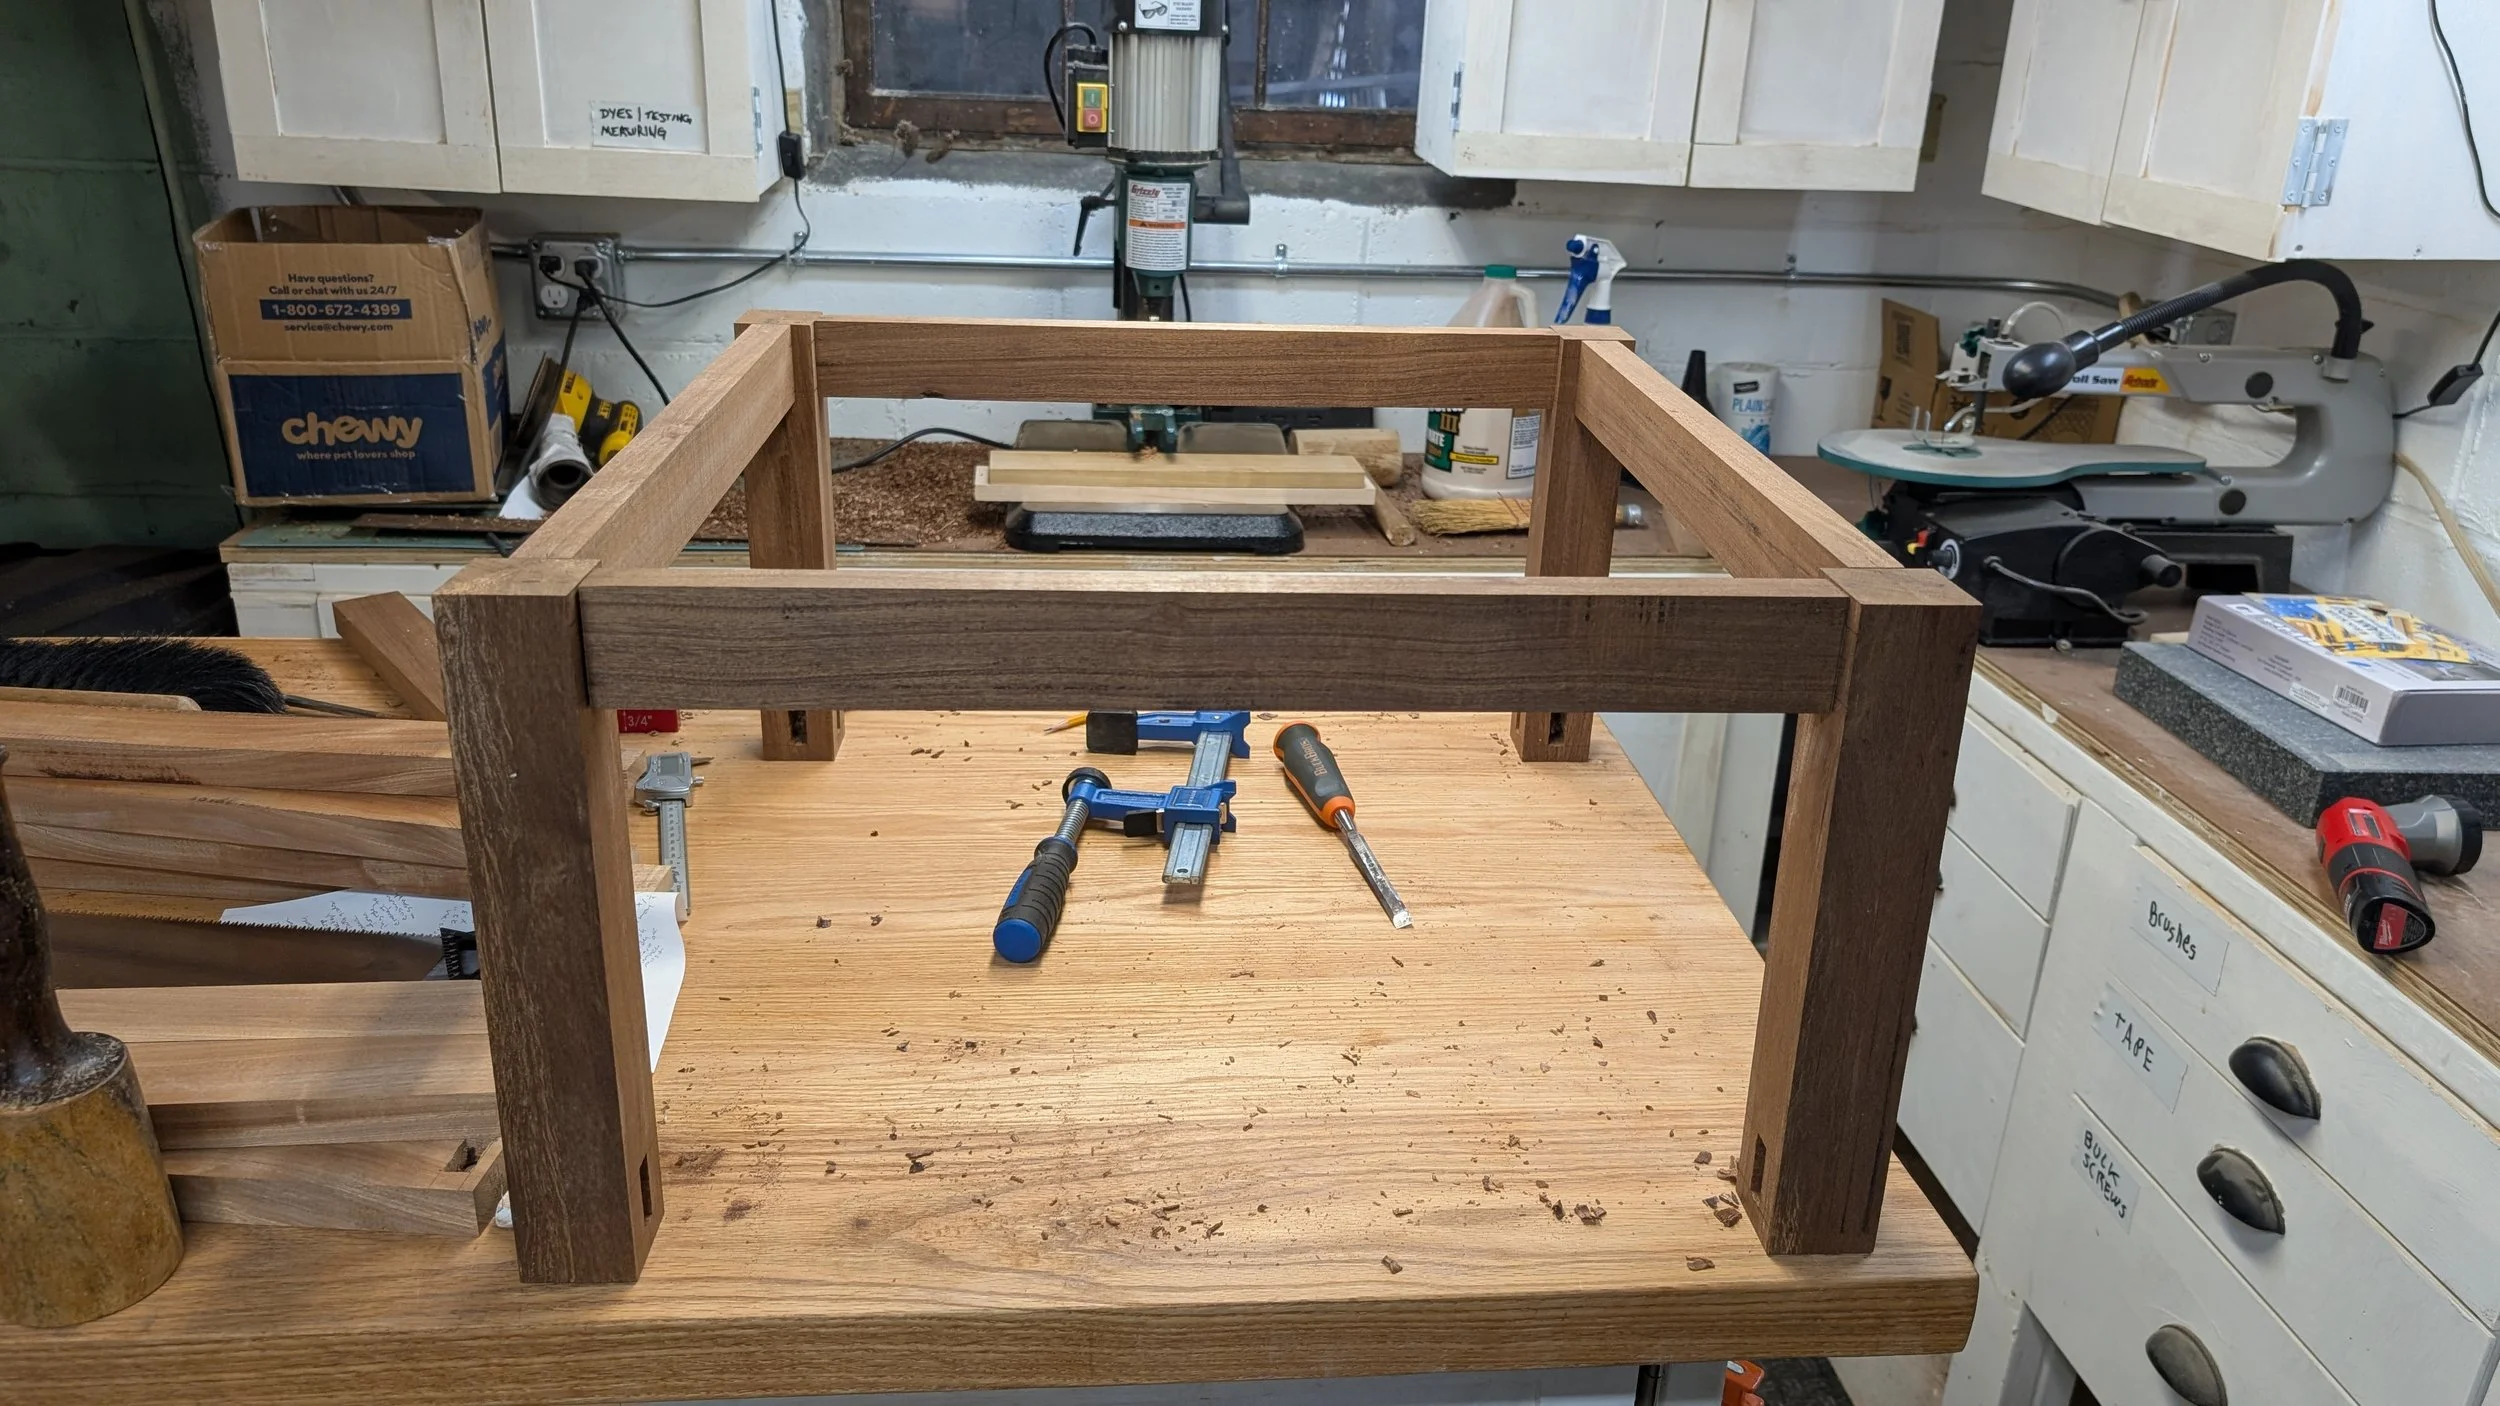
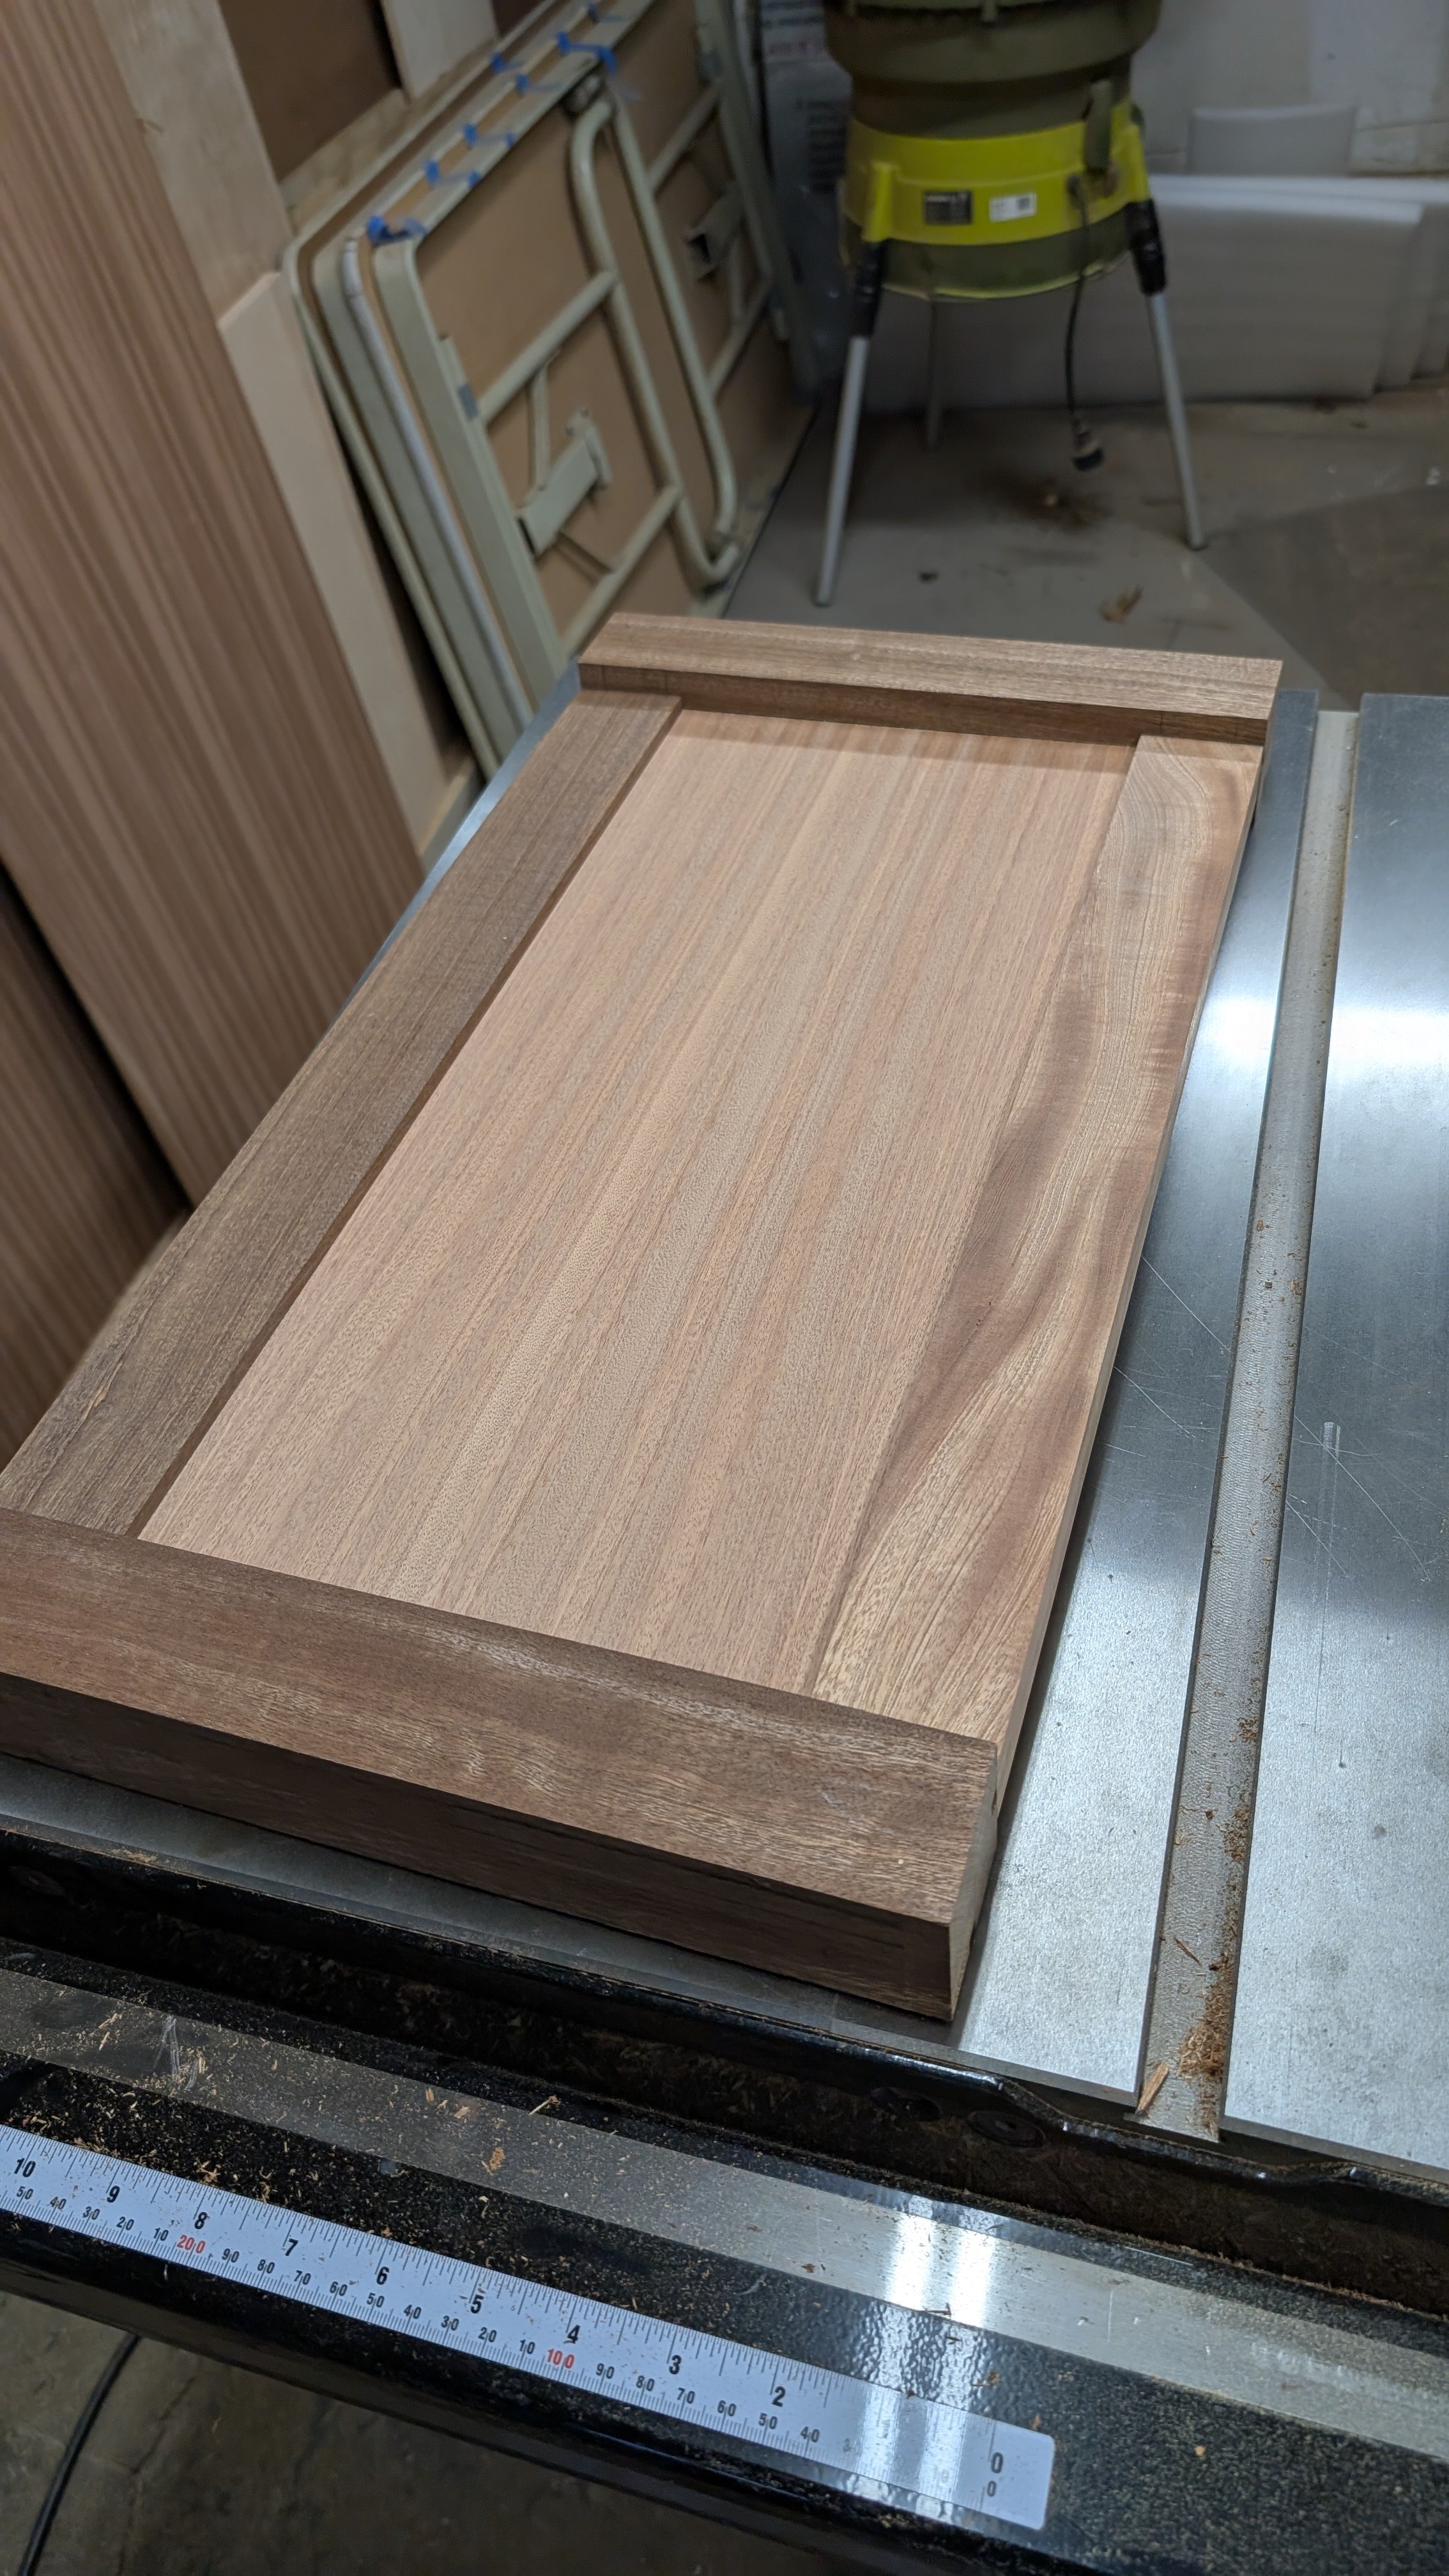
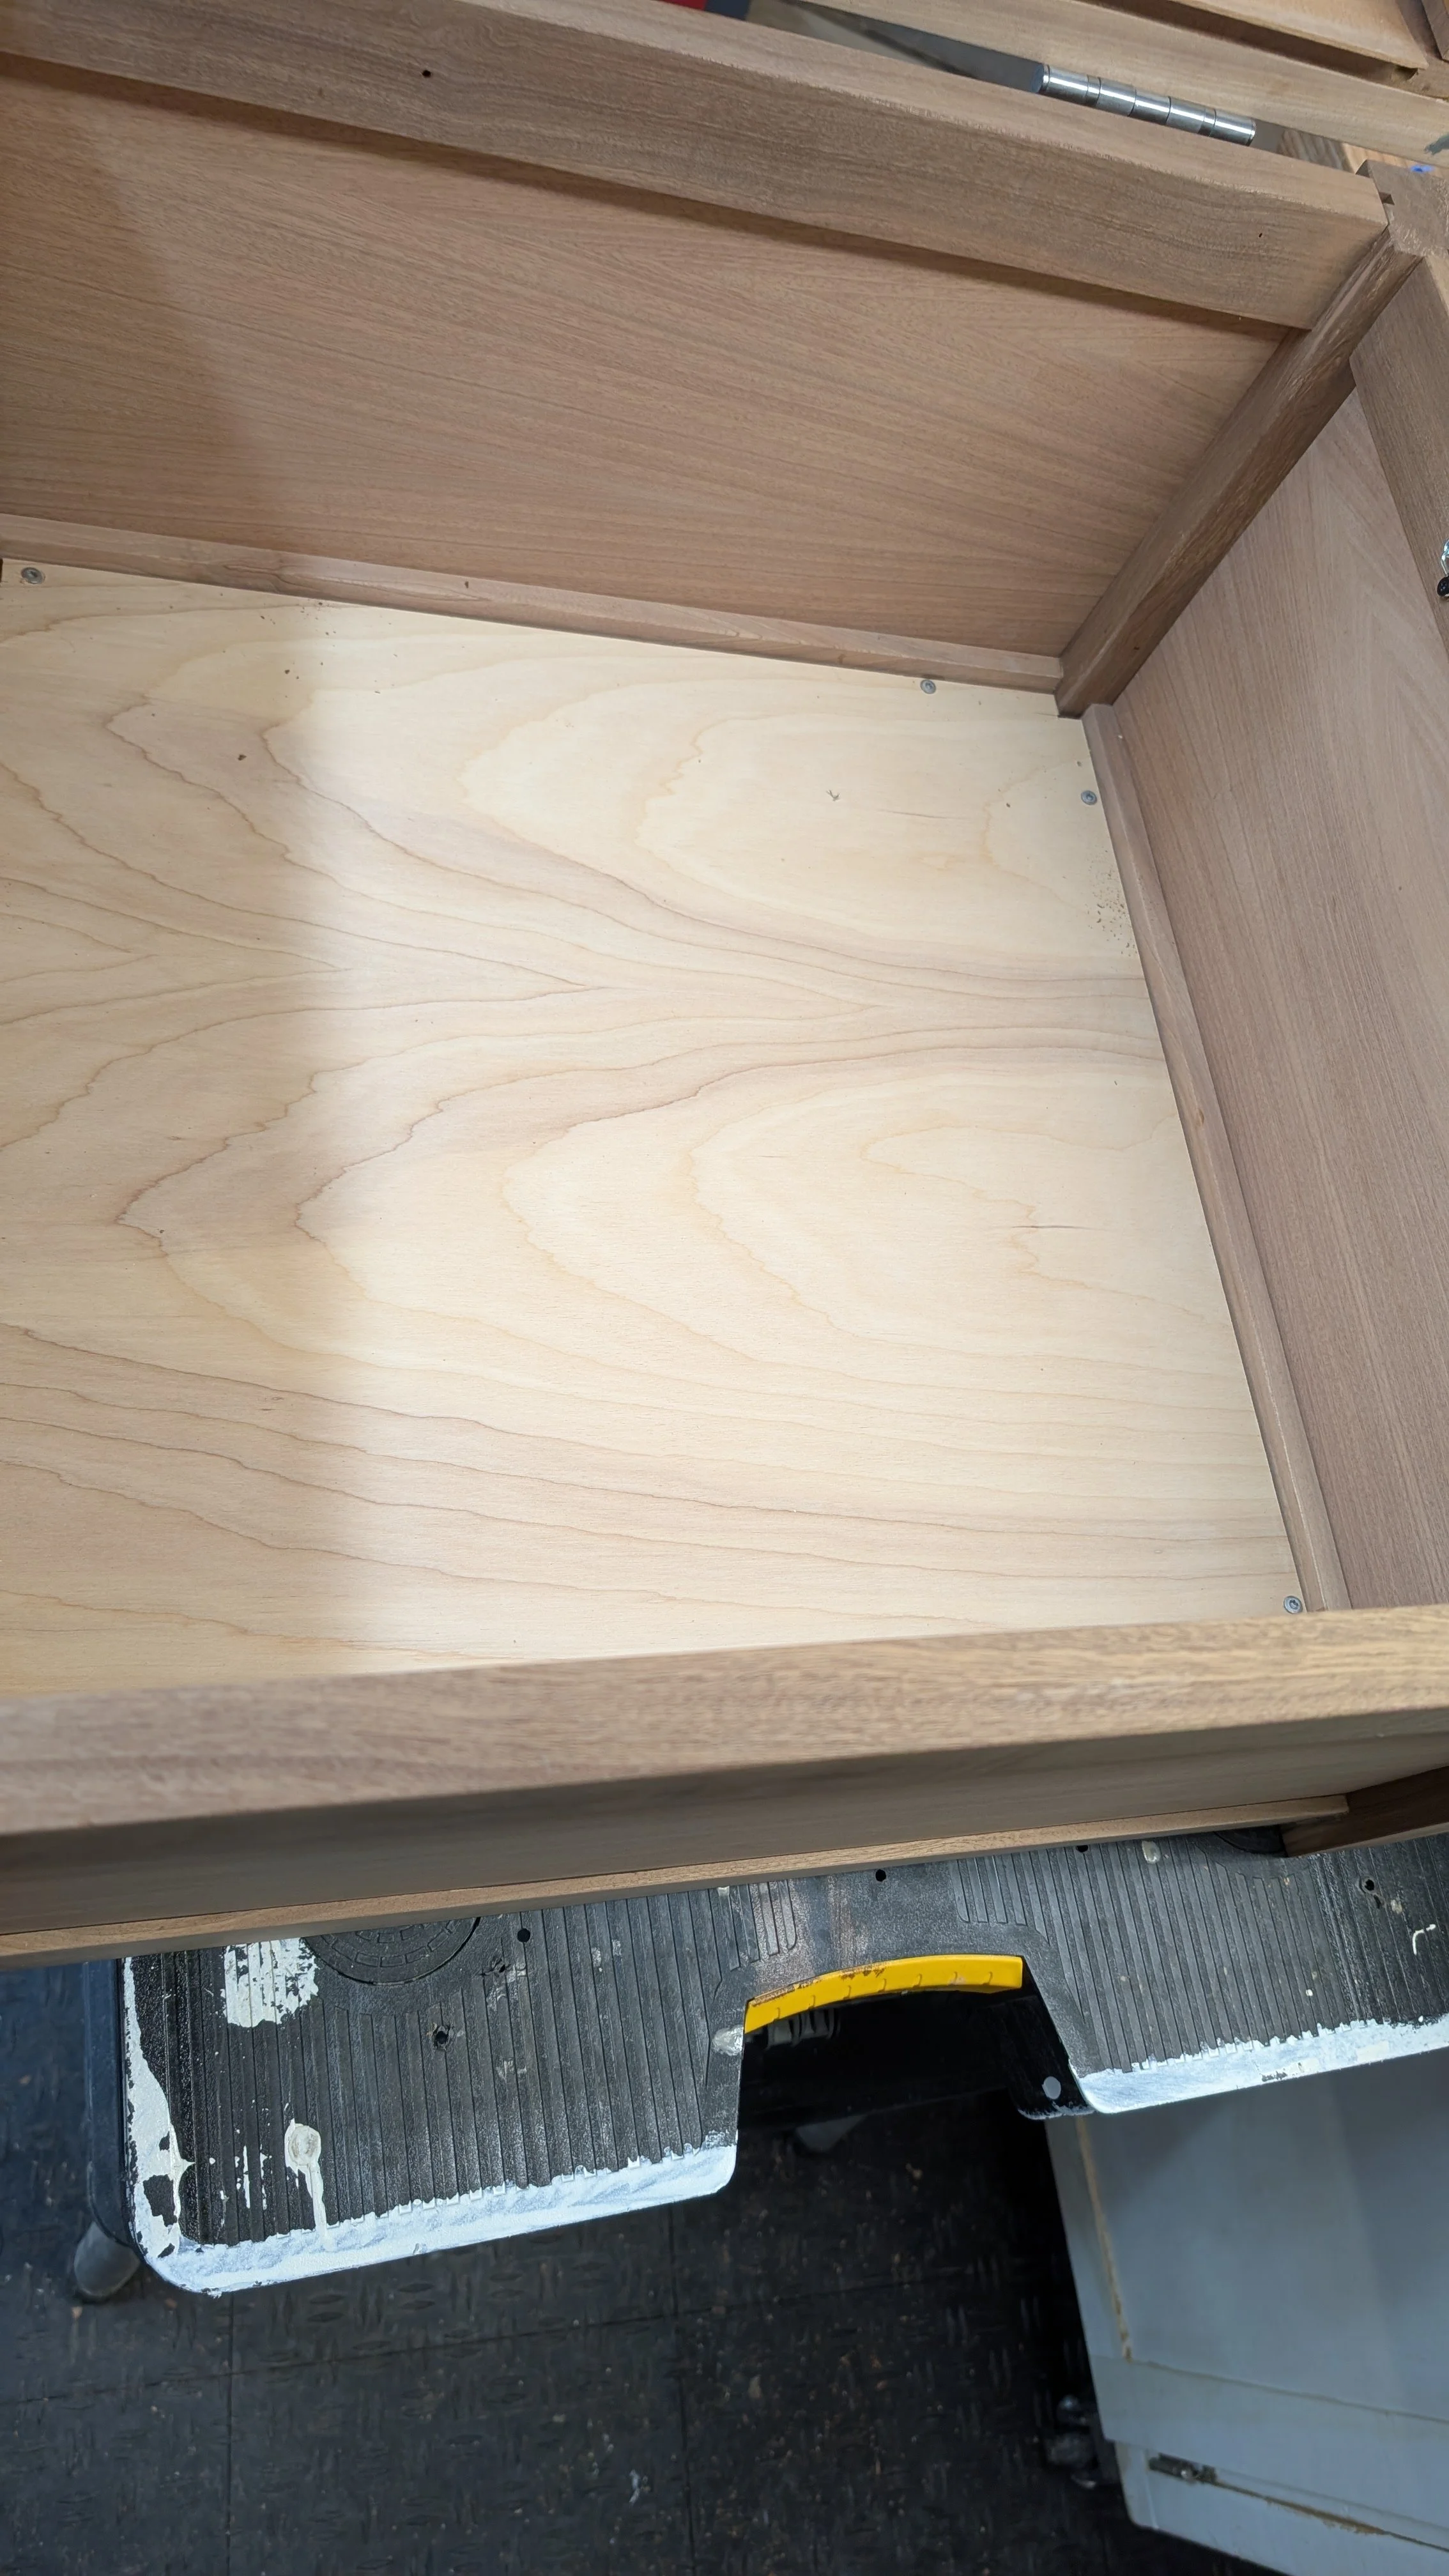
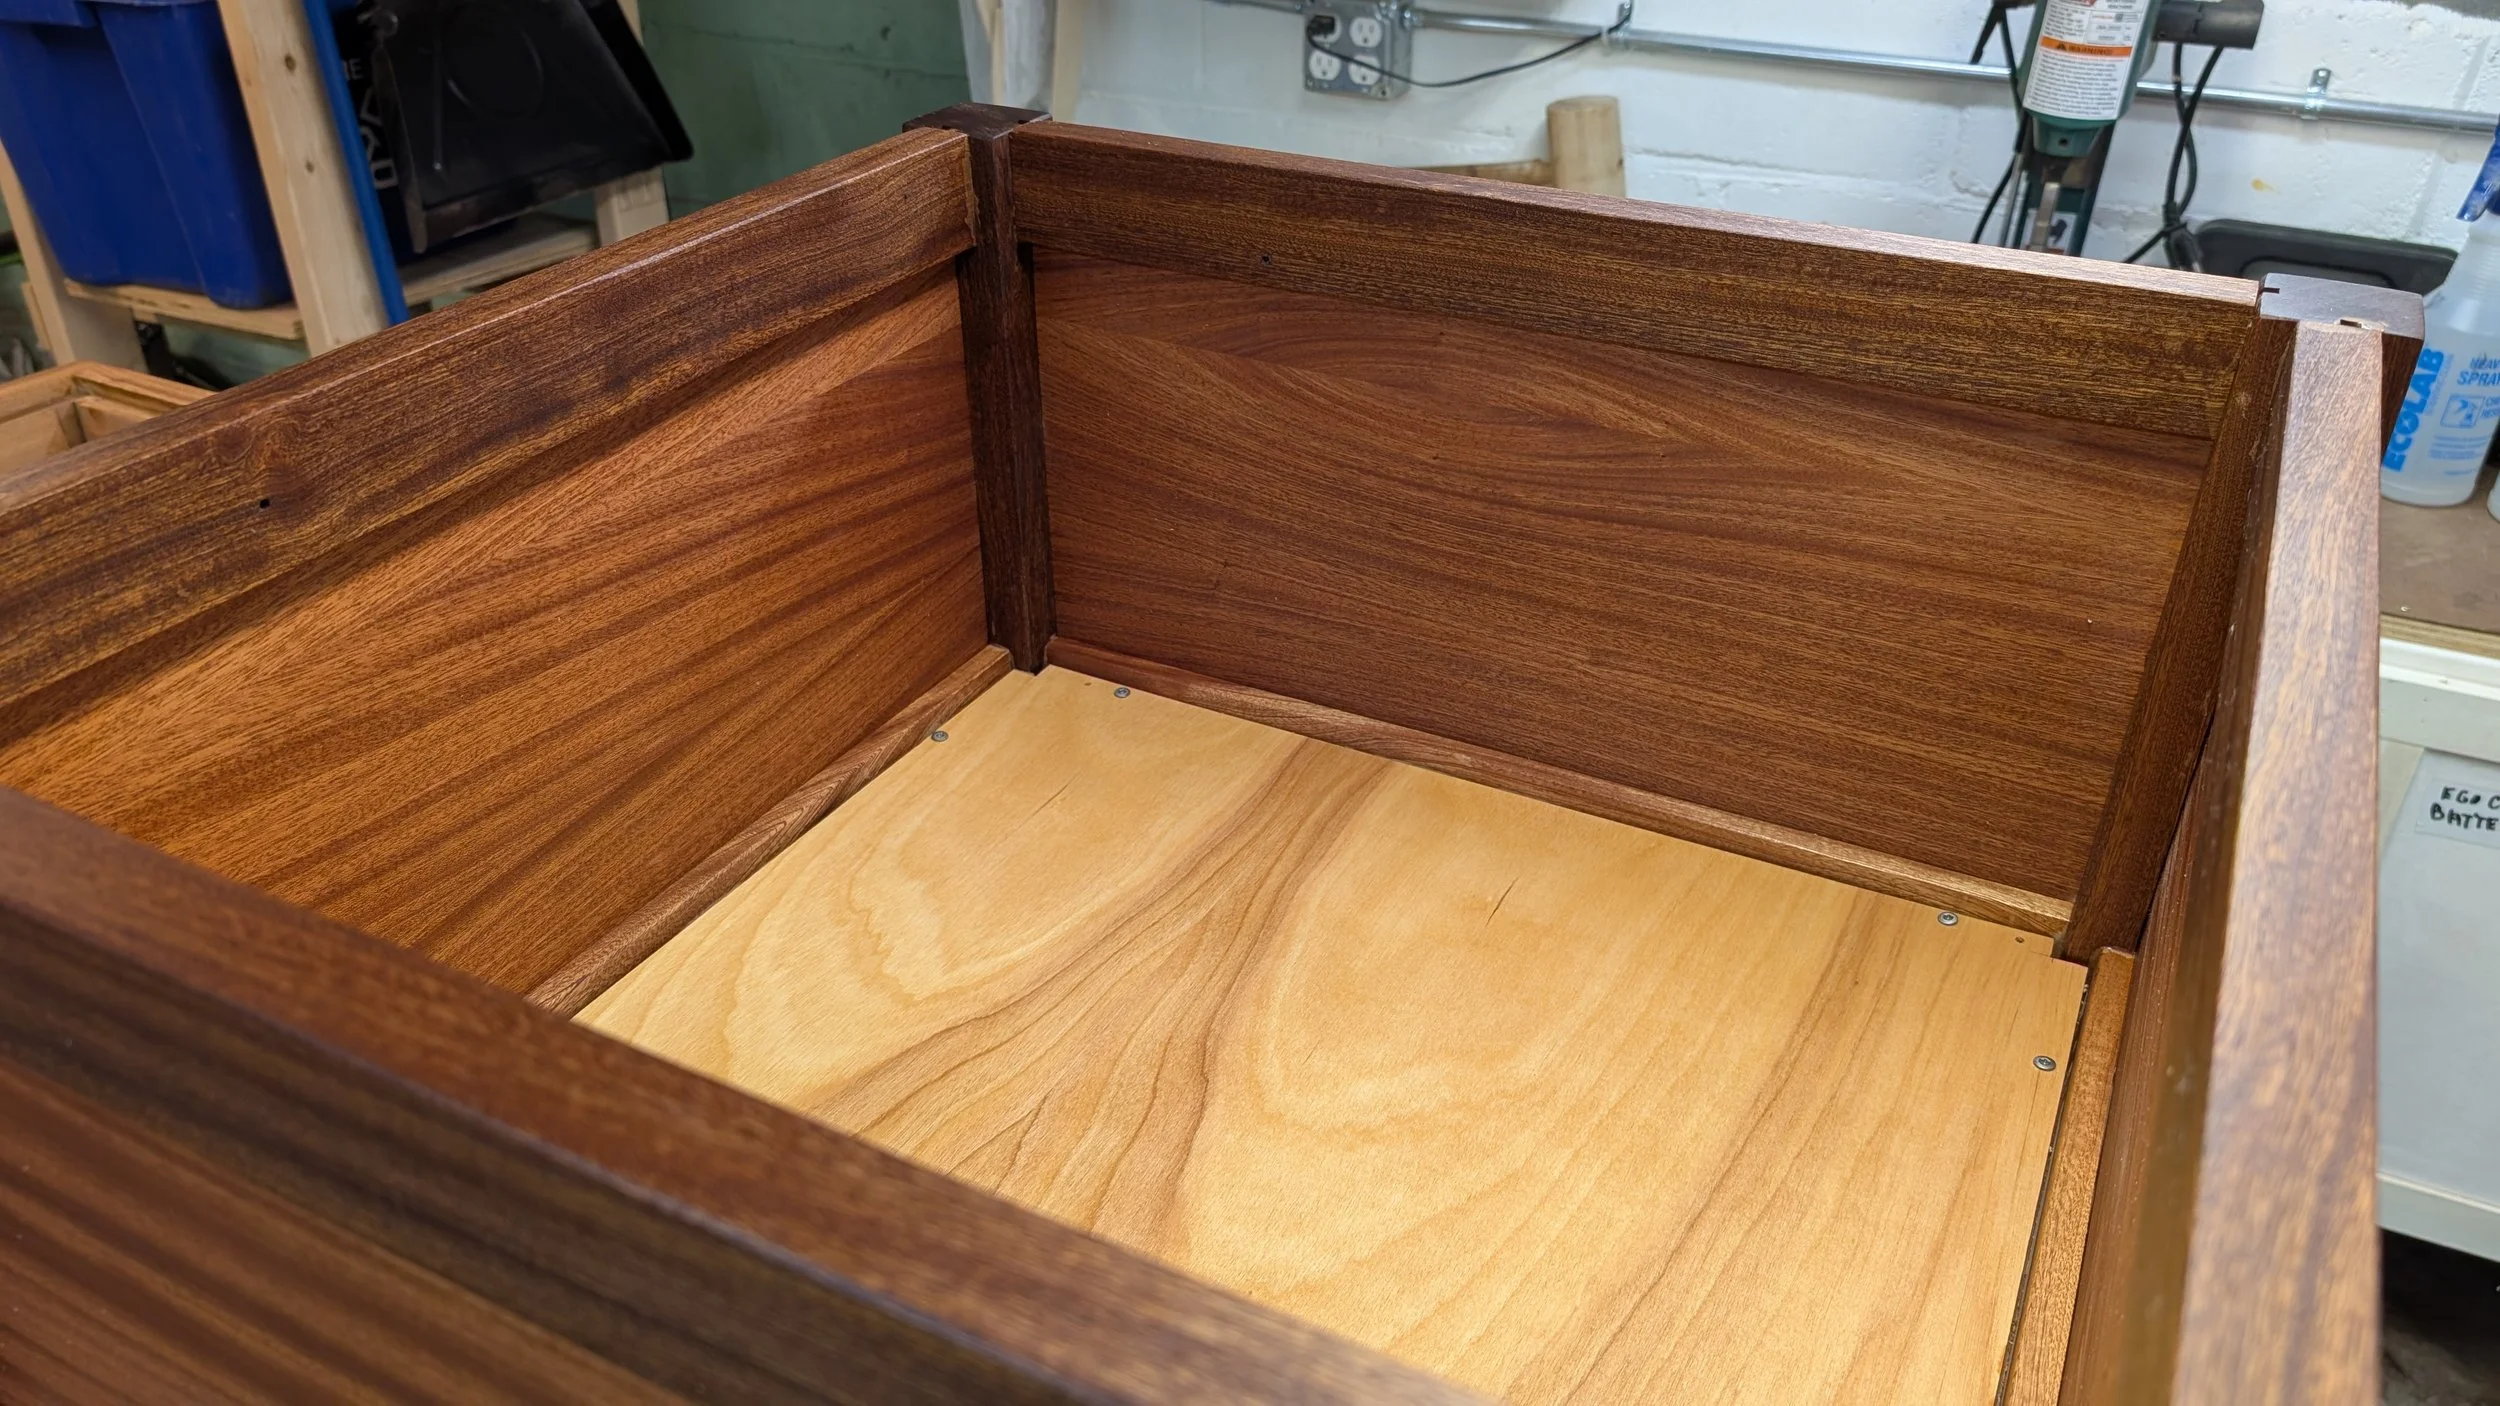
Then I reset the dado stack to 1/4” and cut the panel grooves in the corner posts. I cut the panels to size and did a dry fit of the whole body of the ottoman.
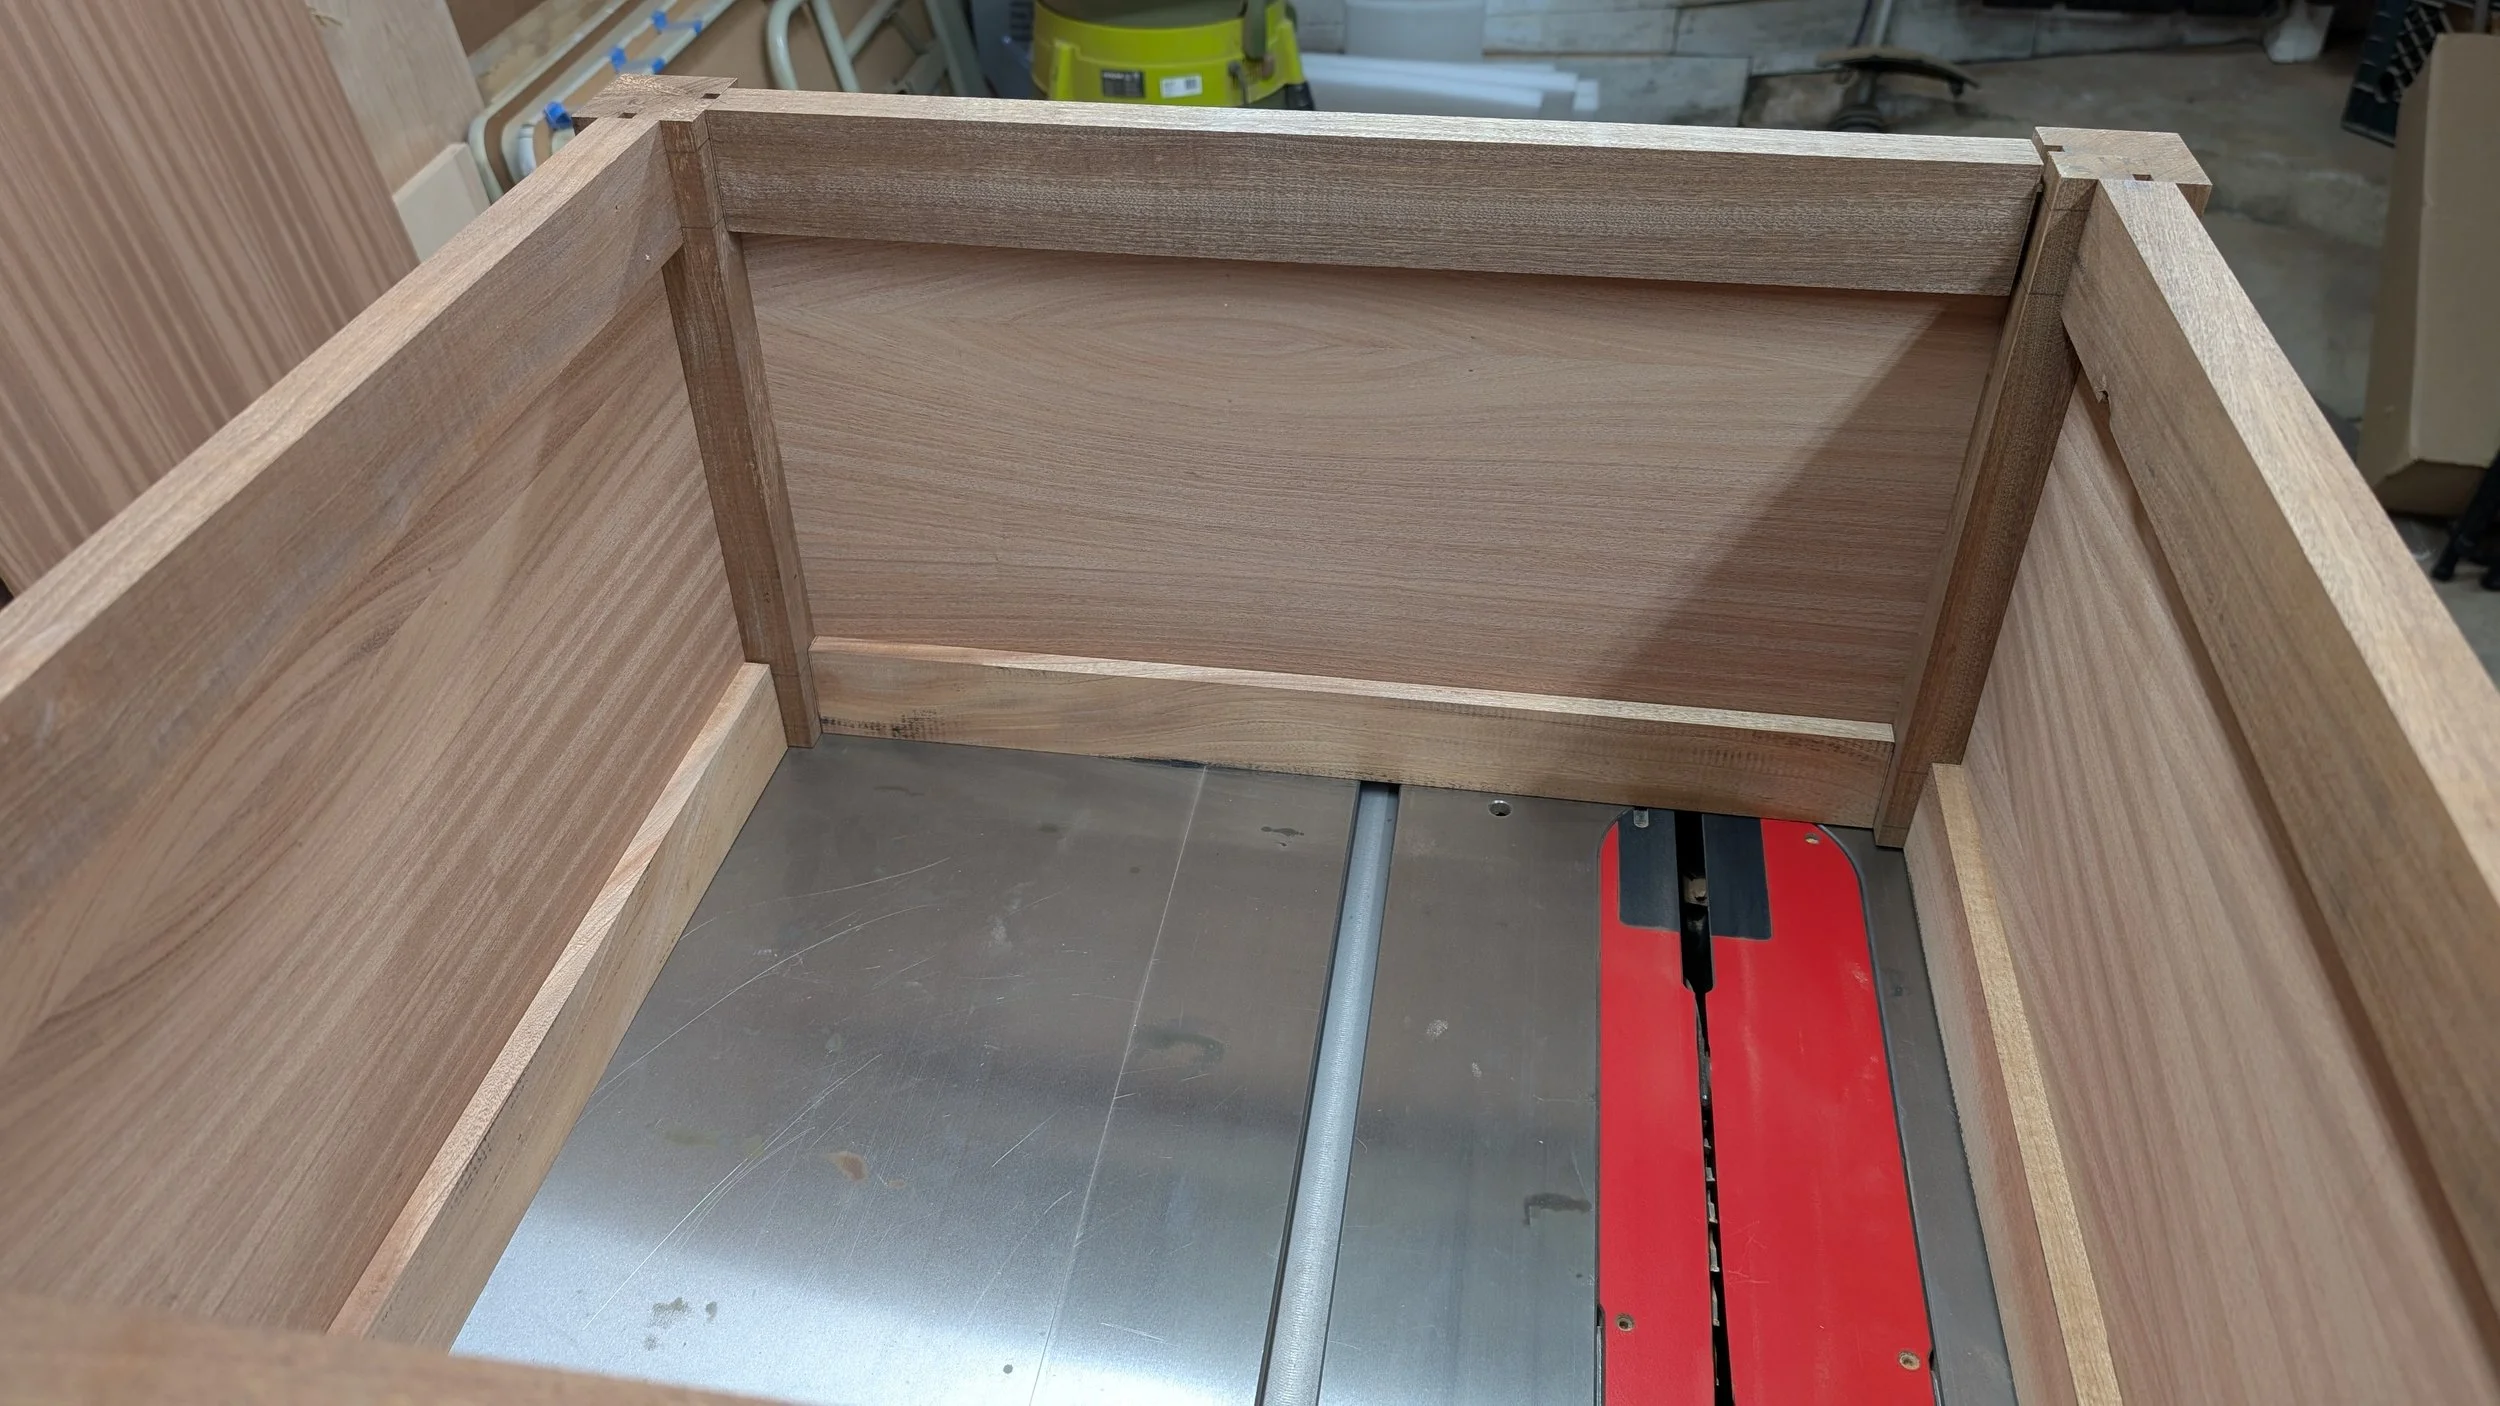
I also made up the frame for the seat which was also mortice and tenon and fitted that to the body. I added an inside cleat to support the seat and a 1/8” alignment edge that extended below the seat to make sure the top lid wouldn’t shift around when someone sat on it.

I then sanded everything from 120 grit to 220 grit ( trying something new to see if it had a good effect on the Hard Wax Oil finish with hardener ). I suspended my sander and vacuum hose from the ceiling with a bungee to reduce sanding fatigue.
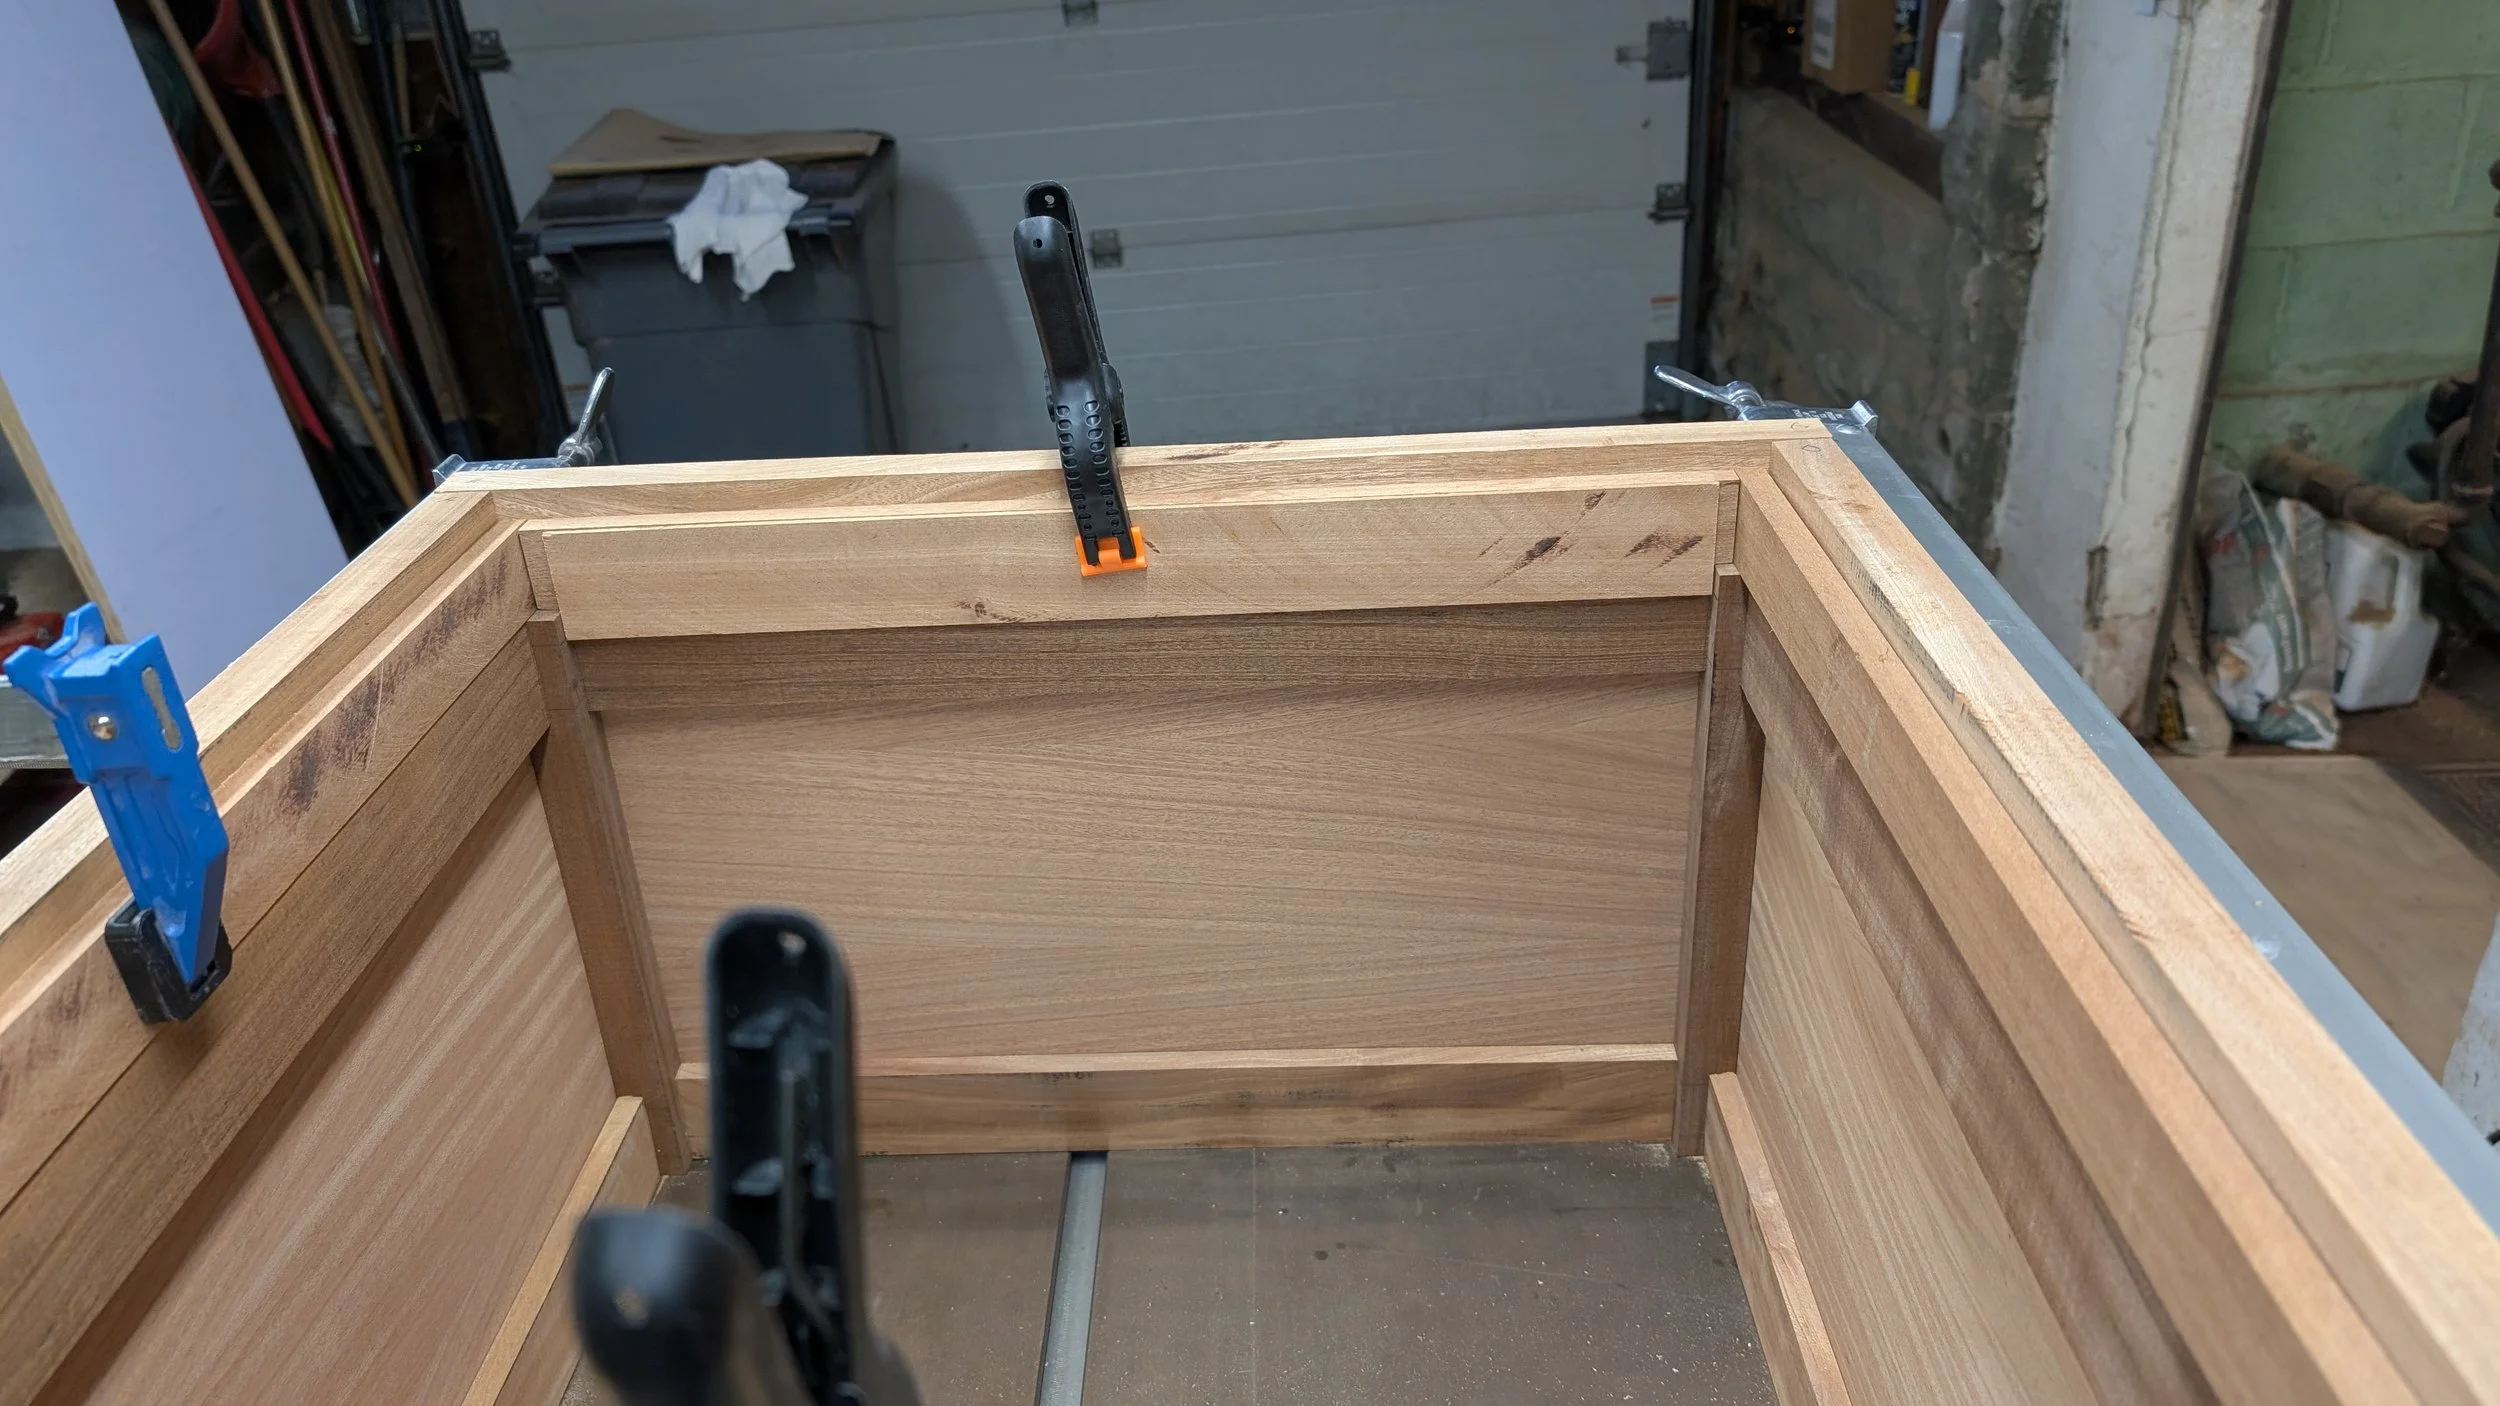
Then I glued everything up and installed the bottom of the box on cleats that I attached around the inside of the bottom frame. I countersunk and pre drilled all the holes from the bottom of the seat to attach the seat to the top frame and mounted the heavy duty hinges ( really passage door hinges ) and chains to hold the top open when getting things in and out of the interior.


Then I took all the hardware off and put finish on everything including the interior.
Finally I did the upholstery gluing two layers of high quality 1 1/2” furniture foam onto a 3/8” thick plywood backing. After shaping the top so it had a curved profile around the top, I covered the seat with upholstery fabric which matches our couch. My wife kindly helped by stitching a large remnant into a square that was just the right size to cover the seat cushion.
Then it was just final assembly and adding the casters and it was ready to deploy.