
My beautiful and talented wife frequently uses her sewing machine ( as well as the even more frightening Serger, multiple needles and blades). Right now she has to carry it down from her crafts cabinet upstairs and set it up on our kitchen table. The light isn’t the best in the kitchen and moving the machine every time is less than optimal. We have an old desk in our dining room that we never ever use and so we thought perhaps we should get rid of the desk and make a sewing table that could also store both machines and the sewing tool box. The dining room has much better light and there would be no carrying the machine any more. ROCKLER makes a sewing machine lift mechanism that can be put inside a desk or table to make the machine rise up through the top and then disappear inside when not in use.
I’m working on the design now and am iterating on a design that will look like a nice cherry colored ( to match or dining room table and chairs ) sideboard when it isn’t in use. And in fact it could provide a surface to serve food or drinks from in the future when it is closed up. The front will have doors that use 270 degree hinges ( and the big one a piano hinge in the middle ) to swing away to opposite sides of the case to allow the operator's knees to go under the surface. There will be a removable panel in the top that will reveal the sewing machine and allow it to rise up to be either flush with the top or be as if it were set on the top.
We’ll have an adjustable goose-neck lamp that can be stored under the table when not in use and installed in a bracket towards the back of the table when it is being used.
There will be two full extension slide out shelves on the left of the knee opening to store the Serger and the sewing tool box respectively.
It will be on brass ball casters to allow it to easily be pulled out from the wall to make space for fabric to flow through the machine and they will have locks to keep the table from moving around while there is sewing going on.
There will be a big out-feed space for the fabric on the left to make it easy to manage large or bulky pieces.
I’ve got a rough idea of the cut-list and hardware required and I’m waiting for the machine lift to get here from ROCKLER so I can look at it’s requirements and make sure I know how I’m going to accommodate it.
If you want to see a similar project this is the video that led me to the ROCKLER machine lift hardware.
I’m also looking to source the wood from a vendor closer to my home since shipping lumber across the country is slow and expensive.
Here are some design sketches so far:

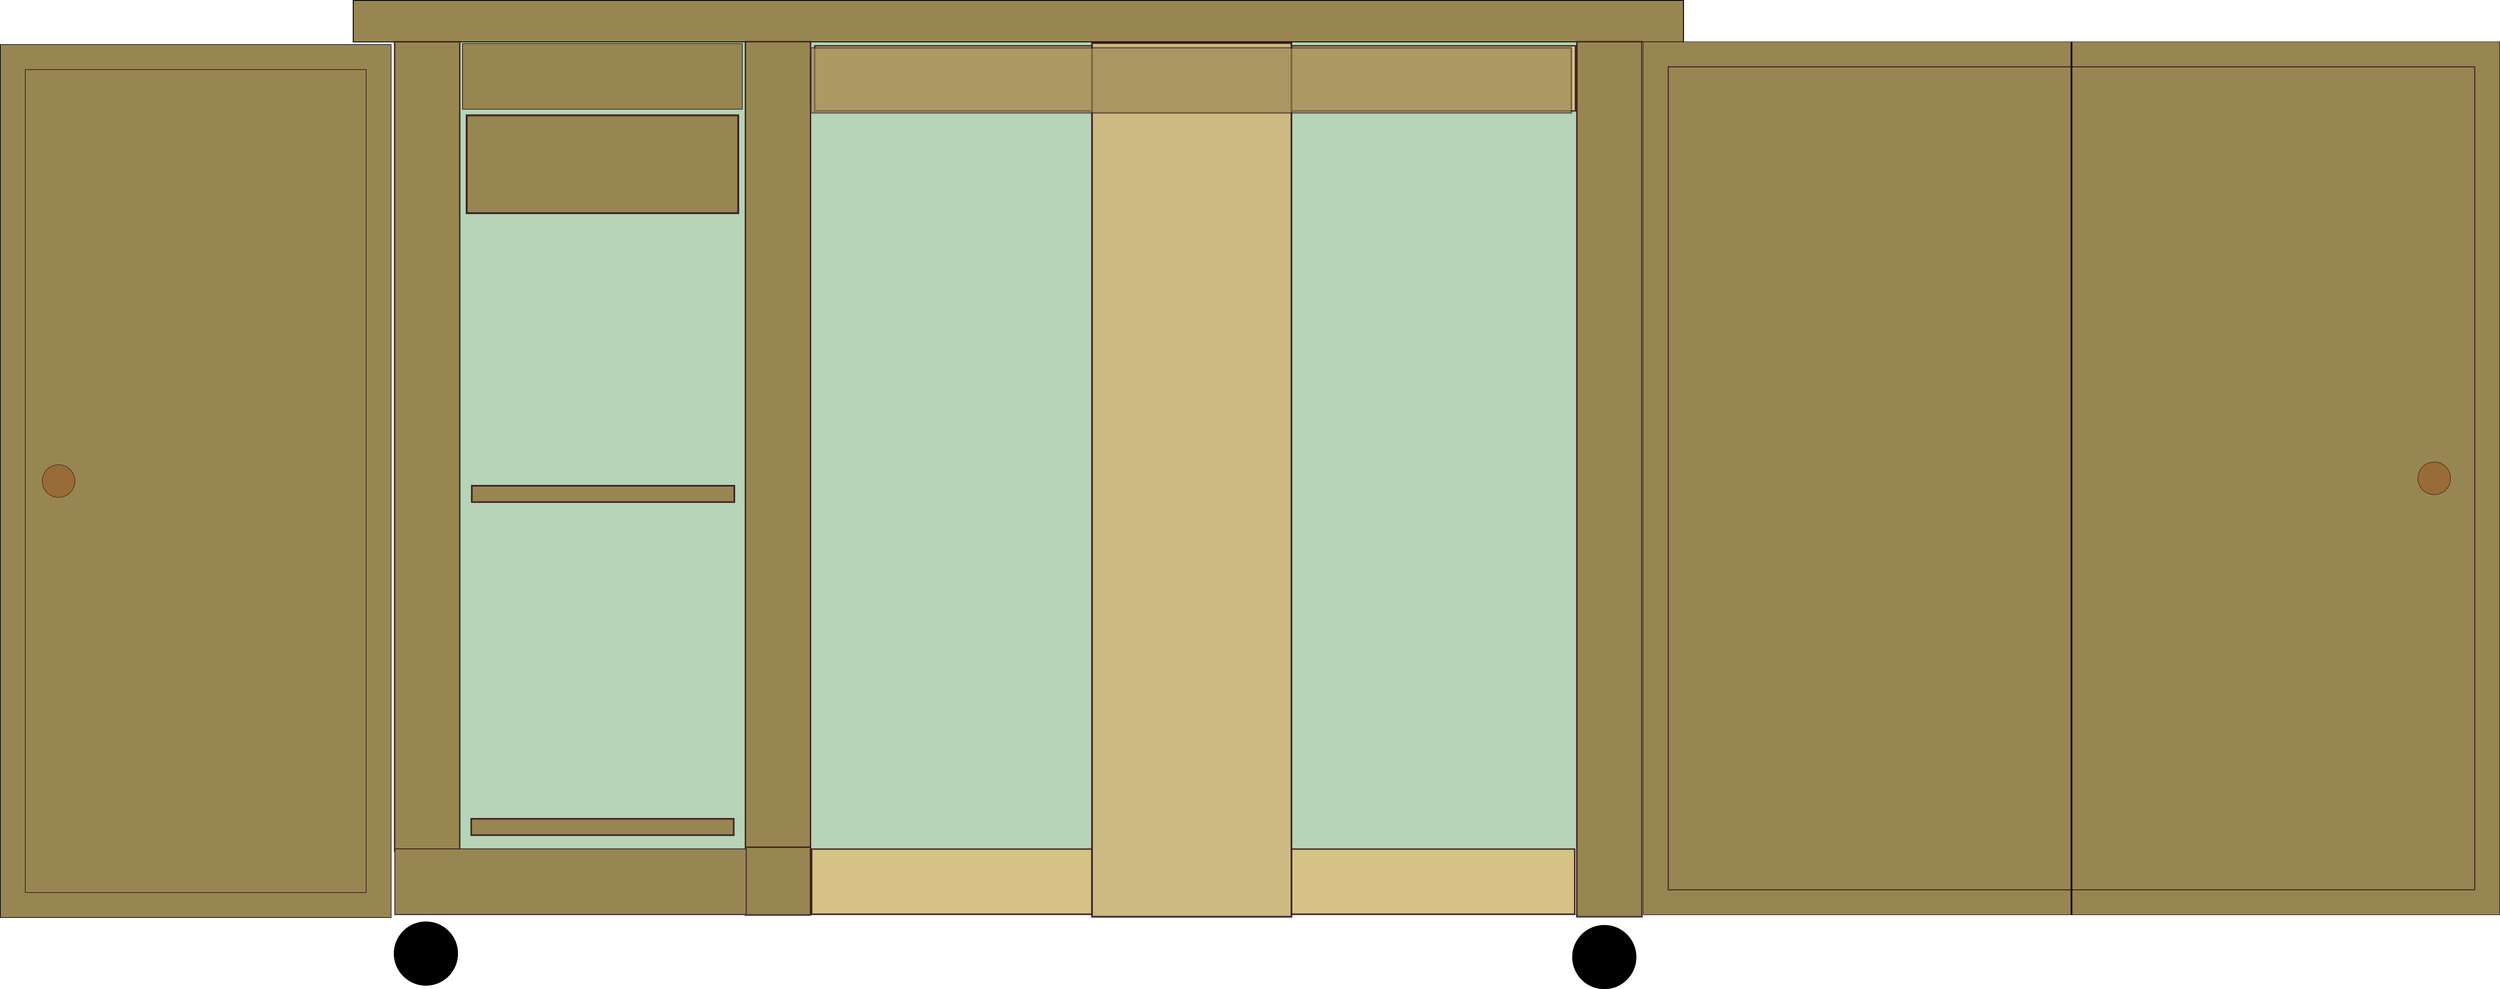

I’ll post updates as things get going…


