• Home
  • Blog
  • About
  • Privacy Policy
Menu

James Goodwin

  • Home
  • Blog
  • About
  • Privacy Policy
View fullsize Photo by my Beautiful Wife
View fullsize PXL_20220811_200717891.jpg

Building Project: Sewing Table Completed

August 14, 2022

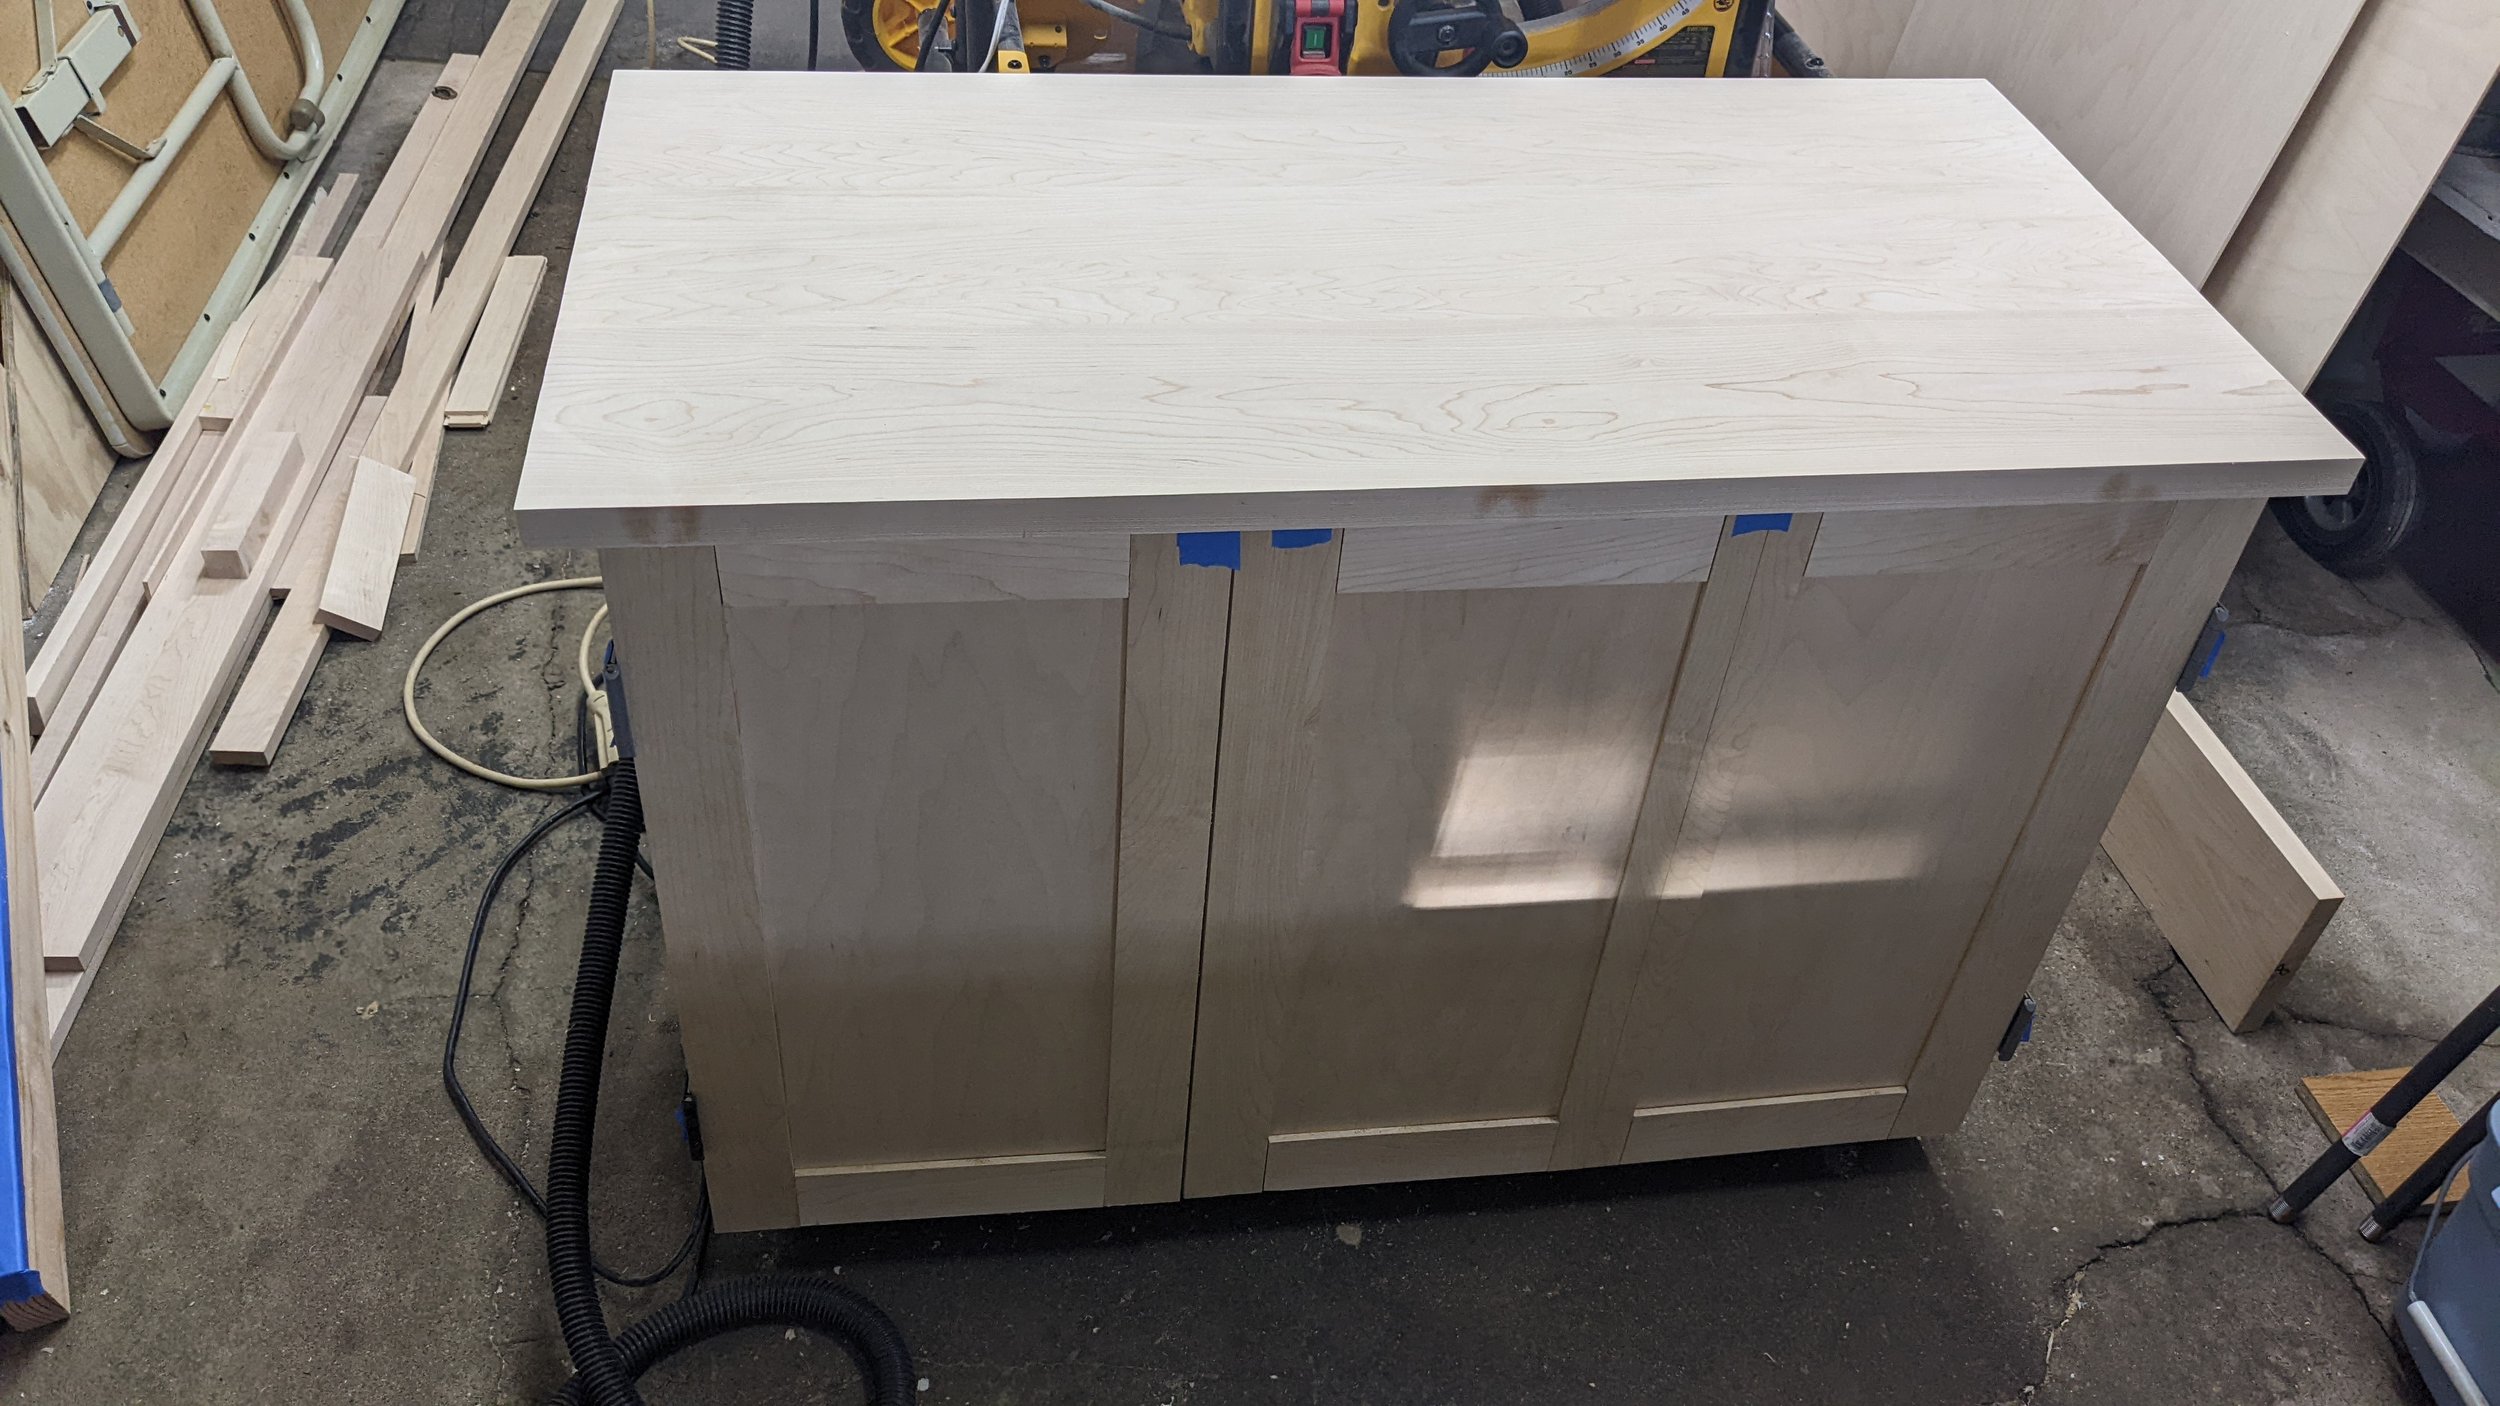
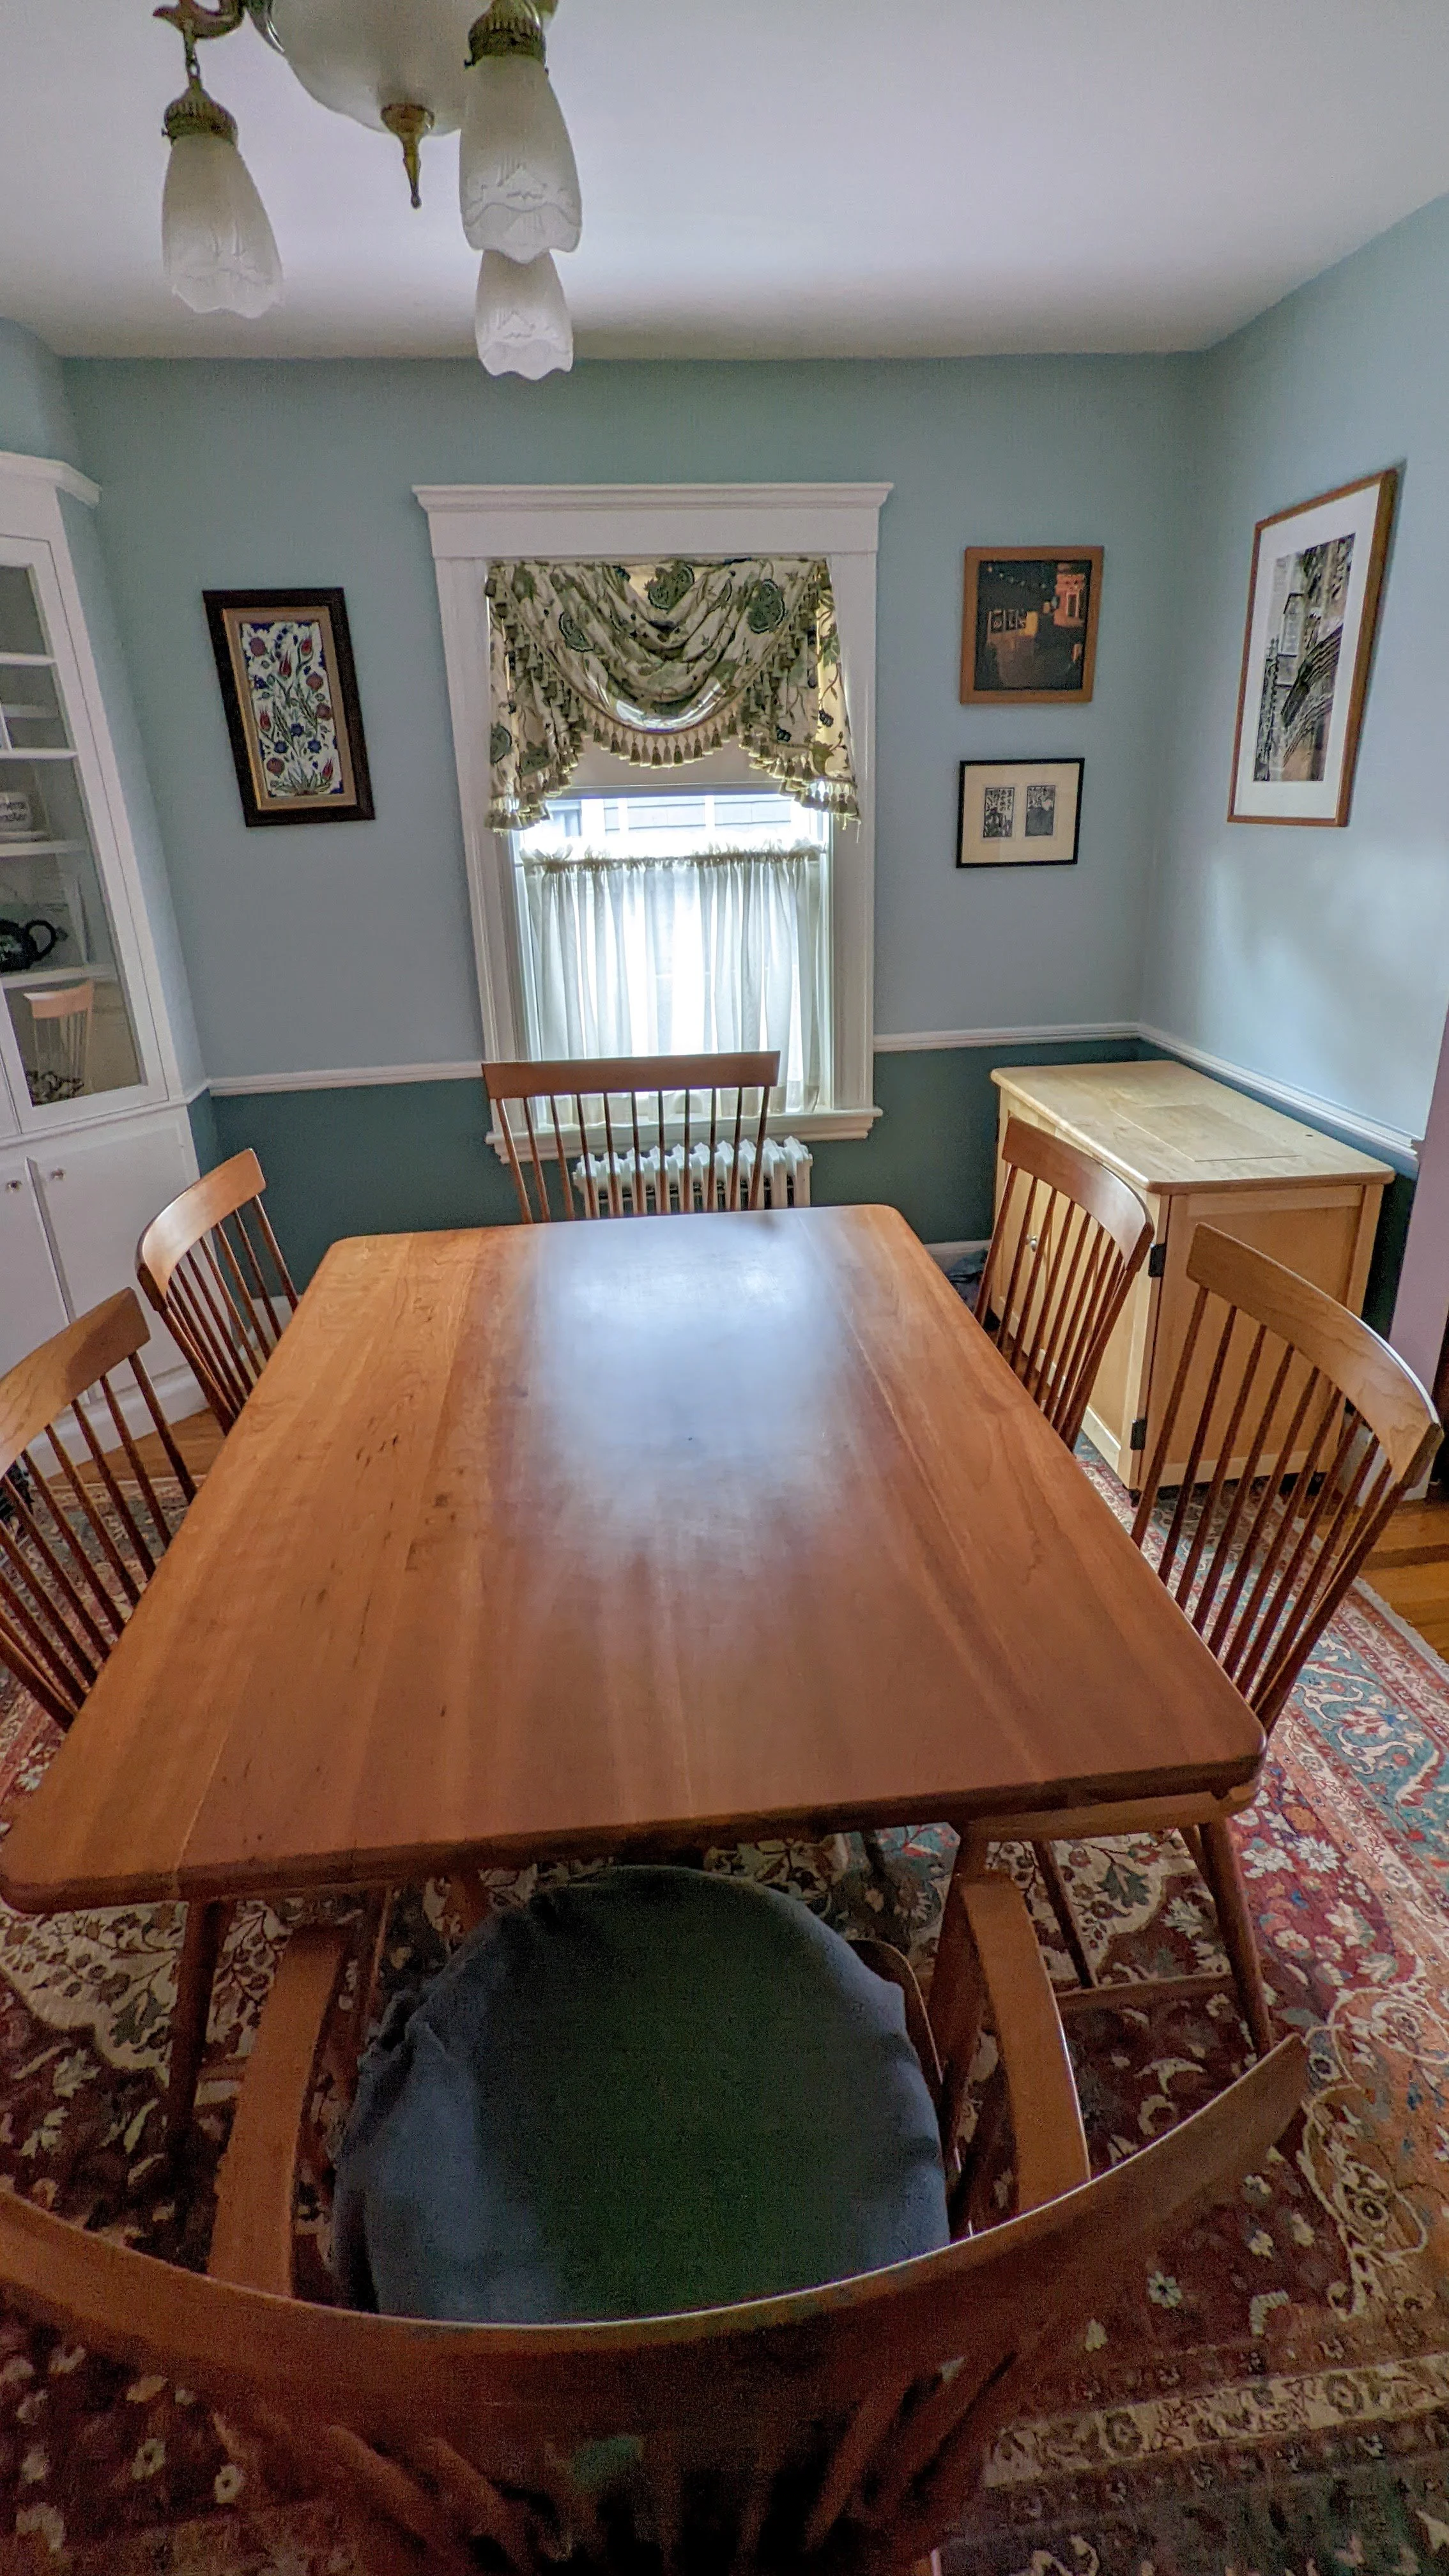
The sewing table is completed and deployed to the dining room where it will live as a sideboard when not in use for sewing. I ended up doing water based polyurethane for the finish on top of natural danish oil. It is my first poly finish on a piece of furniture and there are lots of things I will do differently the next time. One is that I need a better source of high intensity raking light in my shop. I missed a lot of sanding artifacts in the top and I didn’t see them until it was too late. Maybe in a few decades I’ll take the top off and sand it again and actually surface both sides, but for now it is fine and very serviceable. Lesson learned.

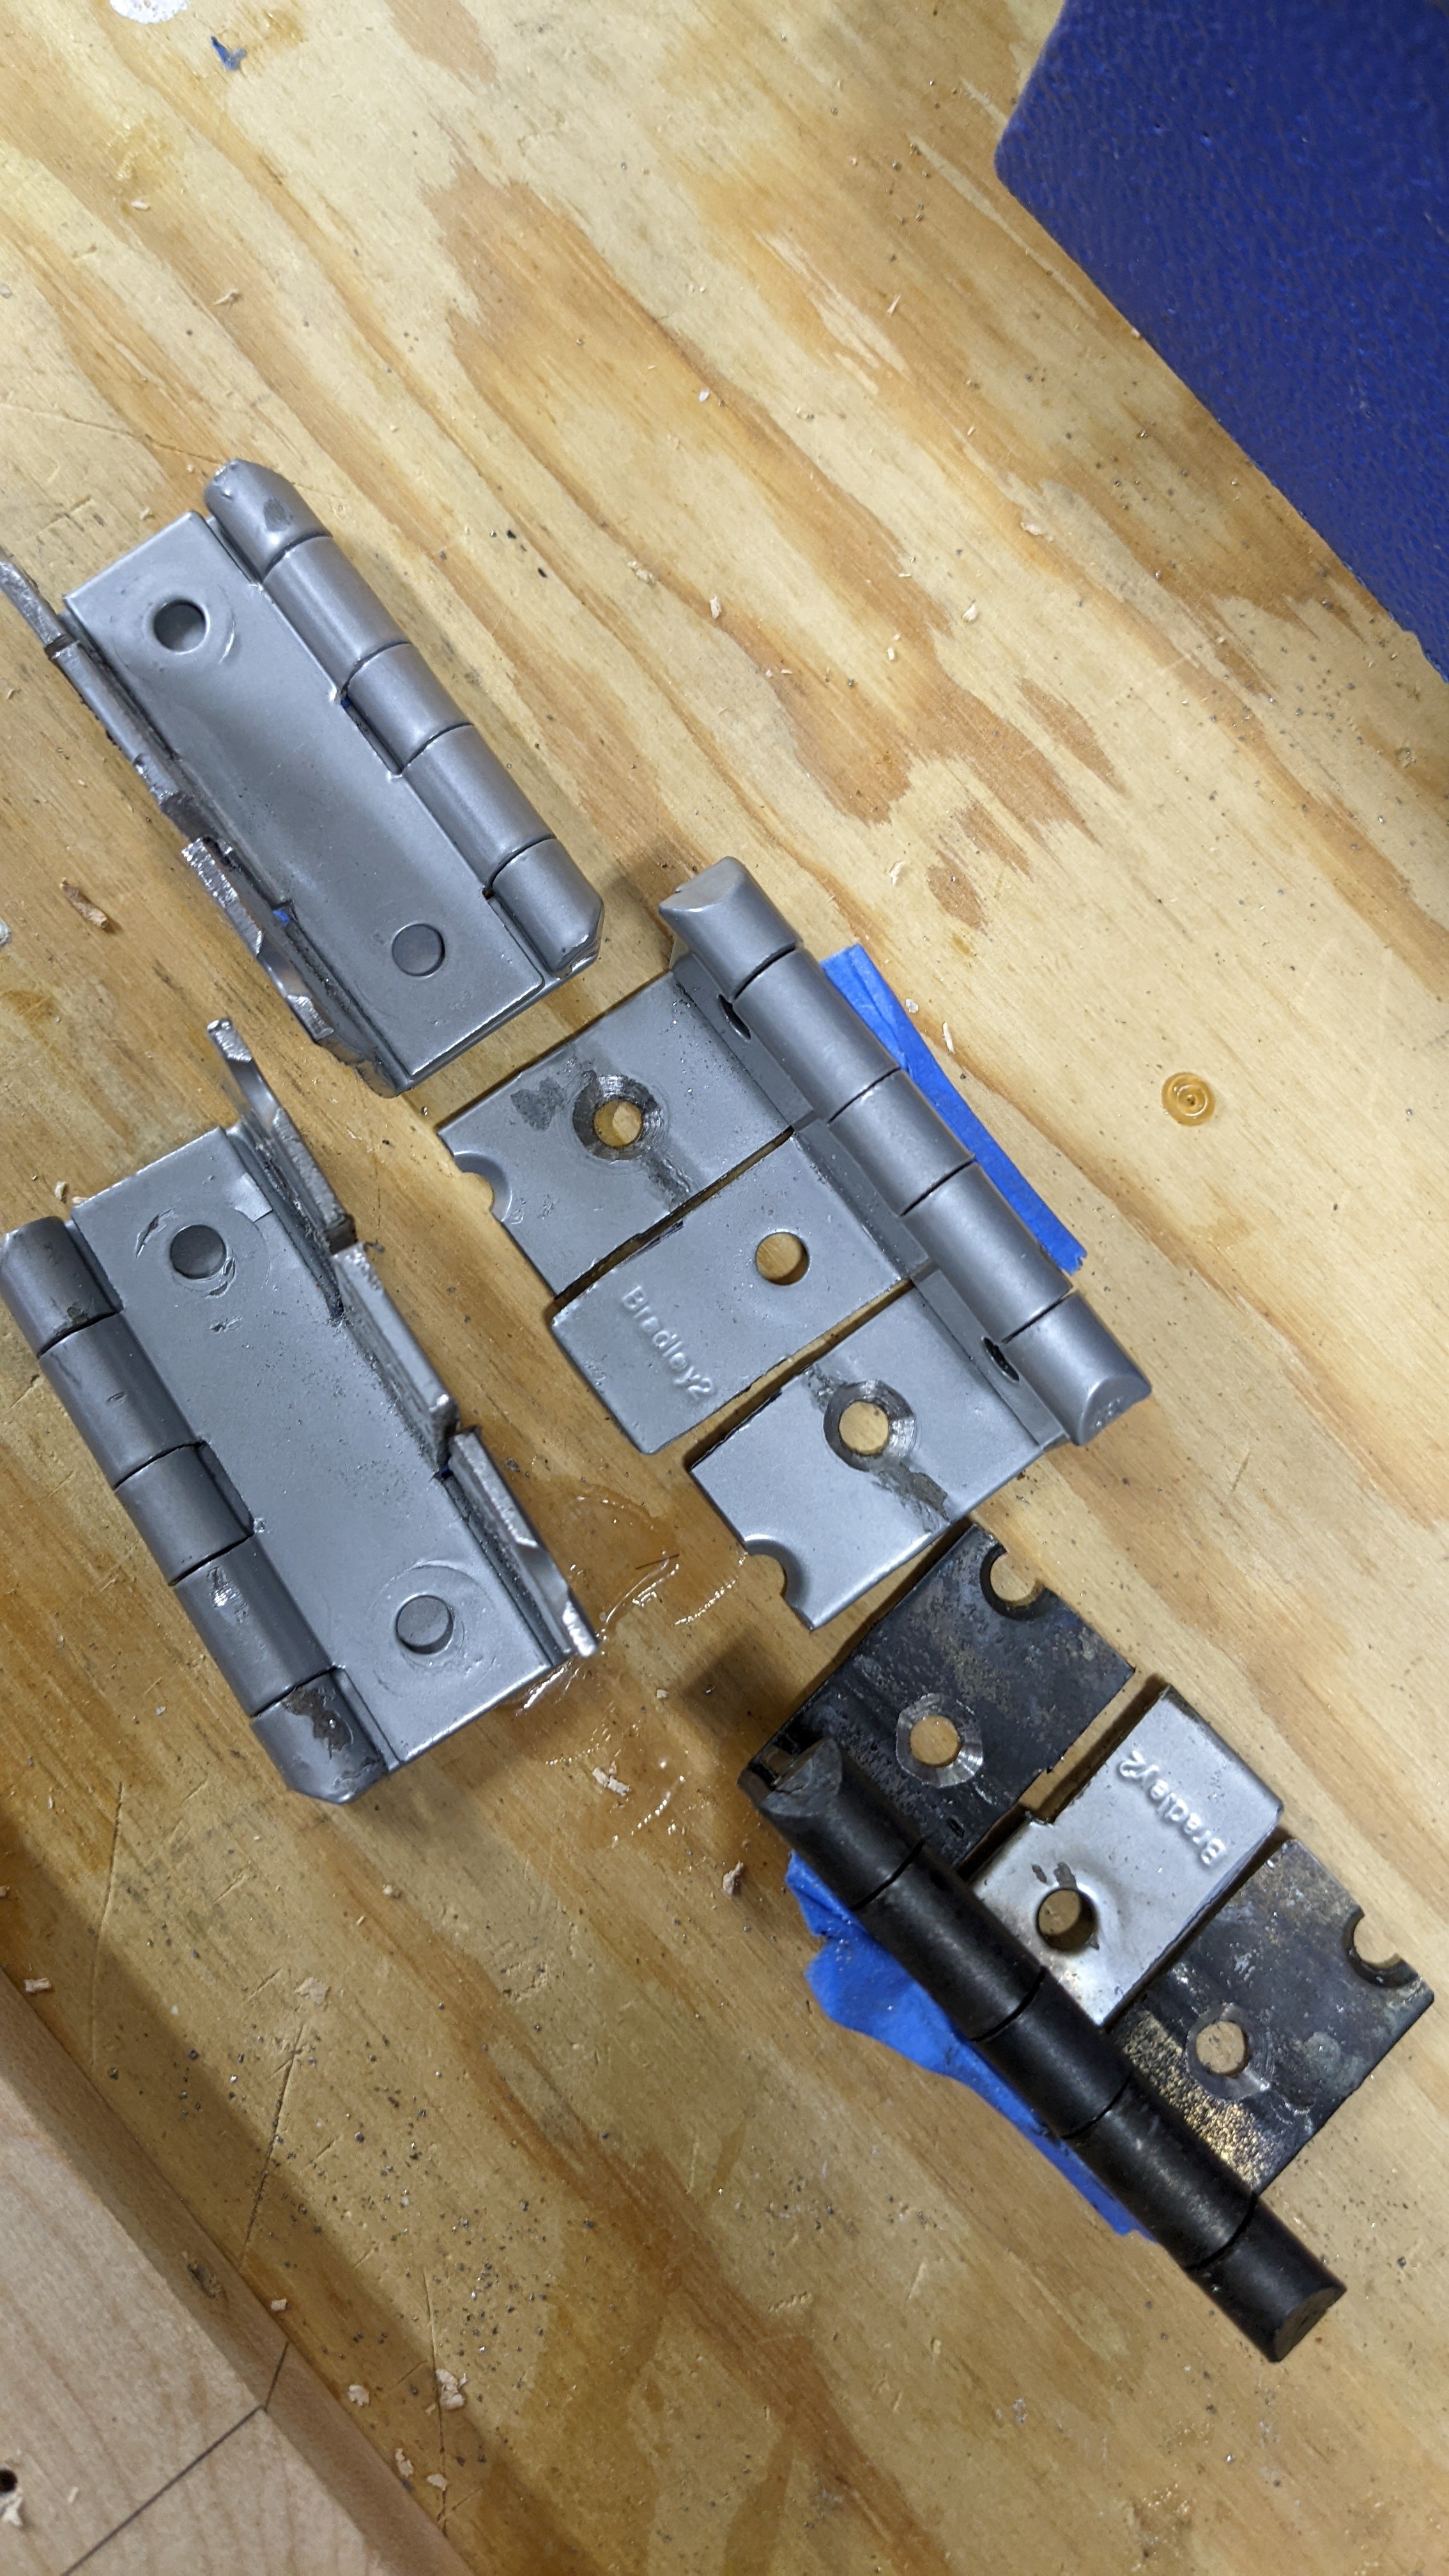
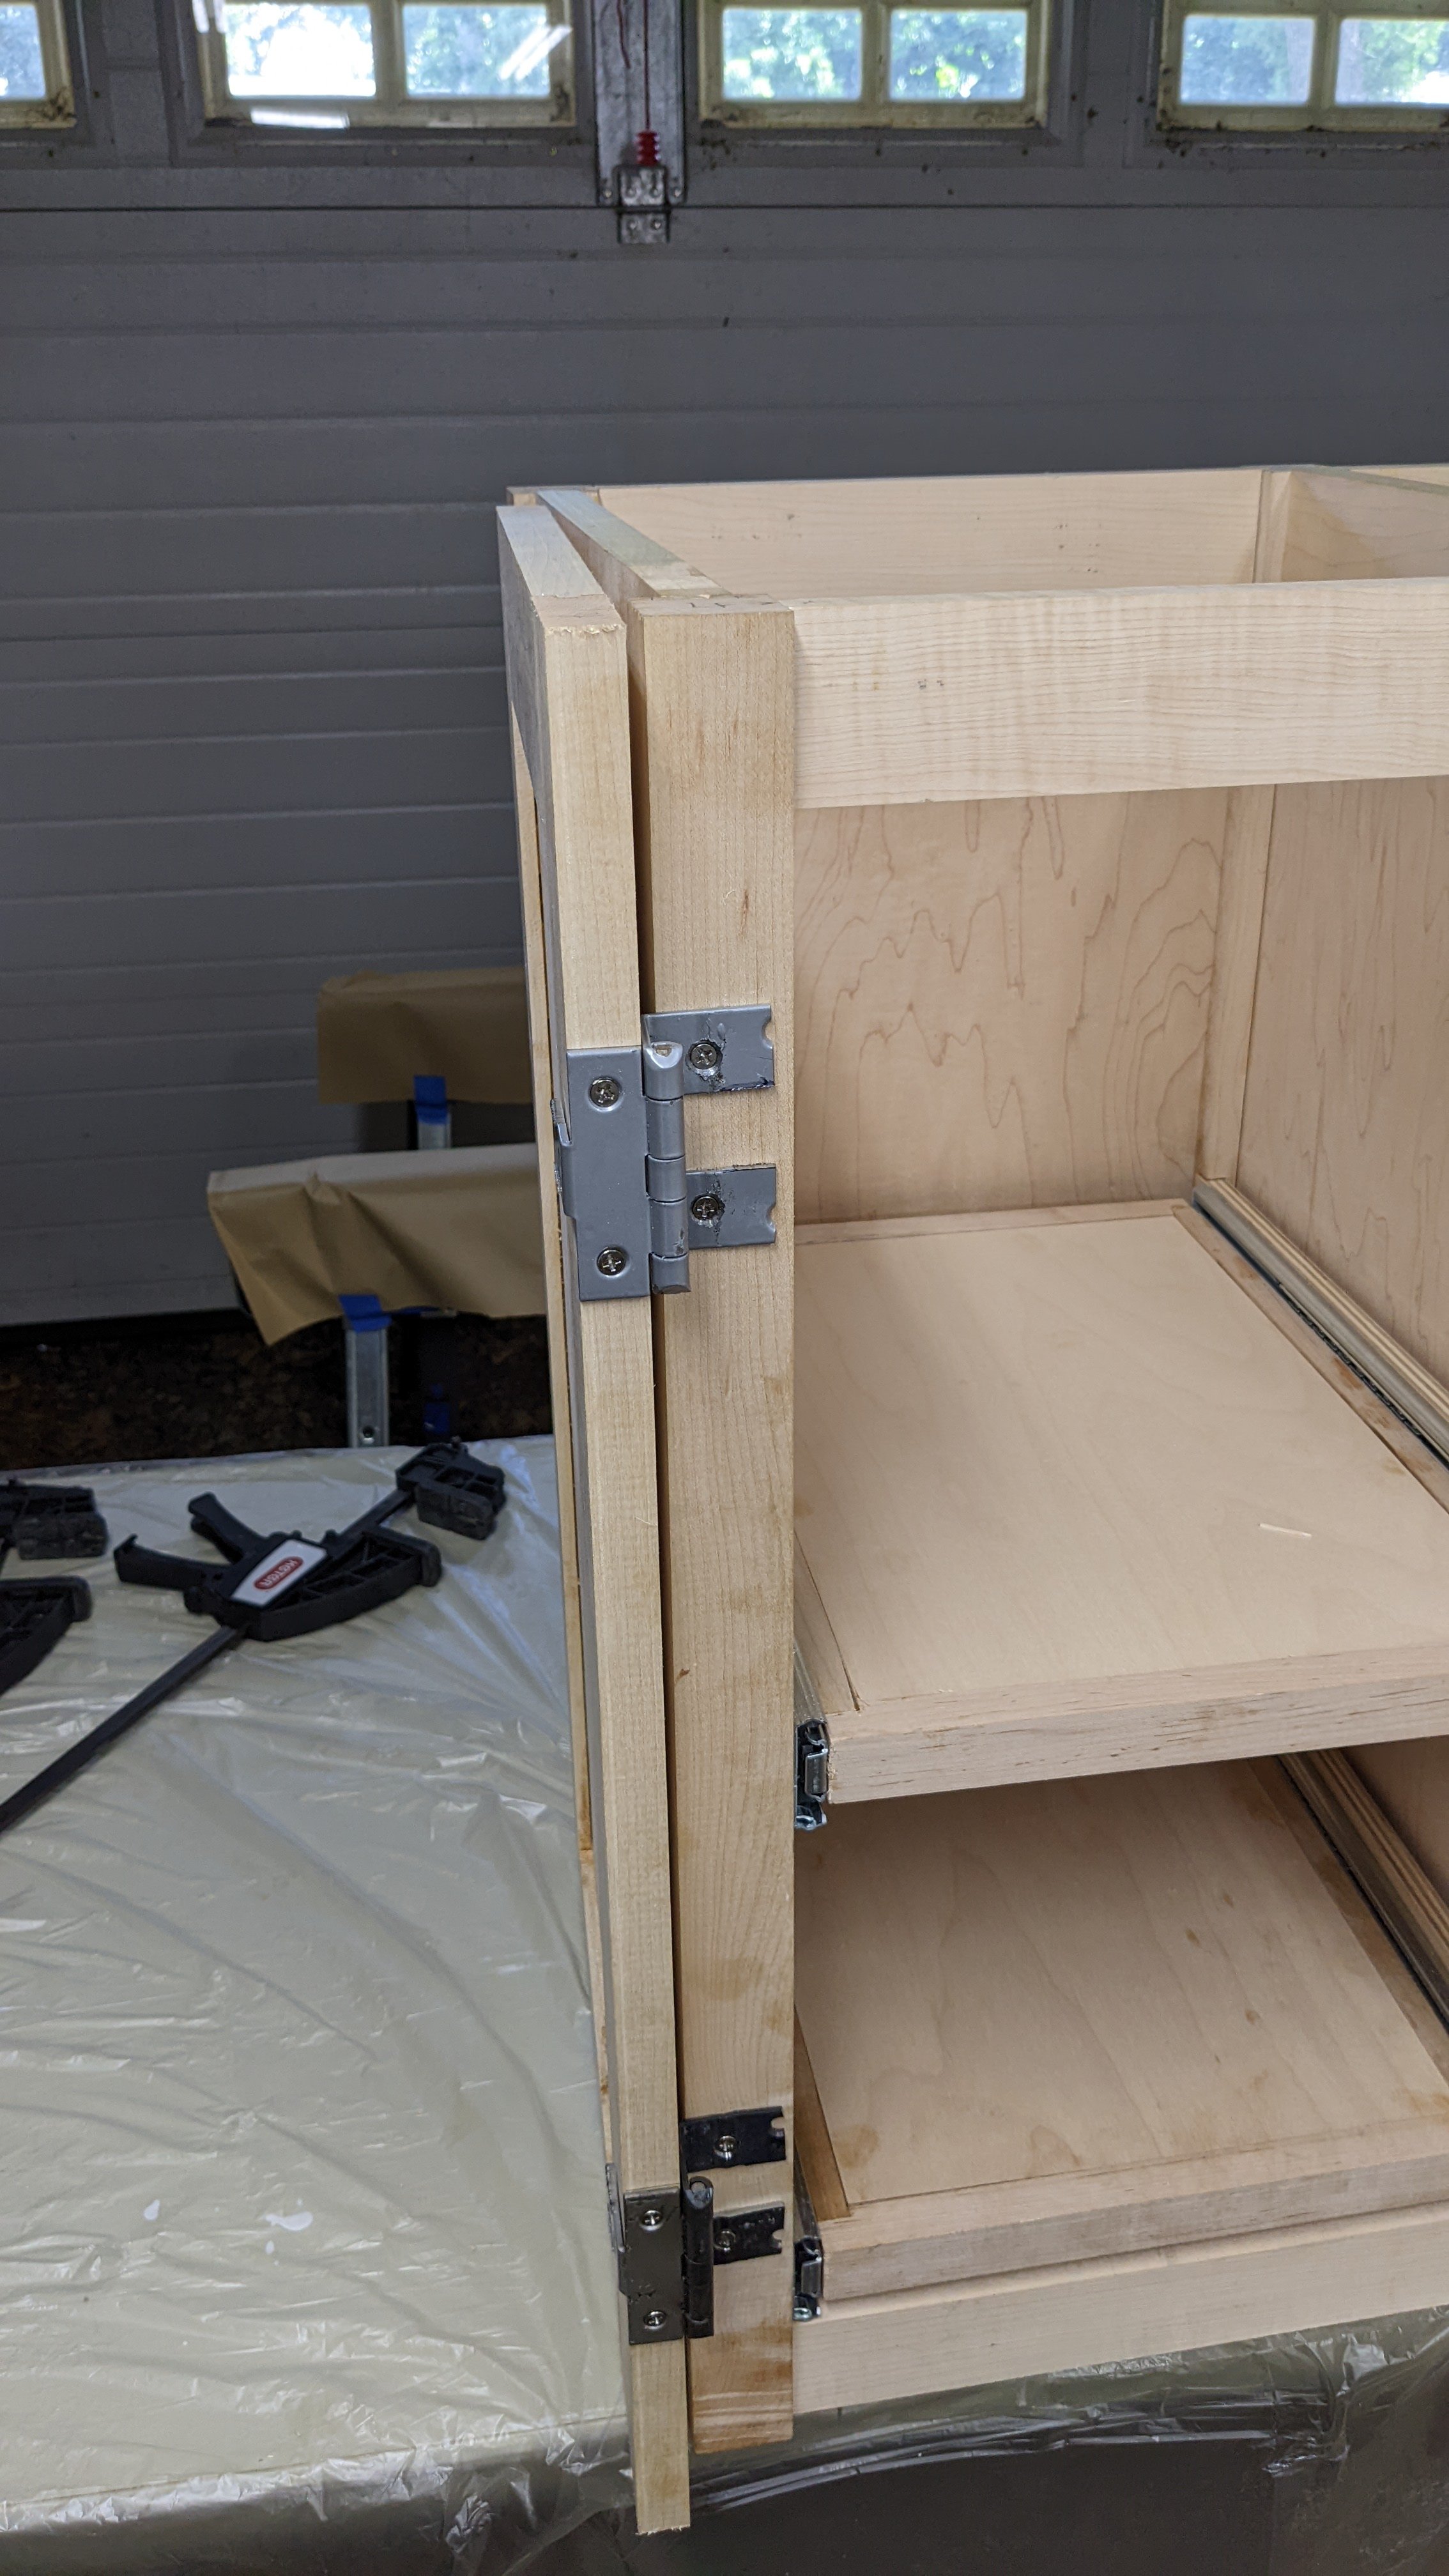
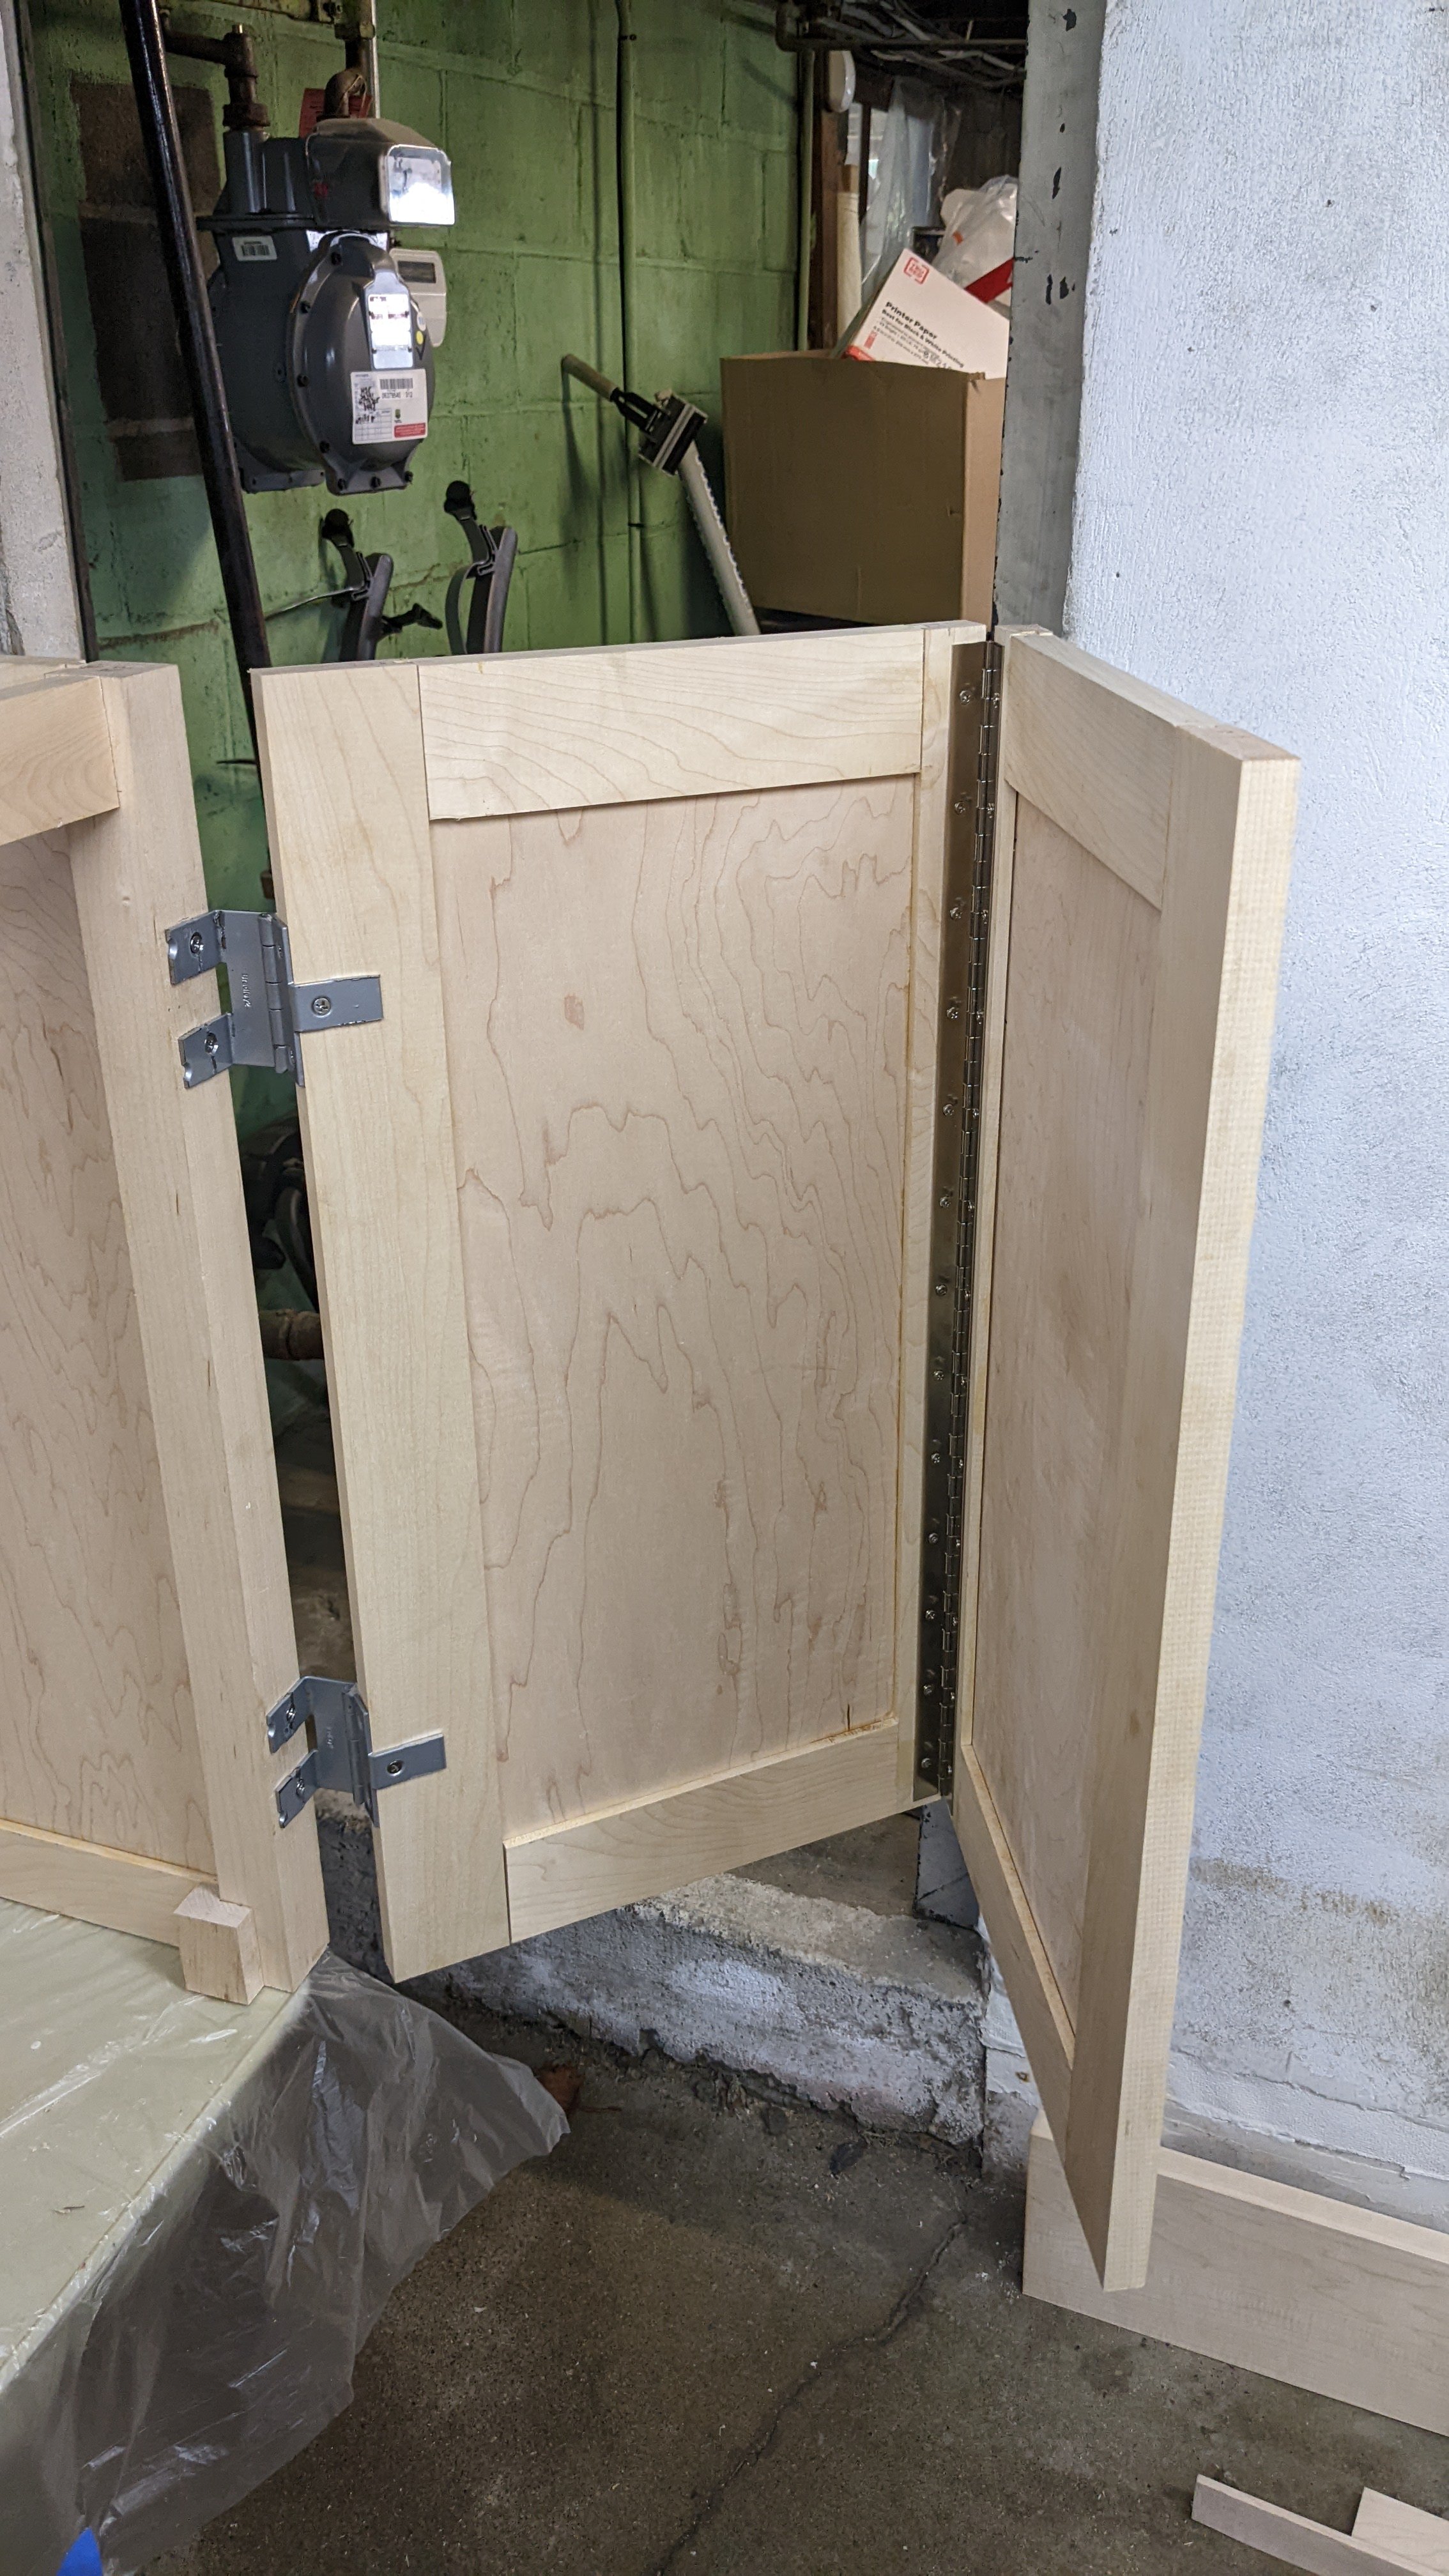
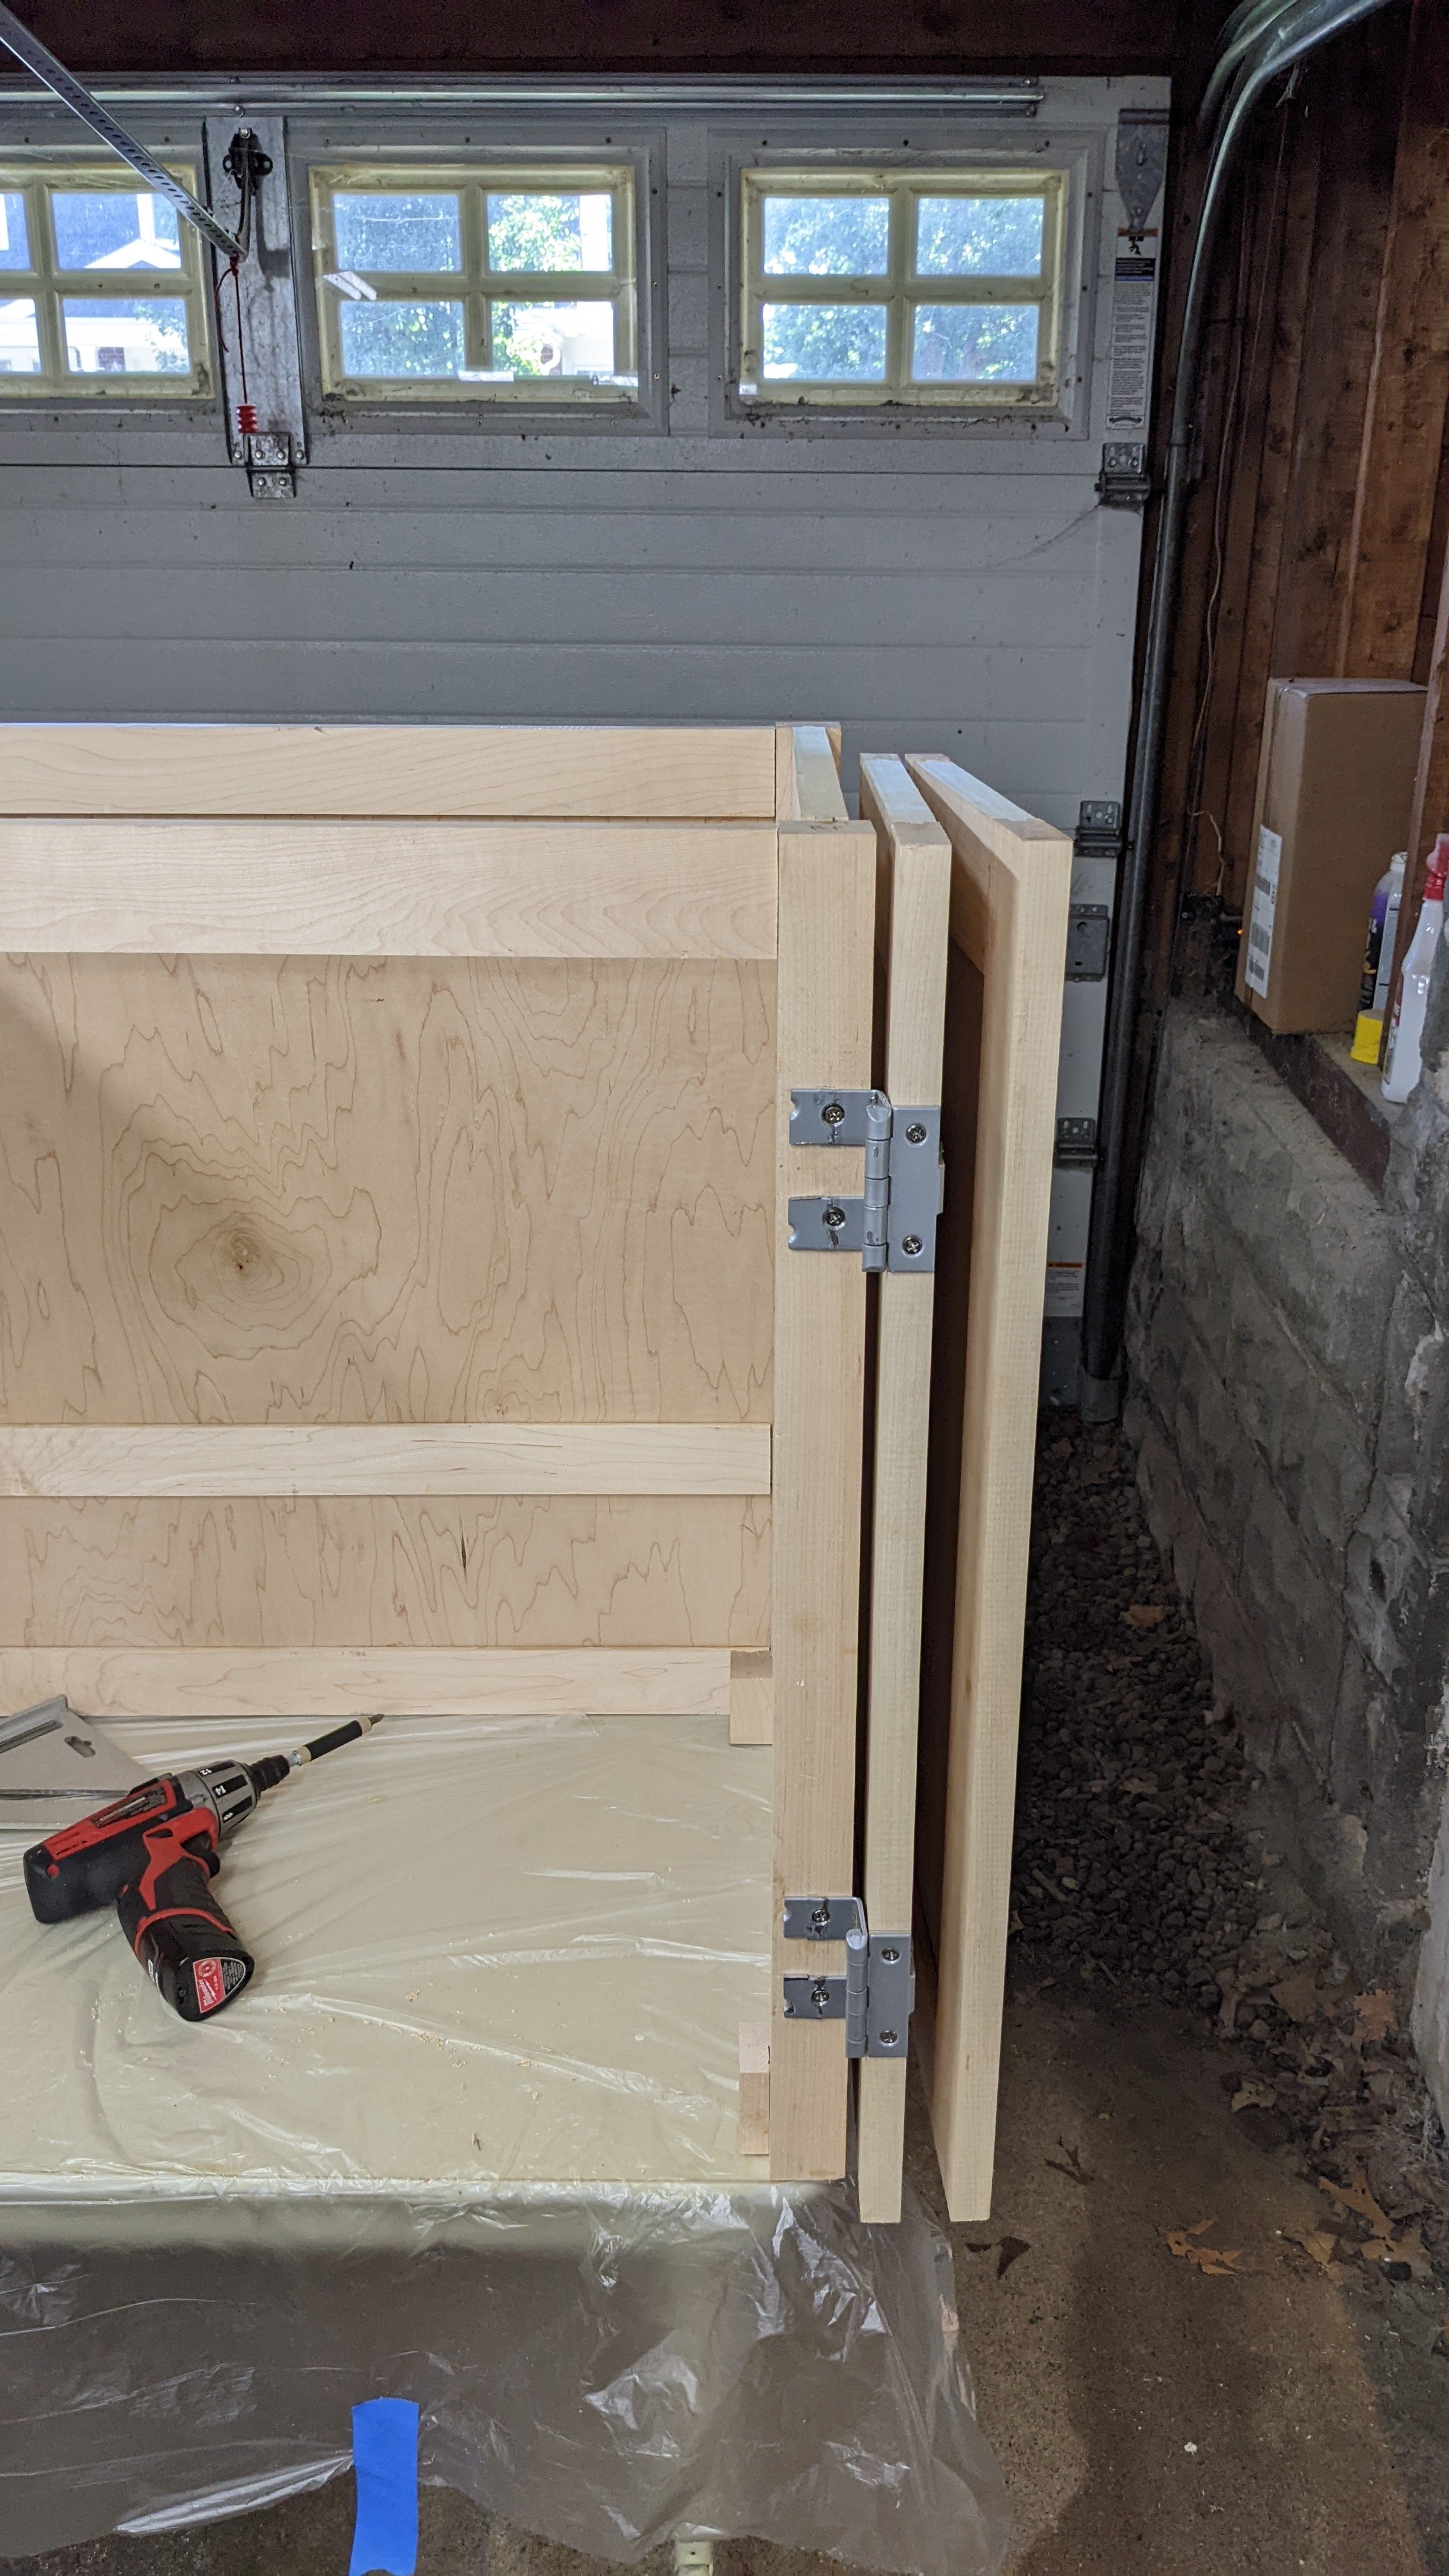
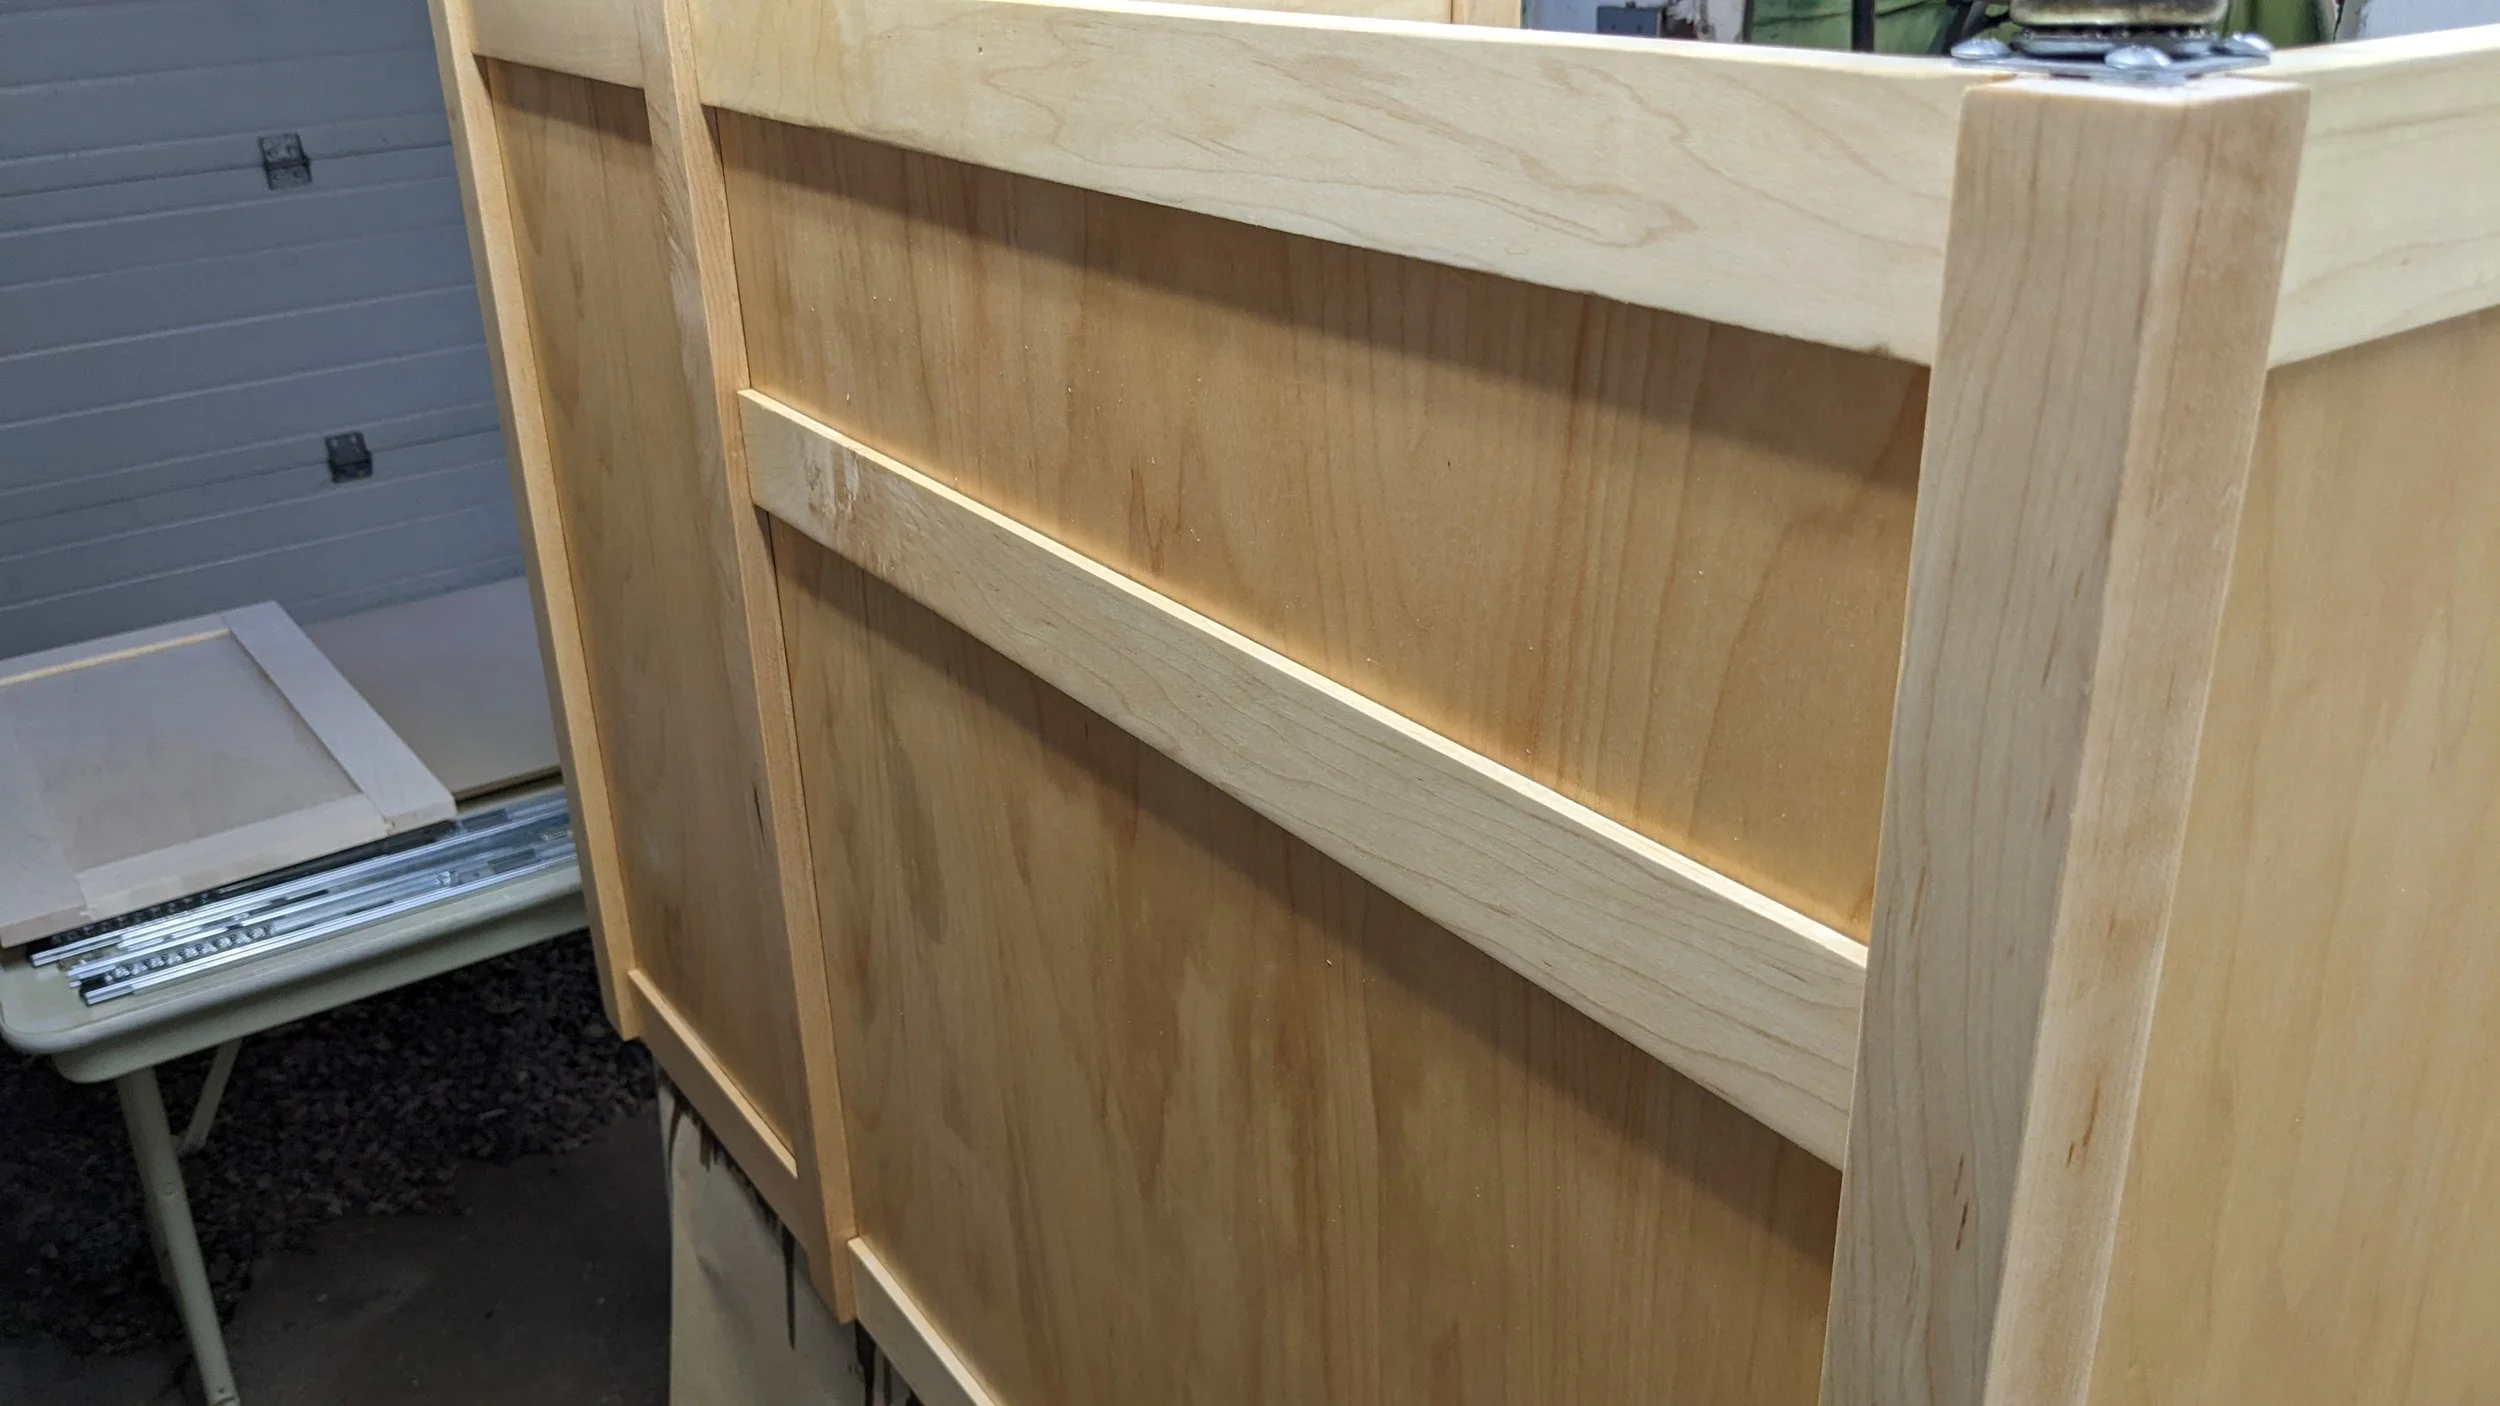
My modified hinges came out great after further trimming them on the band saw, cleaning up the edges on the sanding station and getting a wire wheel to strip/abrade the original finish off of them. I painted them black and they make a nice contrast with the natural finish. I also realized that they needed squaring up and after doing that the doors fit better with fewer washers and such. Also I didn’t need any catches to hold the doors in place when they were completely folded back.

After figuring out where the light should go I drilled a hole for it in the table top, I pressed in a oil impregnated bronze bushing so it wouldn’t destroy the wood over time. I added a hook inside the cabinet to hang the light on when it is stored. It makes set up really quick and my beautiful and talented wife doesn’t need to mess with those stupid clamps.

I added two magnetic catches to keep the doors closed and some nice knobs to the front and now everything is completed. I was originally going to cut a hole in the lift platform for wires from the sewing machine but because of the way this machine’s foot pedal works it actually makes more sense to have the wires go over the front.

I learned a lot on this one, gained some confidence with some of my tools (like the routers for example,) and I know what I need for the next finishing job.

That’s all for now, I’ll post about the next project soon.

In Journal Tags building, sewing table, journal
Comment
View fullsize PXL_20220727_172132081.MP.jpg
View fullsize PXL_20220727_173647479.MP.jpg
View fullsize PXL_20220727_173714050.MP.jpg
View fullsize PXL_20220727_173731686.MP.jpg
View fullsize PXL_20220727_173745594.MP.jpg

Building Project: Sewing Table Progress

August 4, 2022

It’s been busy on the Sewing Table project. I found a local hardwood supplier Boulter Plywood which was great, they’re right over in Medford and they deliver locally. The milled stock and veneer plywood that they provided was really nice, super clean, the wood had clearly been stored really well. They even send along a bundle of off-cuts, so nice. It is all maple. The plywood is mdf in the middle with two veneer faces, super stable, no voids, gorgeous.

This was the most complex design I’ve done to date, a lot of joints, slide out shelves, solid wood table top, three doors, 270 degree hinges, a hole with a hatch in the tabletop, a sewing machine lift. Fortunately it was very repetitious in terms of fabrication. Groove all the uprights (paying attention to which way the grooves are supposed to be pointing), make the same mortise twenty four or so times, tenon all the tenons. I had a good repeatable setup on the drill press for the tenons. The cheek cuts on the band saw were OK, but I think I’m going to get a table saw jig for next time, the band saw blade deflects at the end of the cut just a little and leaves artifacts that have to be cleaned up.

I put together a little time-lapse video showing some of the repetitive parts of the build:

One new thing was gluing up my first tabletop. The mill provided very straight, very consistent boards and I was able to match the edges no problem. I made it slightly oversize so I could cut it to final dimension after the glue up. It was relatively flat and not bad at all for my first time. I did have to surface it with an 80 grit belt on the belt sander and aggressive diagonal sanding across the whole thing. But, it got into shape really quite quickly and I was very pleased with the result.

View fullsize IMG_20220723_132859_622.jpg
View fullsize IMG_20220724_075556_549.jpg

Of course the very next thing I needed to do was cut a hole in it for the sewing machine to come up through. This is my second time cutting a hole like this and was resolved to do better this time. I used the rectangular router guide jig that I’d bought after the last time. That seems to be my pattern, I struggle through something and it convinces me to buy the right tool for the next time. I got a really nice 1/4” spiral up cutting bit for the router 1 3/4” long. It did a beautiful job cutting through the over 1” thick solid maple. I did three passes and a lesson for next time is to probably do it in just two passes because the remaining wood wasn’t thick enough to support the piece I was cutting out and I had a small amount of tear out. But cutting from the backside of the tabletop with the up cutting spiral bit resulted in a super clean edge other than that. Fortunately the tear out was all just where I was going to rout a dado for the hatch to sit in in any case and so wasn’t really a problem.

The sewing machine lift from ROCKLER was super easy to install and adjust. I put a temporary plywood version of the lift table for marking the location on the underside of the tabletop. Fortunately I had a nice clean cutting experience with the lift hole and so I’m able to use the offcut as a perfectly matched lift table that fits the thickness of the top and looks really nice.

I did a separate glue-up for the hatch and had to do a 1/2” rabbet that matched depth perfectly both on the top and on the backside of the hatch. I used the same rectangular router guide jig and managed to do it without mangling anything. Probably the most precise routing job I’ve done to date, to within a thirty-second of an inch.

View fullsize PXL_20220725_184833638.jpg
View fullsize PXL_20220727_160002430.MP.jpg
View fullsize PXL_20220727_160020855.MP.jpg
View fullsize PXL_20220725_170505313.MP.jpg

I had to modify the 270 degree hinges ( there aren’t a large selection that I could find ). I did find out that my puny band saw can rip through 1/8” steel no problem and I was able to drill new mounting holes and countersink them on my drill press. My first time using cutting oil, now the shop smells like a shop. I still have to clean them up and paint them black but they work.

PXL_20220722_171819408.jpg
PXL_20220722_143306790.jpg
PXL_20220722_134854894.jpg
PXL_20220722_143257657.jpg
PXL_20220722_134845128.jpg

The slide out shelves were like very short upside down drawers and so they went pretty quickly. I’m getting better at fitting the slides but I still always get that first width a little too tight. Fortunately since they’re just glued up I was able to just rip a bit off and make them fit perfectly.

View fullsize PXL_20220722_143257657.jpg
View fullsize PXL_20220716_192702566.jpg
View fullsize PXL_20220716_192654088.jpg
View fullsize PXL_20220715_201752067.jpg

The doors were easier this time and they fit well. Splitting the right hand door down the middle and installing my first piano hinge was exciting. I wanted the table to look and function like a sideboard in our dining room when it isn’t in use and I think the doors work well for that.

View fullsize PXL_20220721_125056049.jpg
View fullsize PXL_20220721_153626039.jpg
View fullsize PXL_20220721_153634930.jpg
View fullsize PXL_20220721_153700611.jpg
View fullsize PXL_20220724_115147386.jpg

Finally I had to round the corners ( traced a tuna can for the radius) and round over the top and bottom of the tabletop. My new hand held router did great doing the round over. And so after four grades of sanding on the whole thing today is the beginning of doing the finish. I’m doing a natural Danish Oil finish on this one, and I might put water based polyurethane on it as well, but I’m going to wait a few days and see what I think then.

View fullsize PXL_20220727_172130403.MP.jpg
View fullsize PXL_20220804_173734139.jpg
View fullsize PXL_20220804_173502461.jpg

That’s it for this update, more when it goes into service…

In Journal Tags building, sewing table, journal
Comment

Latest & Greatest

Blog RSS
Featured
Jun 15, 2025
Sewing storage wall cabinet
Jun 15, 2025
Jun 15, 2025
Jun 15, 2025
Dovetail practice box
Jun 15, 2025
Jun 15, 2025
May 2, 2025
Cruise around Japan
May 2, 2025
May 2, 2025
Apr 2, 2025
One day builds...
Apr 2, 2025
Apr 2, 2025
Mar 31, 2025
Modern Wing-back Chair
Mar 31, 2025
Mar 31, 2025
Mar 16, 2025
Retired five years, an update...
Mar 16, 2025
Mar 16, 2025
Jan 29, 2025
The Clock
Jan 29, 2025
Jan 29, 2025
Jan 28, 2025
Reykjavik Iceland and Helsinki Finland Trip ( December 2024 )
Jan 28, 2025
Jan 28, 2025
Jan 28, 2025
San Francisco trip to Bay Area Maker Faire ( October 2024 )
Jan 28, 2025
Jan 28, 2025
Sep 15, 2024
Some small projects...
Sep 15, 2024
Sep 15, 2024

Tags

  • building
  • journal
  • projects
  • python
  • software

All content on this site is Copyright 2007-2024 by James Goodwin unless otherwise noted.