Please see the prior project for a description of the Fire Table, this project is a complement to that one. I wanted to build some chairs to go with the Fire Table and the new circular patio. We already had a set of chairs we bought ten plus years ago that we really liked so I decided to copy/re-interpret those.
The original chairs were made from teak and teak is WAY too expensive. I made this version from western red cedar. There were a couple of details that required special tooling and fixtures. First one was the rake of the chair back, seat, and back leg. The original manufacturer used a custom finger joint cutter to cut ten degree angle finger joints to join two straight pieces into the angled profile required. I experimented with a standard finger joint router bit in the router table. Let me tell you there is no more terrifying router bit than a finger joint bit. Try as I might I just couldn’t get it to work repeatably, it’d probably work fine to connect two pieces of stock end to end, but not at a ten degree angle.
I decided to use my stacked dado cutter in the table saw and make a custom ten degree box joint sled fixture. This worked great and I was able to make some prototypes of the joint that worked great. It’s also a ninety degree box joint cutter which I’m going to use on my next drawer project.


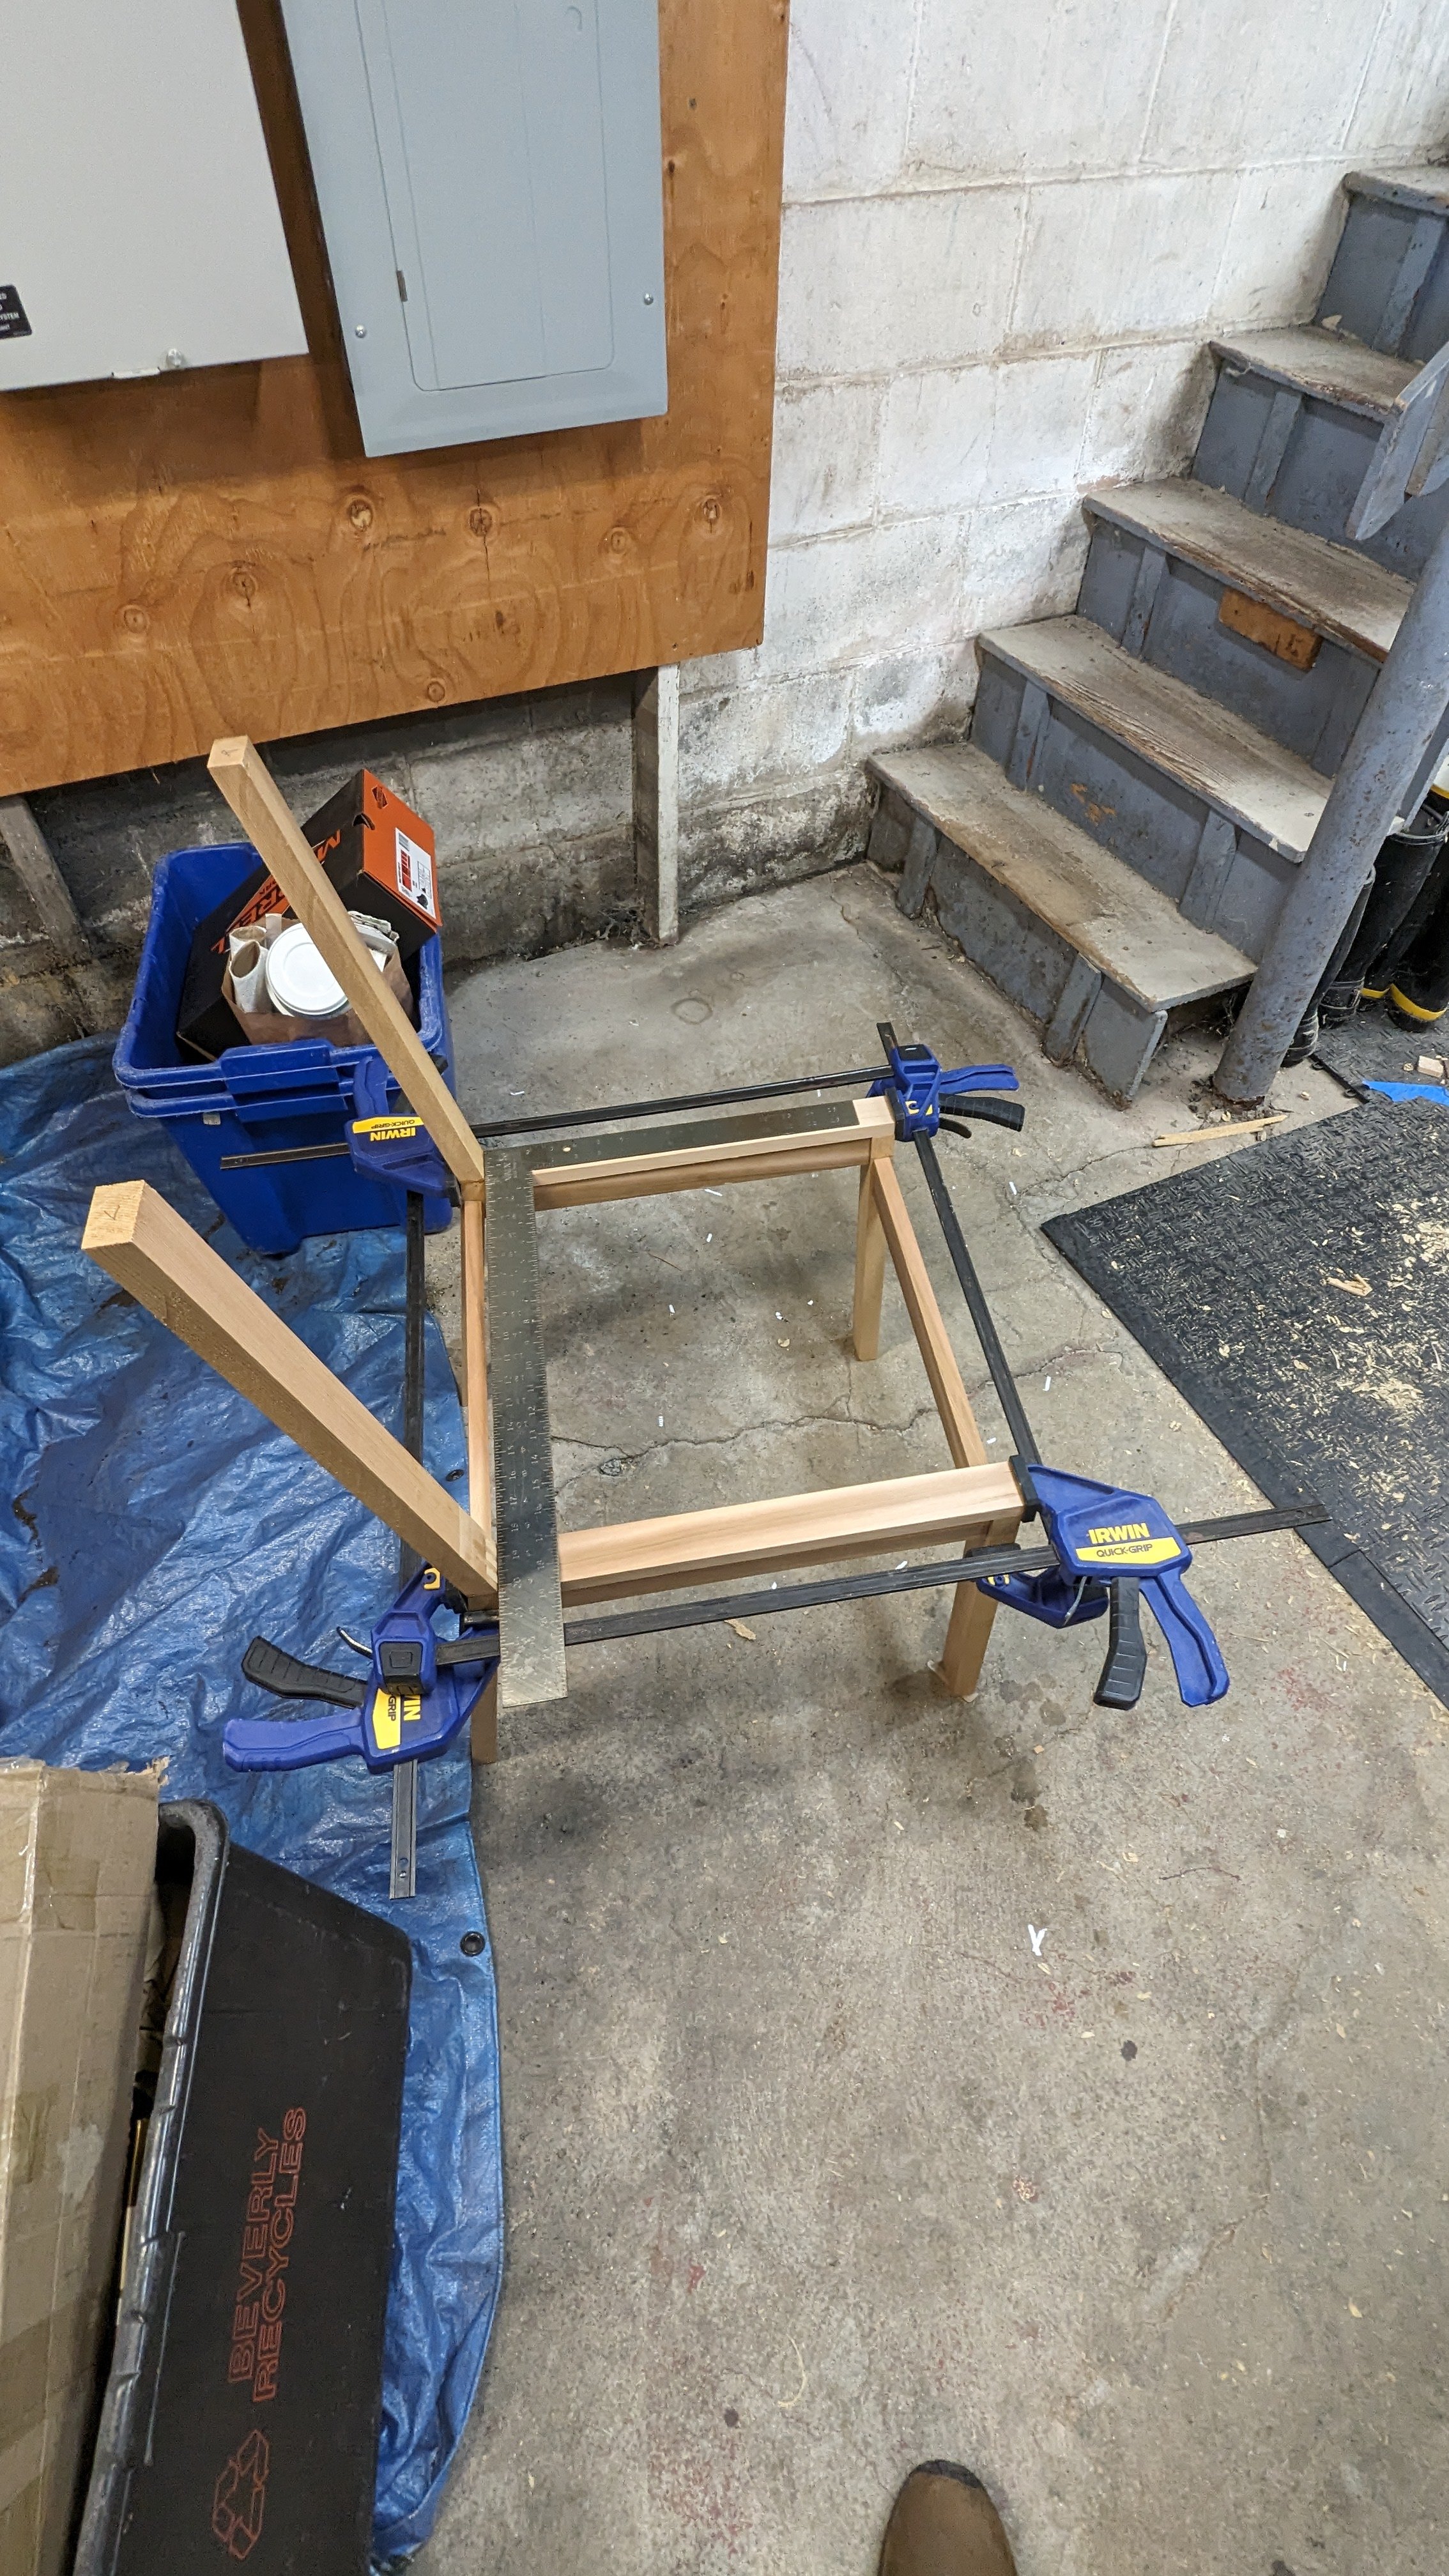
The back legs glued up great, the angled box joint is very strong. The angle of the back also introduced an issue with the side rails of the chair. In the original the manufacturer had just used screws and wood plugs to connect the rails to the legs. I didn’t want to do that so I decided to do through tenons. The issue was that the mortises in rear leg have to be parallel to the ground so I had to create some ten degree angled block fixtures so I could clamp the legs in the right orientation to drill and chisel the mortises. I also had to create a table saw sled for cutting the ten degree angled shoulders for the tenons.
This all worked very nicely, I found that using a coping saw to square up the through mortises worked better than chisels in the soft cedar. Also, I discovered a minor issue with my otherwise wonderful Dewalt table saw. While it has a big enough arbor for an eight inch dado stack and a nice dado throat plate from the manufacturer, the height setting on the blade doesn’t lock so spinning the mass of a three quarter inch wide dado stack causes the blade to drift downward as you cut. I found that inserting an f-clamp through the front of the saw body and clamping the adjustment wheel tightly stopped this.
I built one chair completely as a proof of concept before I went into production mode to crank out all the parts for the other three.


I also had to get into metal fabrication on this project, the seats on these chairs are fabric sling seats and they are held by aluminum clamping bars bolted through the side rails. I couldn’t find any off-the-shelf hardware like this so I ordered some one inch by half-inch aluminum flat bar. I cut the bars to length, copied the hole pattern from the original chair, drilled them, deburred the holes, rounded the ends on the bench sander, sanded them like wood up to 220 grit which gave them a very smooth brushed look and then I applied two coats of clear spray lacquer. The original clamps were tubes with plugs in the ends, but these look very similar and work great.


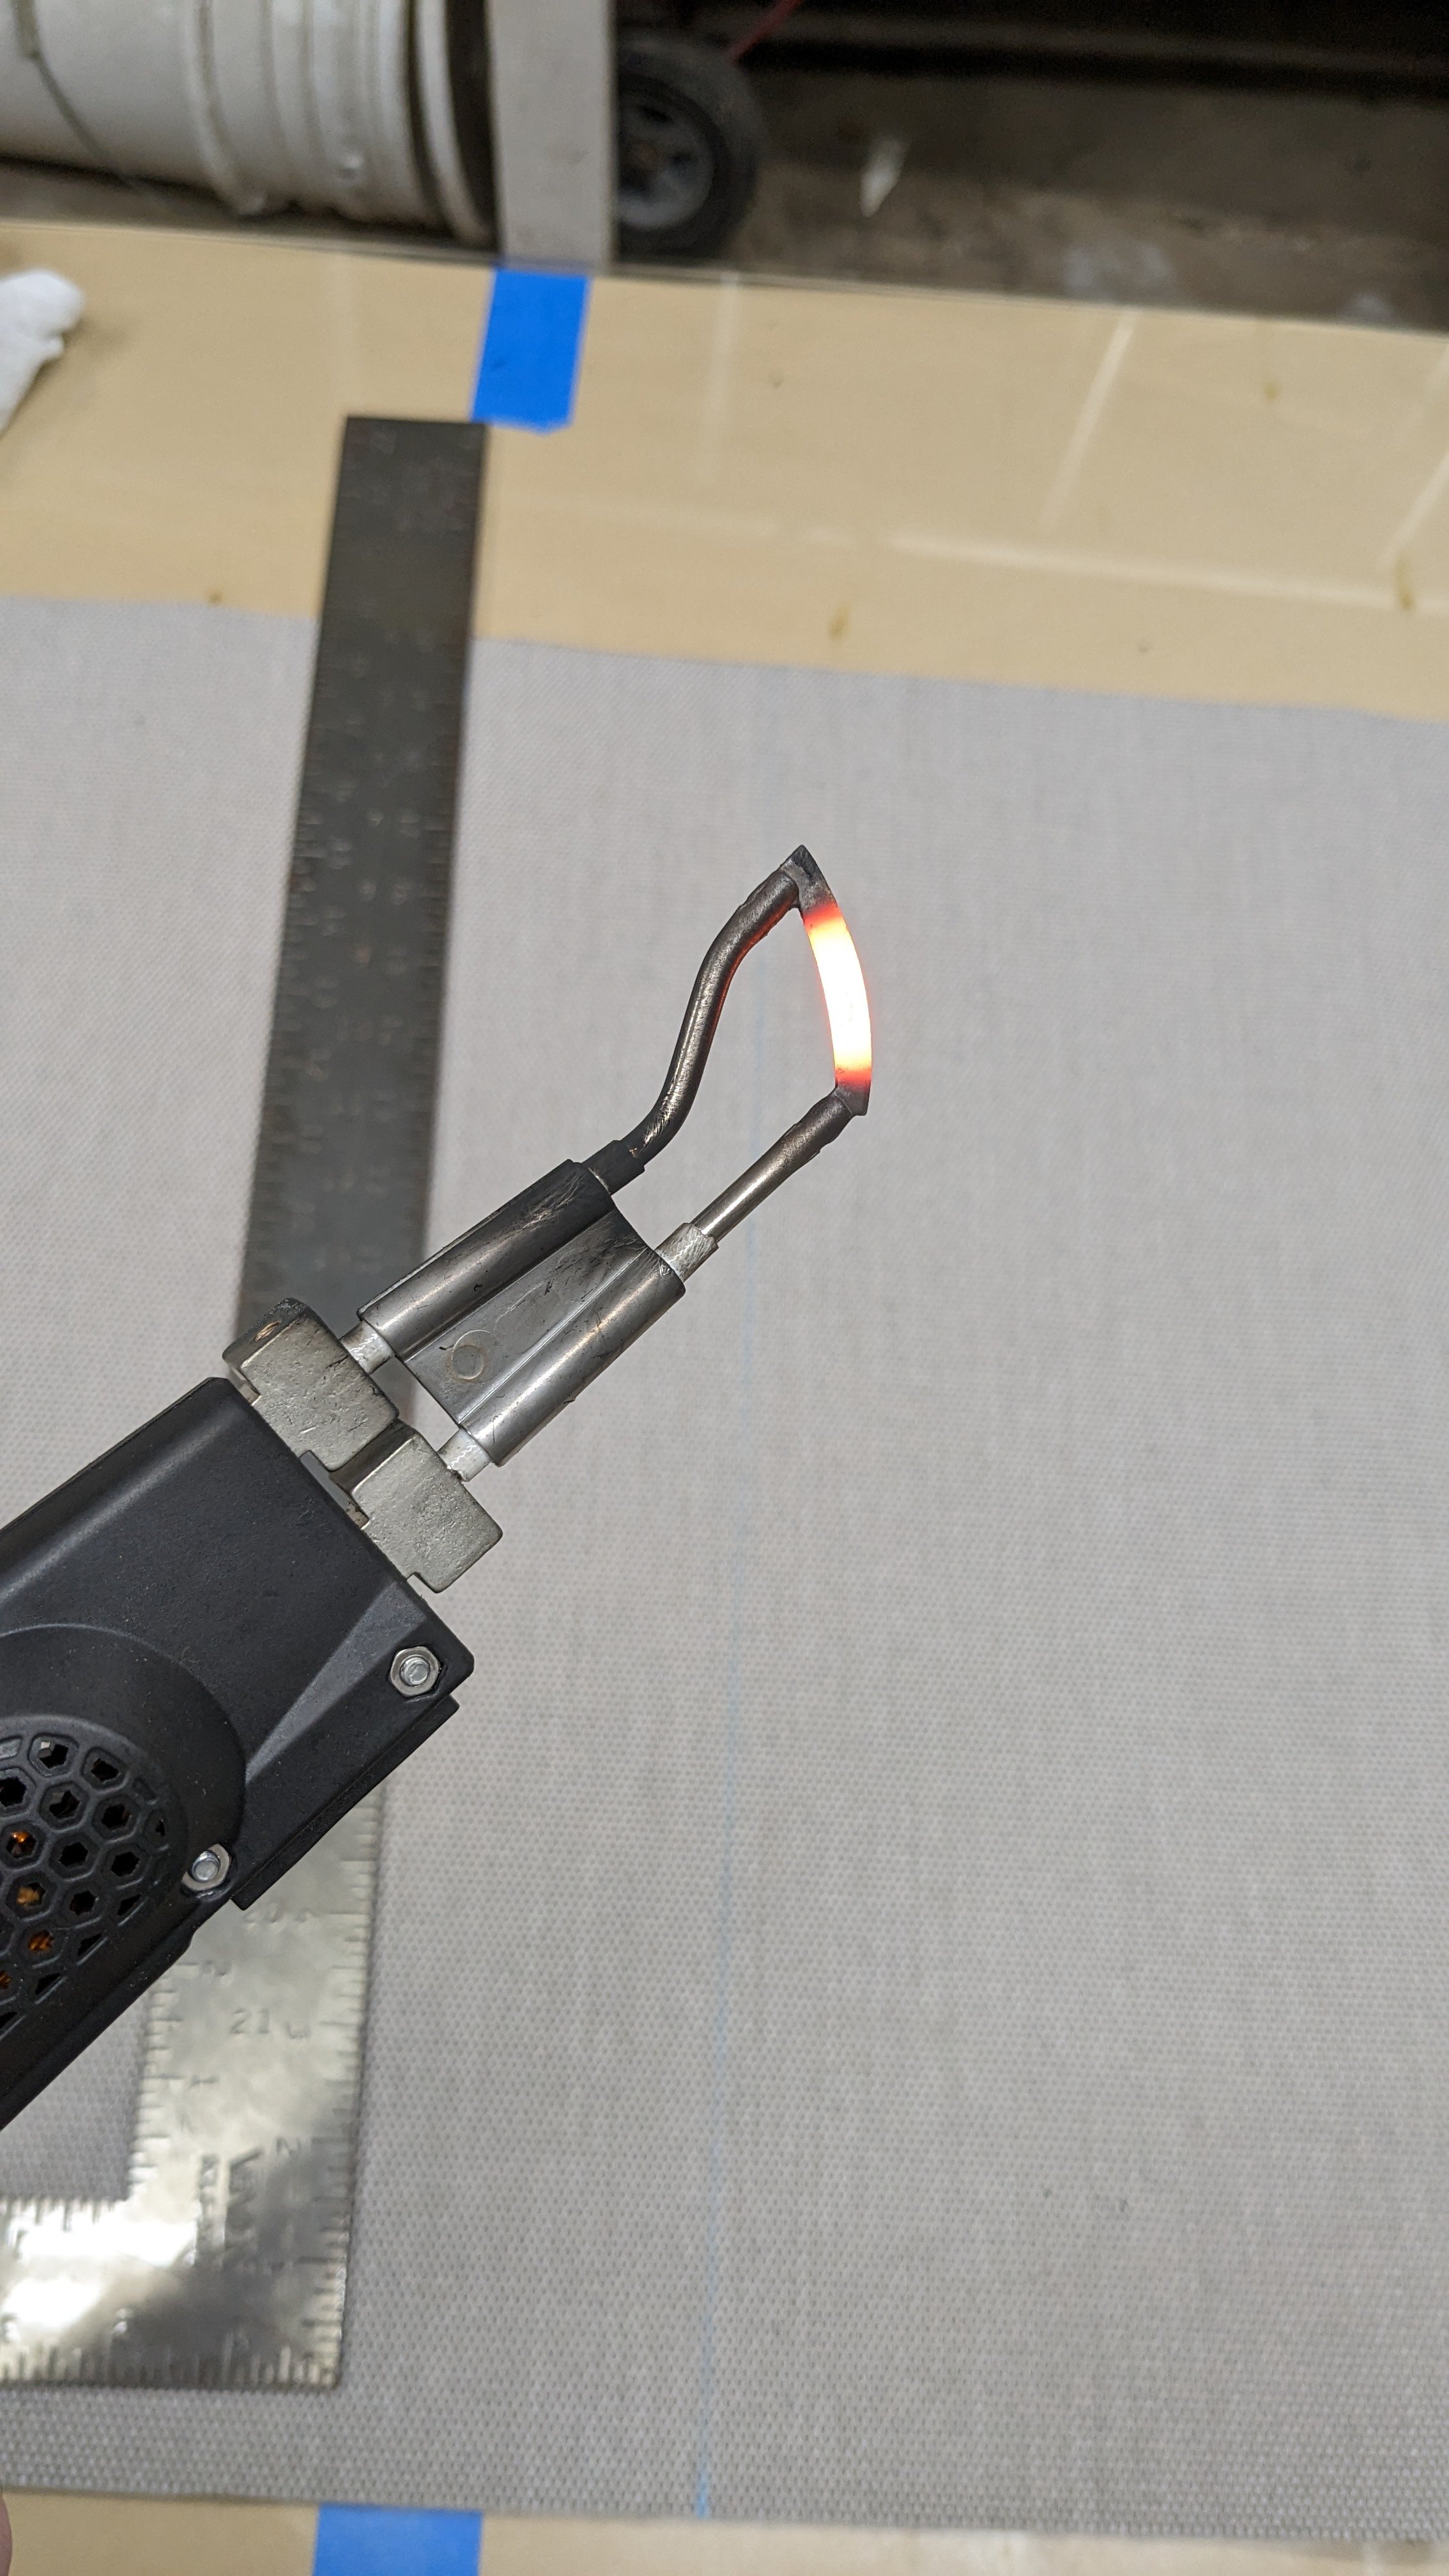
Finally I needed to sew the slings for the seats and the backs of the chairs. I found the fabric that was used for the original chairs from a company called Sunbrella. It is a really nice outdoor fabric which doesn’t break down with exposure to the elements and is very comfortable. In order to not have the edges unravel you need to cut it with a hot knife which melts the edges as you cut. You use a sheet of glass for the cutting surface so you don’t set your table on fire and you have something for the cutter to just glide across.
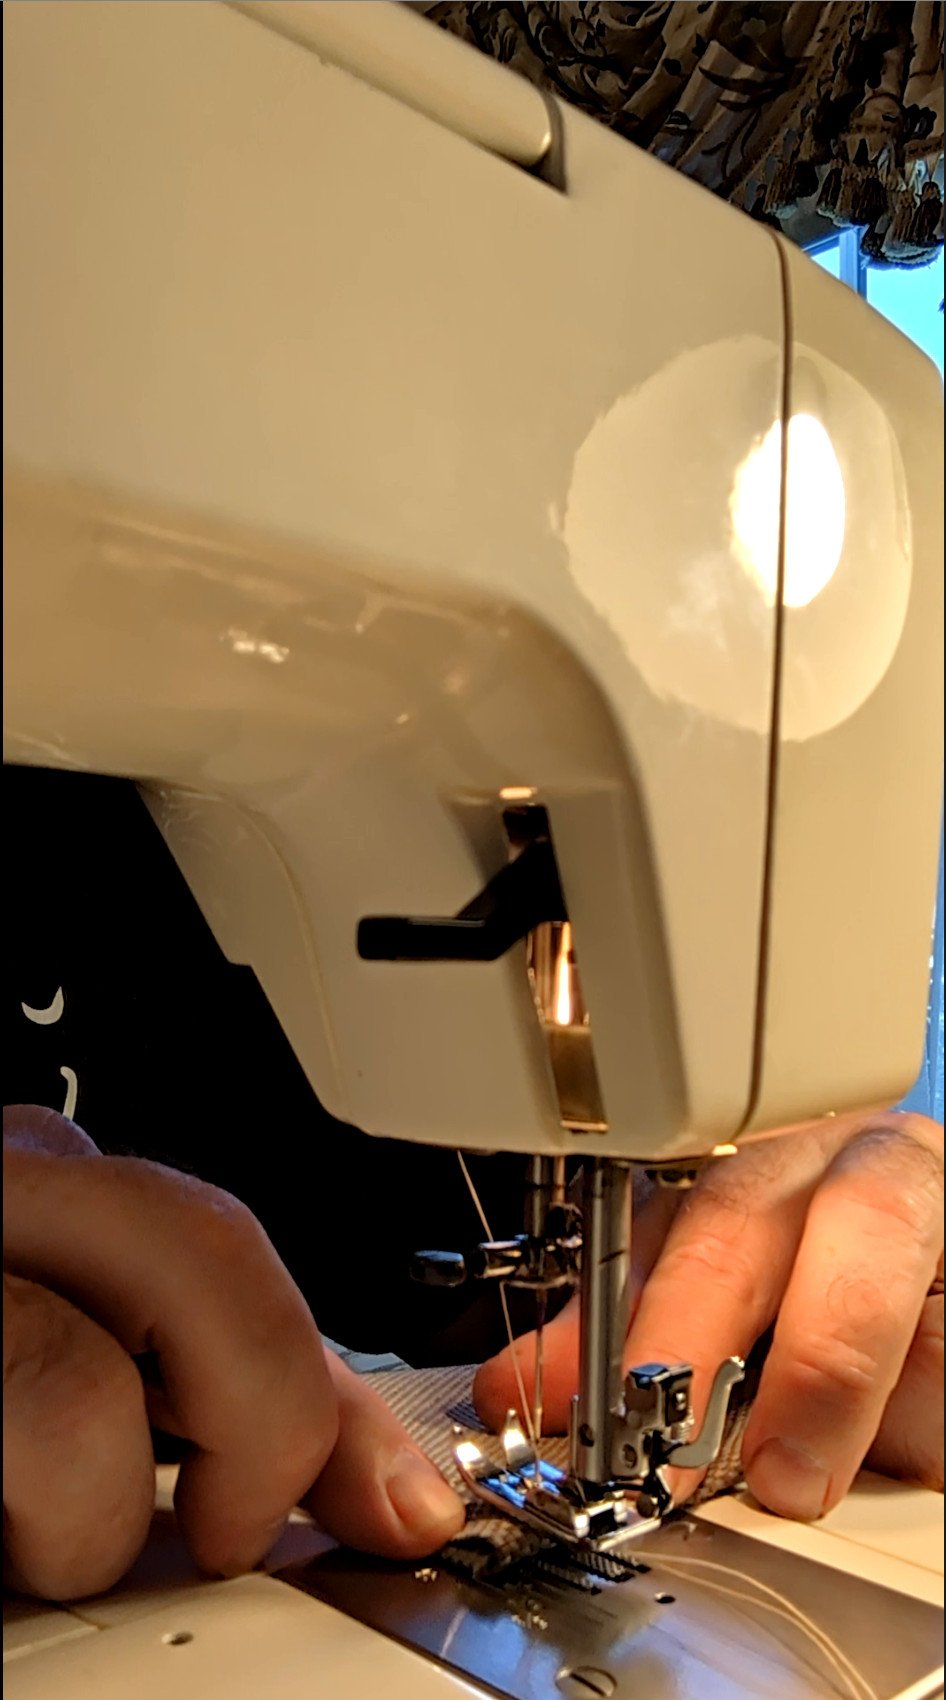
I got a refresher course on using the sewing machine from my beautiful and talented wife. I found the right needle to use ( a ball point to avoid splitting the fibers of the fabric ) and the right thread, a heavy gauge nylon thread that is UV resistant. I watched some videos on cutting and sewing this kind of fabric on the Sailrite sewing machine YouTube channel. I learned about double sided seam tape and how to reduce the thickness in the corners of a panel. Then there was lots of measuring, cutting, folding, taping and finally sewing to make all the panels. I used the hot knife to punch the holes for bolts to pass through and mounted the seats and backs.


I’m really pleased with how they came out and I learned a lot doing this project. I got comfortable with the stacked dado head cutter, and building custom sleds for the table saw, and my sewing improved a lot. I decided not to put finish on any of this outdoor furniture as there was considerable difference of opinion about finishes for cedar for outdoors. It will just weather to grey like the rest of our outdoor furniture. I can always put some mineral oil on it later like I’ve done with the teak if it turns out it needs it. On to the next project!
Update 10/24/2023: Just a couple of updates after deployment. First, one of the chair backs had a joint fail. Incredibly it seemed like the glue never cured and the joint just finally slipped. After some research I found out that western red cedar has an oil that interacts with Tightbond III which is the glue that I used. Apparently you need to sand or machine the surfaces right before applying the glue or it will interact with the oil that comes to the surface. This explains why all of the other joints are just fine and only this one failed. I built this joint and did dry fits with it but I didn’t glue it for several days because it was the first one I did. The rest of the joints I glued up very shortly after machining them. I was able to repair the joint with a brace glued and screwed to the back and I also injected some CA glue into the joint. It is just fine now. Here’s what a good joint and the failed joint look like:


Also I wanted to just share my drawing for the chairs such as it is…