We’ve been doing a lot of changes to the landscaping around our house. Part of the project was adding a new circular patio in the middle of the yard with a new garden path. Now that all the construction and planting is done I’m building some furniture for the new patio. I wanted to build a fire table and four additional chairs based on the ones from our other deck which we really like.
I found a fire table kit that includes all the plumbing and burner components from a company called GRISUN. The glass fire pan wind shield and the fire glass also came from them. I also found a compact Propane tank that is made to be operated while on it’s side, it’s only 19.9 lbs of Propane but it fits inside the base of the table.
I designed the table to have plenty of room around the perimeter for drinks and snacks and to be a comfortable height to set things on while seated near the fire. I also made sure that the table would fit the patio nicely with plenty of room for the chairs I was building around it.
I chose to make it out of Western Red Cedar, the most economical outdoor water resistant wood I could obtain. I looked briefly at Teak but the price/lf made my eyes bleed, not to mention that the high silica content wears down your cutting tools. As it turns out the Cedar was really nice to work with, very light weight, strong, straight, stable and very pretty with long straight grain lines. I didn’t have any problems with splitting or tearing out. Also, the shop smells great after cutting a lot of it.
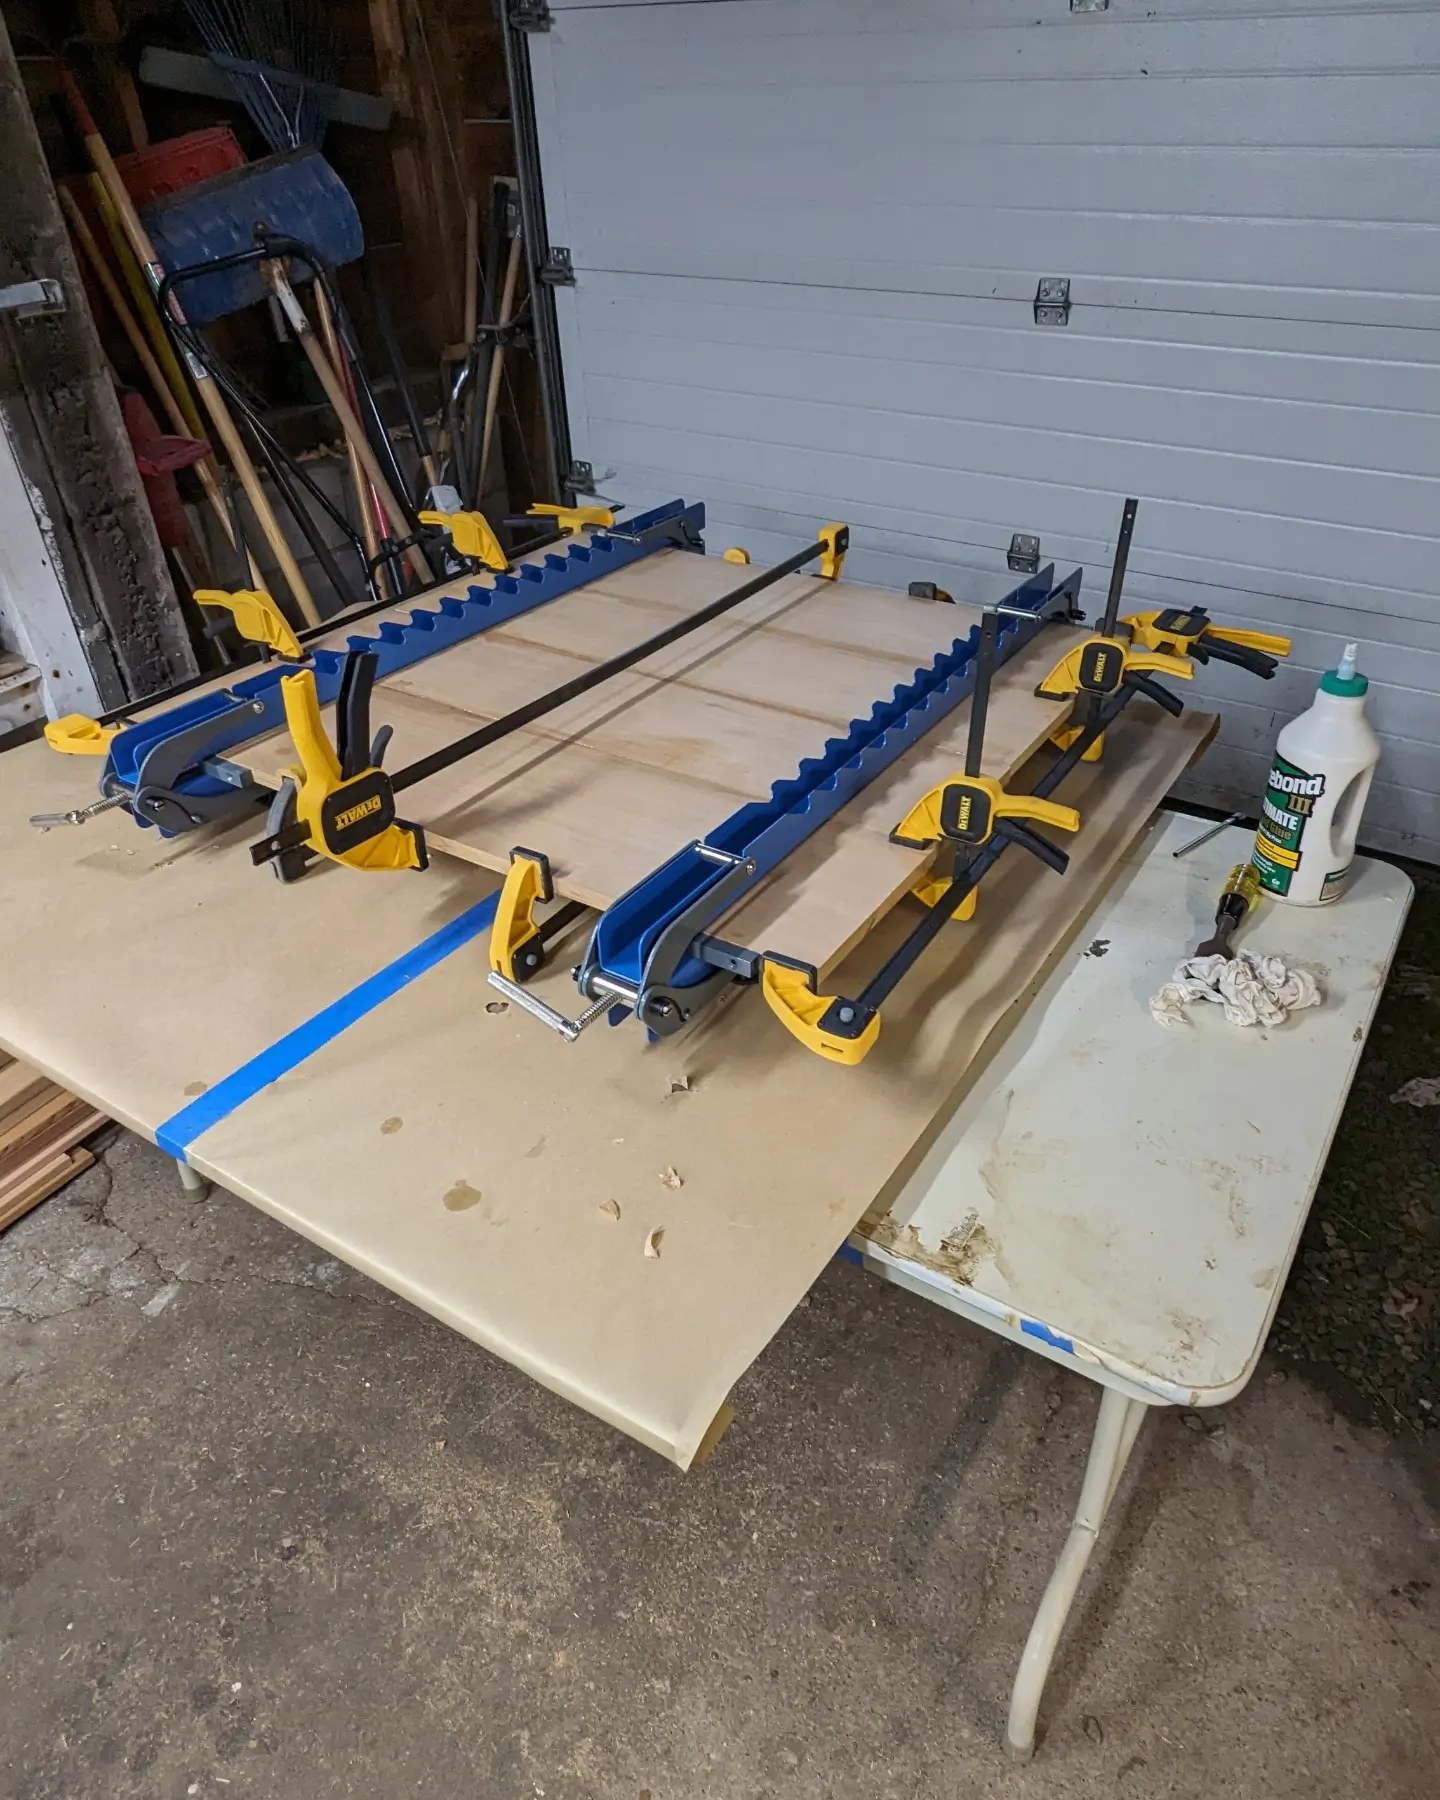
I glued up the top out of wide 9 1/4” x 3/4” ( nominal ) boards after ripping the rounded edges off since I think this lumber is intended for construction projects like siding, trim etc… and so it comes in nominal sizes and has rounded corners. I really love my Rockler Panel Clamps, all the panels for this project came out super flat so that I didn’t have to plane anything, just a bit of sanding.
I built a frame to sit under the top with a 3 1/2” perimeter with mitered corners and 2” lap jointed bracing around the 18” x 18” opening for the fire pan.

I used expansion clips to attach the top to the top frame. I drilled a pilot hole from the back and then used the flush cutting bit on the router to cut out the opening for the fire pan. A little cleaning up of the corners and rasping the opening and the pan fits securely but not too tightly in the opening. The off cut was nice and clean too and so I use it later on.

I glued up blanks for the legs ending up with legs 1 3/8” square. I cut a center groove 1/4” wide by 3/8” deep in two sides of each leg. I cut the stretchers out of 2” wide material with 3/8” x 1/4” tenons on each end and a 1/4” wide by 3/8” deep groove on one side. Finally I glued up panels for all of the sides out of 3 1/2” x 3/4” (nominal) material again ripping off the rounded corners. I cut the panels to final size allowing for a 1/4” x 3/8” tongue around the entire perimeter to fit into the groove in the legs and the stretchers.


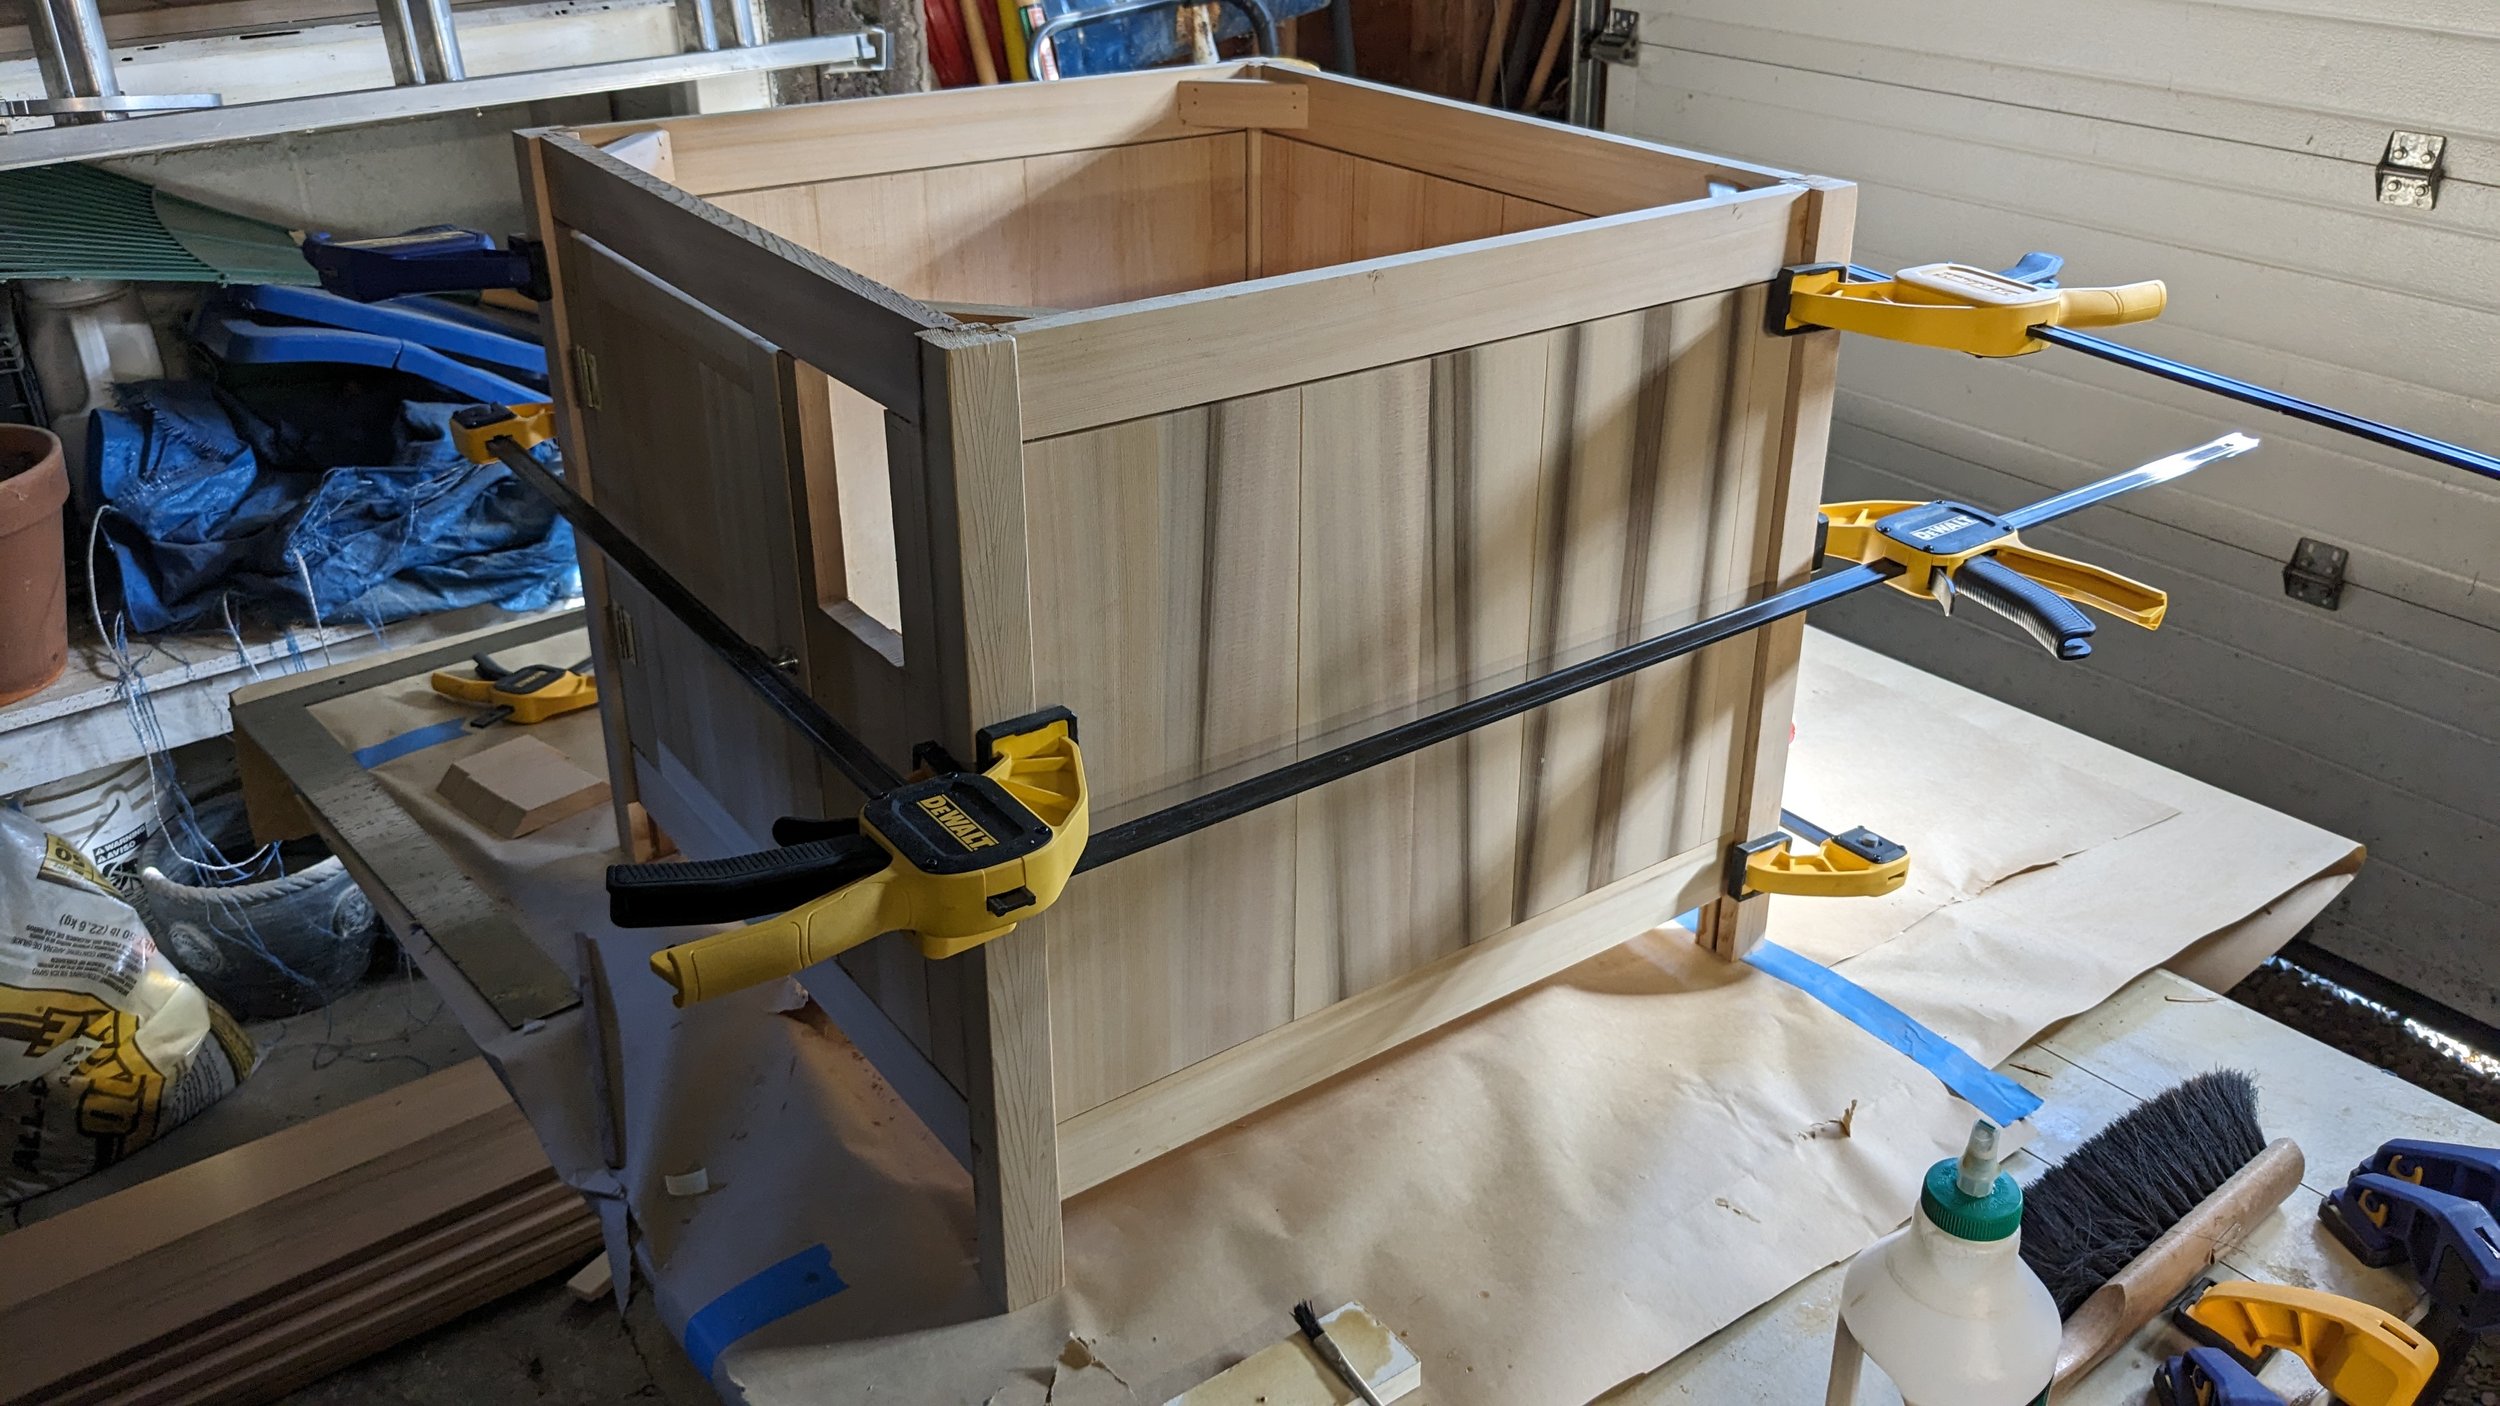

In one side I cut out and framed a door to allow access to the interior as well as a cutout for the control panel with the burner nob and igniter button. I added diagonal corner braces top and bottom. I installed the bottom of the case made from 3/4” pressure treated plywood attached to the bottom diagonal braces with screws. The bottom has two 4”x4” vents with expanded steel mesh covers to allow any propane that were to enter the base to exit from the bottom since it is heavier than air.
After sanding everything to 220 grit, I glued up the case and the top. I have decided to just leave the wood untreated so it can weather naturally. I installed the plumbing inside and then completed attaching the top to the case with angle brackets out in the yard. I got the tank filled and tested all the gas connections with soapy water under pressure to make sure there were no leaks. I added the fire glass and glass wind shield and fired it up.
It works great, the igniter doesn’t work for some reason, but a fireplace lighter works to get it started just fine. Also you need to adjust the regulator on the connection to the tank to make sure you don’t get a fireball on start up. One ten pound bag of fire glass wasn’t enough to properly cover the burner so I got a second one and that was just right.
The last step was building a fire pan lid to keep leaves and excess rain and snow out of the fire pan. I made it from the piece I cut out of the top so it has nice wide boards to match the top of the table and a border to hold it onto the top of the glass wind shield.


I’m very happy with how it came out, I have a couple of minor things to fix down the road. The door is too close to the control panel and one of the hoses from the valve blocks getting the tank in through the door. At some point I’ll move the door to the left and flip the hinges to solve that problem. Until then the fire pan can be lifted out and the tank extracted through the top as needed.
Next up is the chair building project which will be exciting since these will be my first chairs. You can see the chairs that I’m copying in the images above.