• Home
  • Blog
  • About
  • Privacy Policy
Menu

James Goodwin

  • Home
  • Blog
  • About
  • Privacy Policy

Some small projects...

September 15, 2024

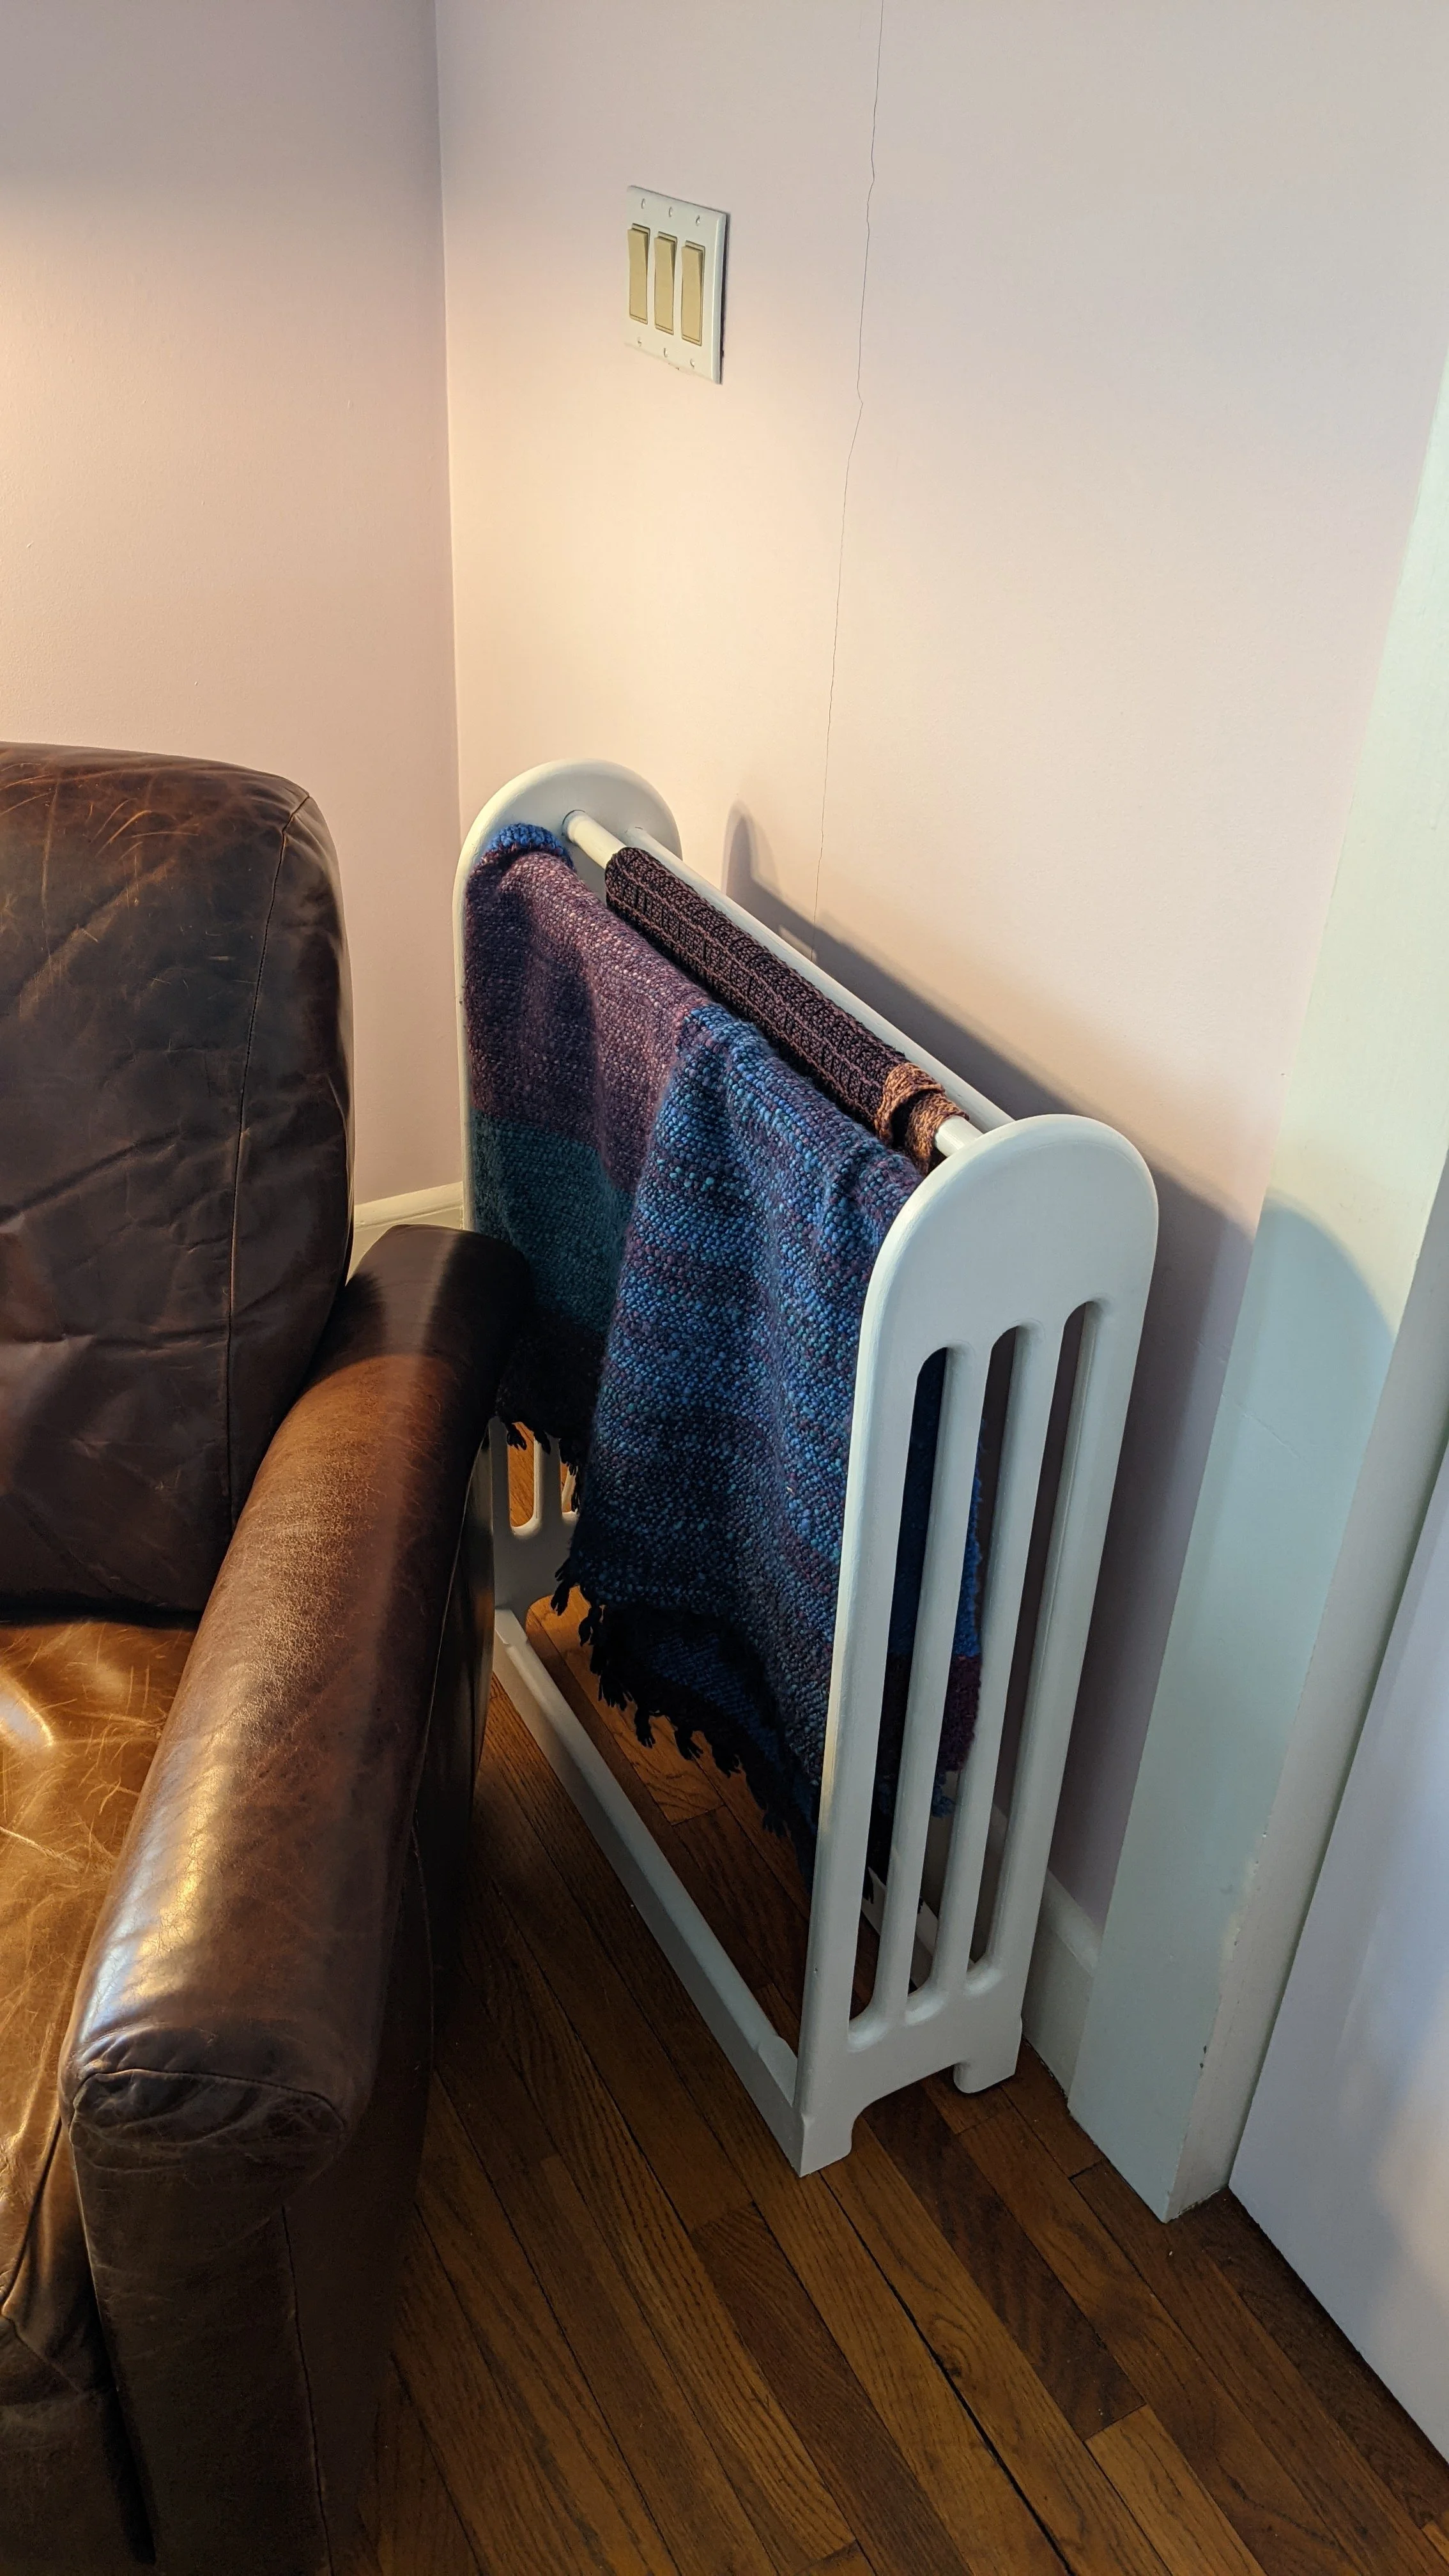
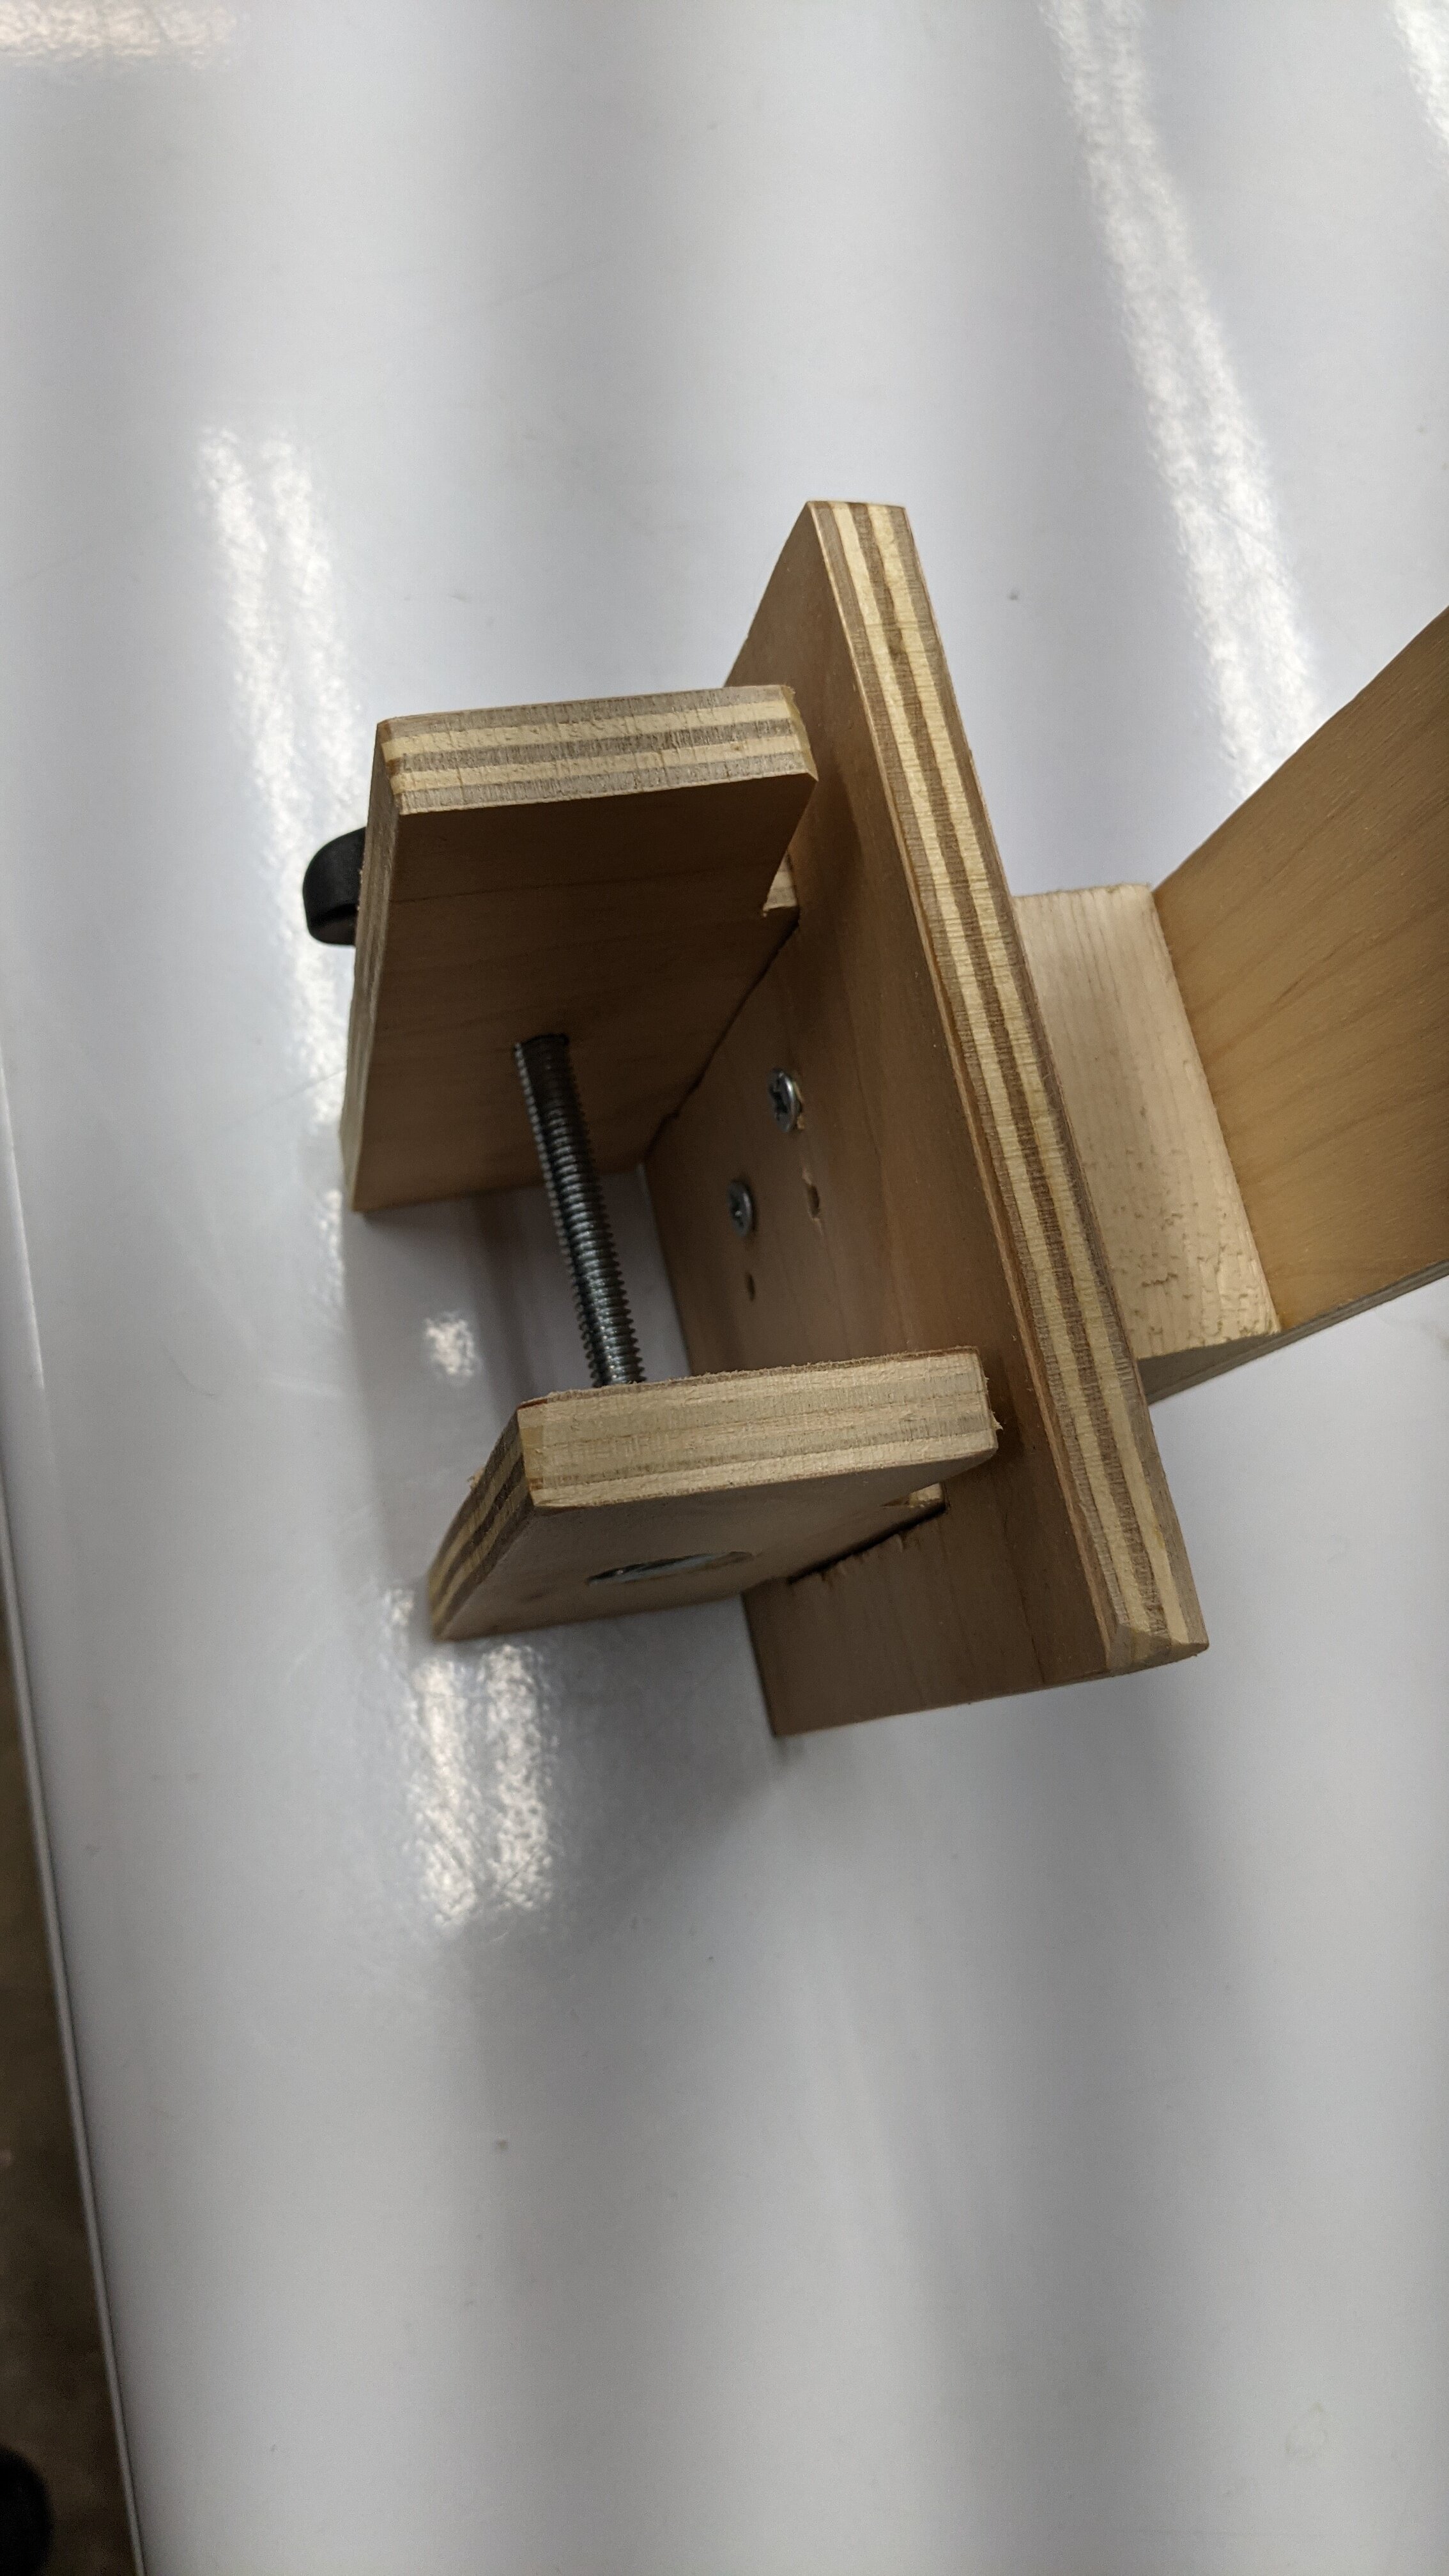
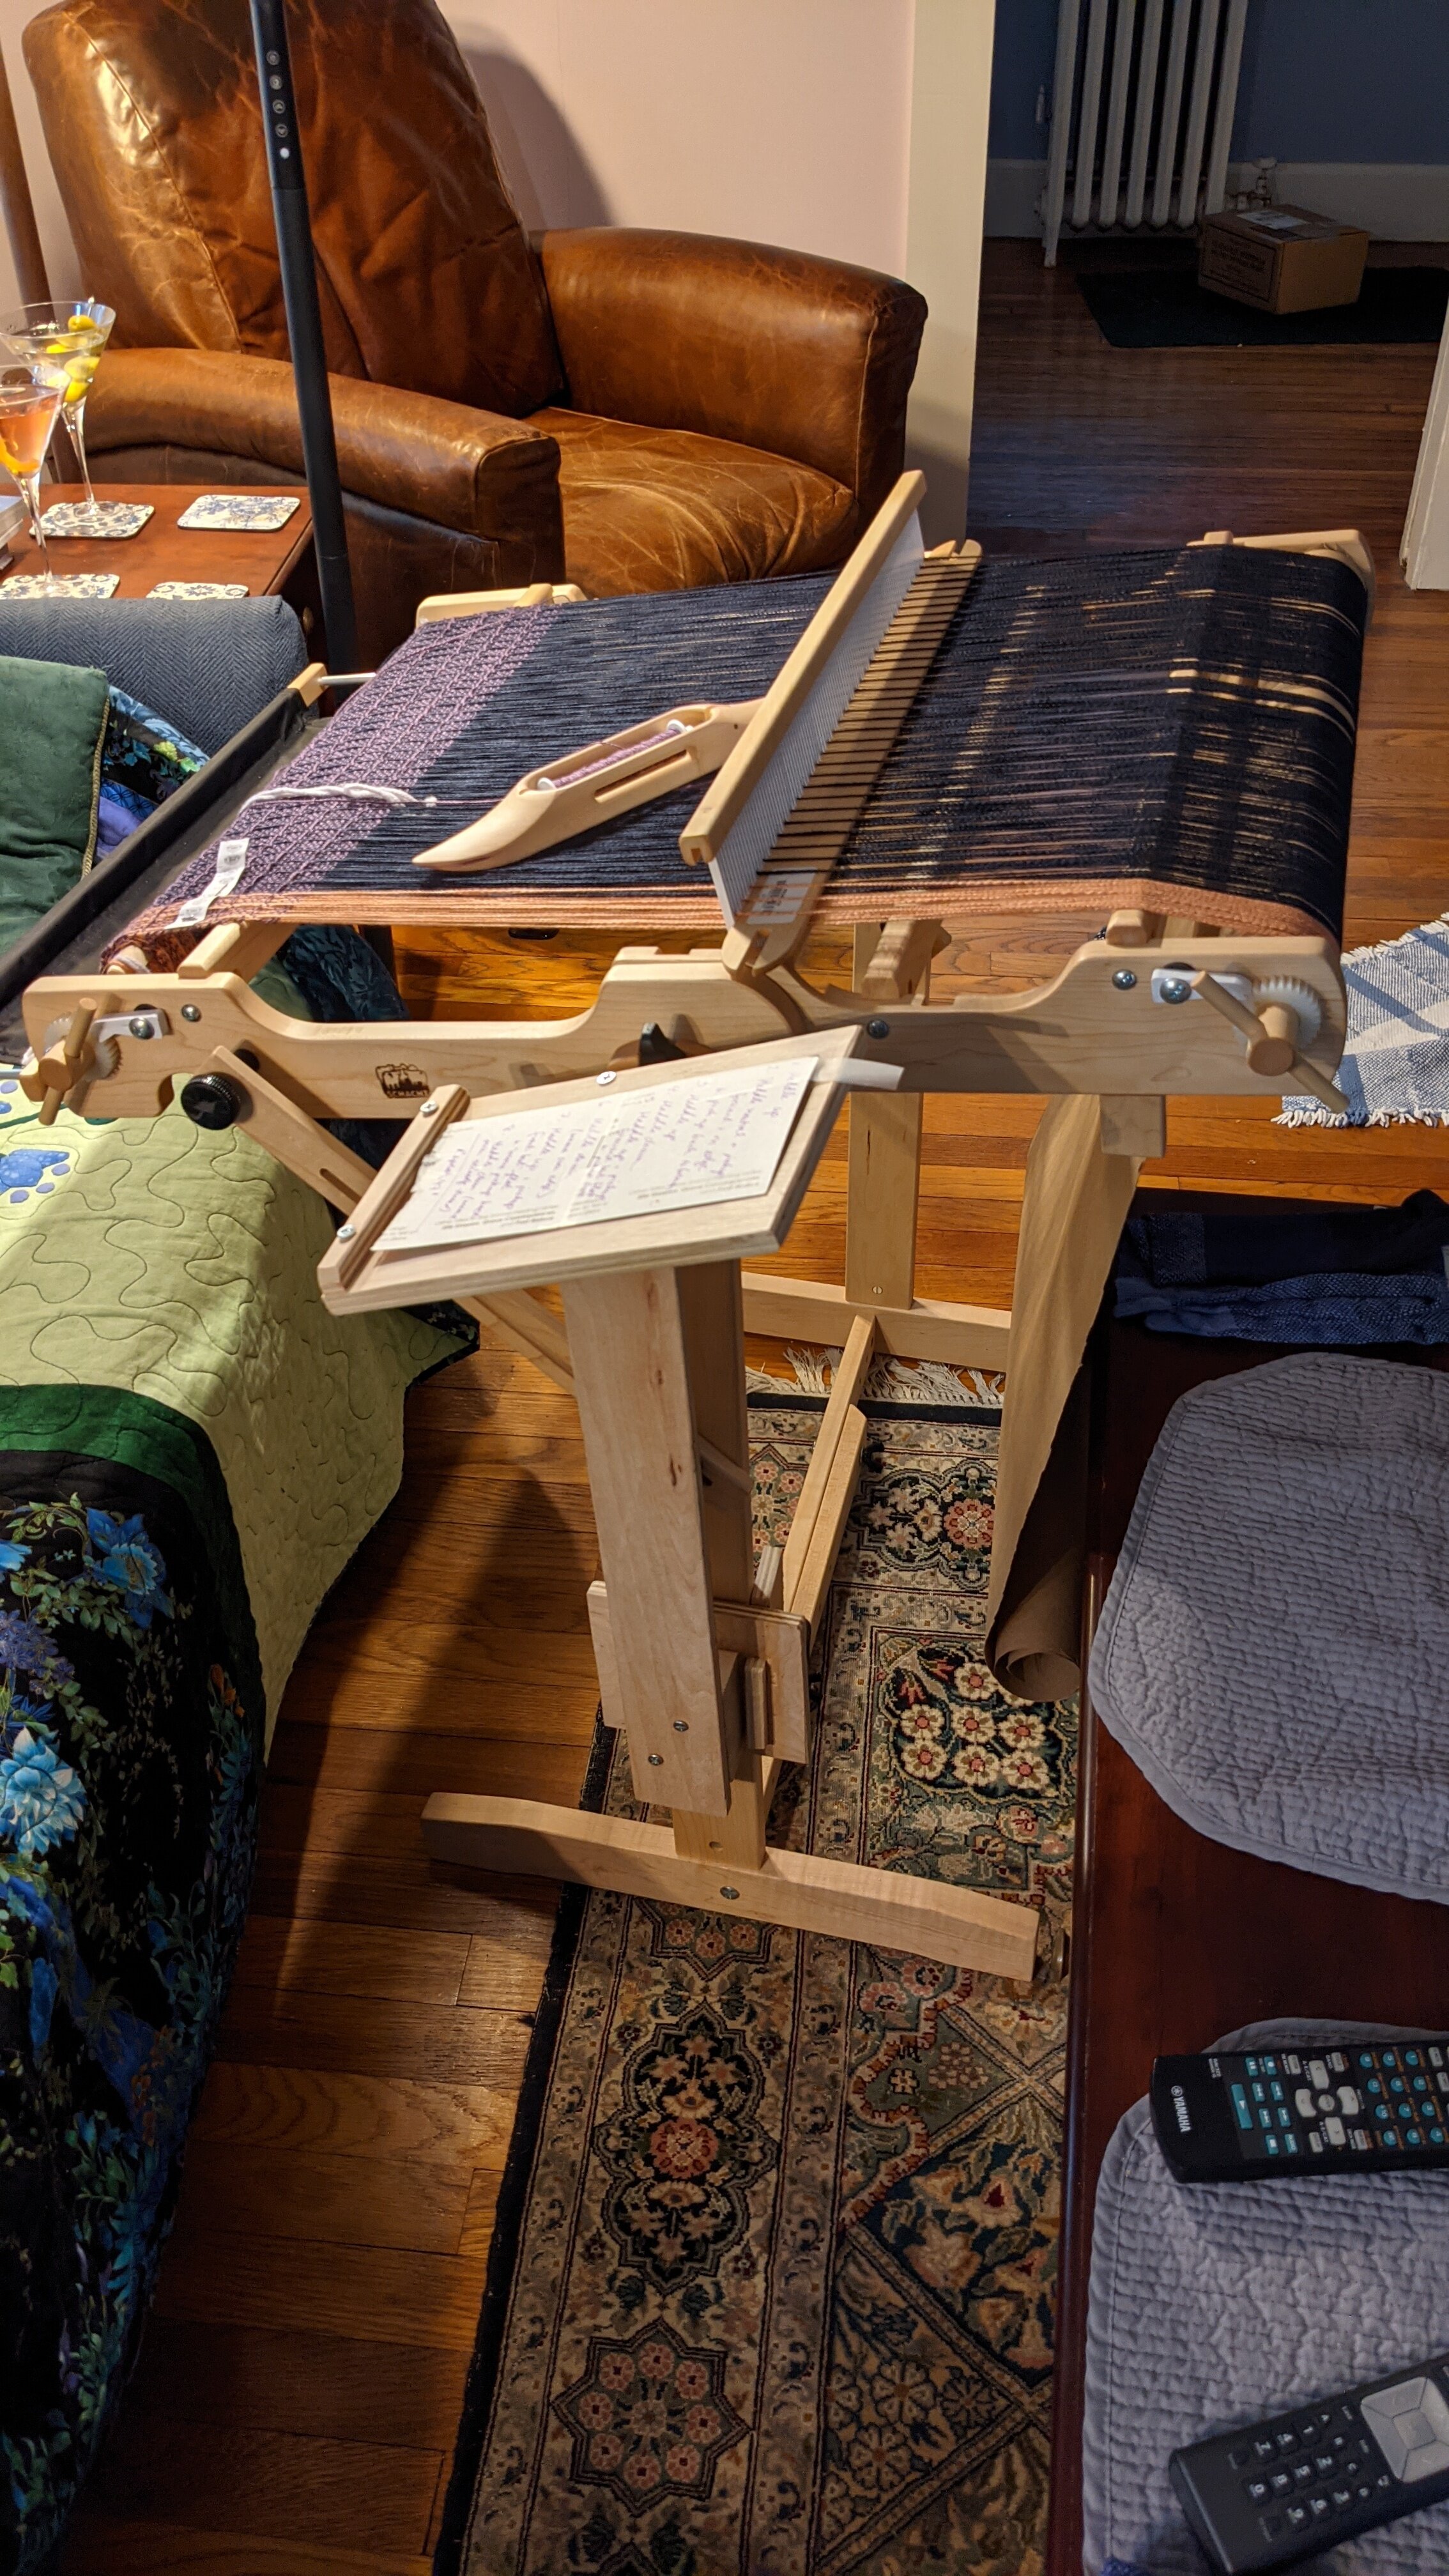
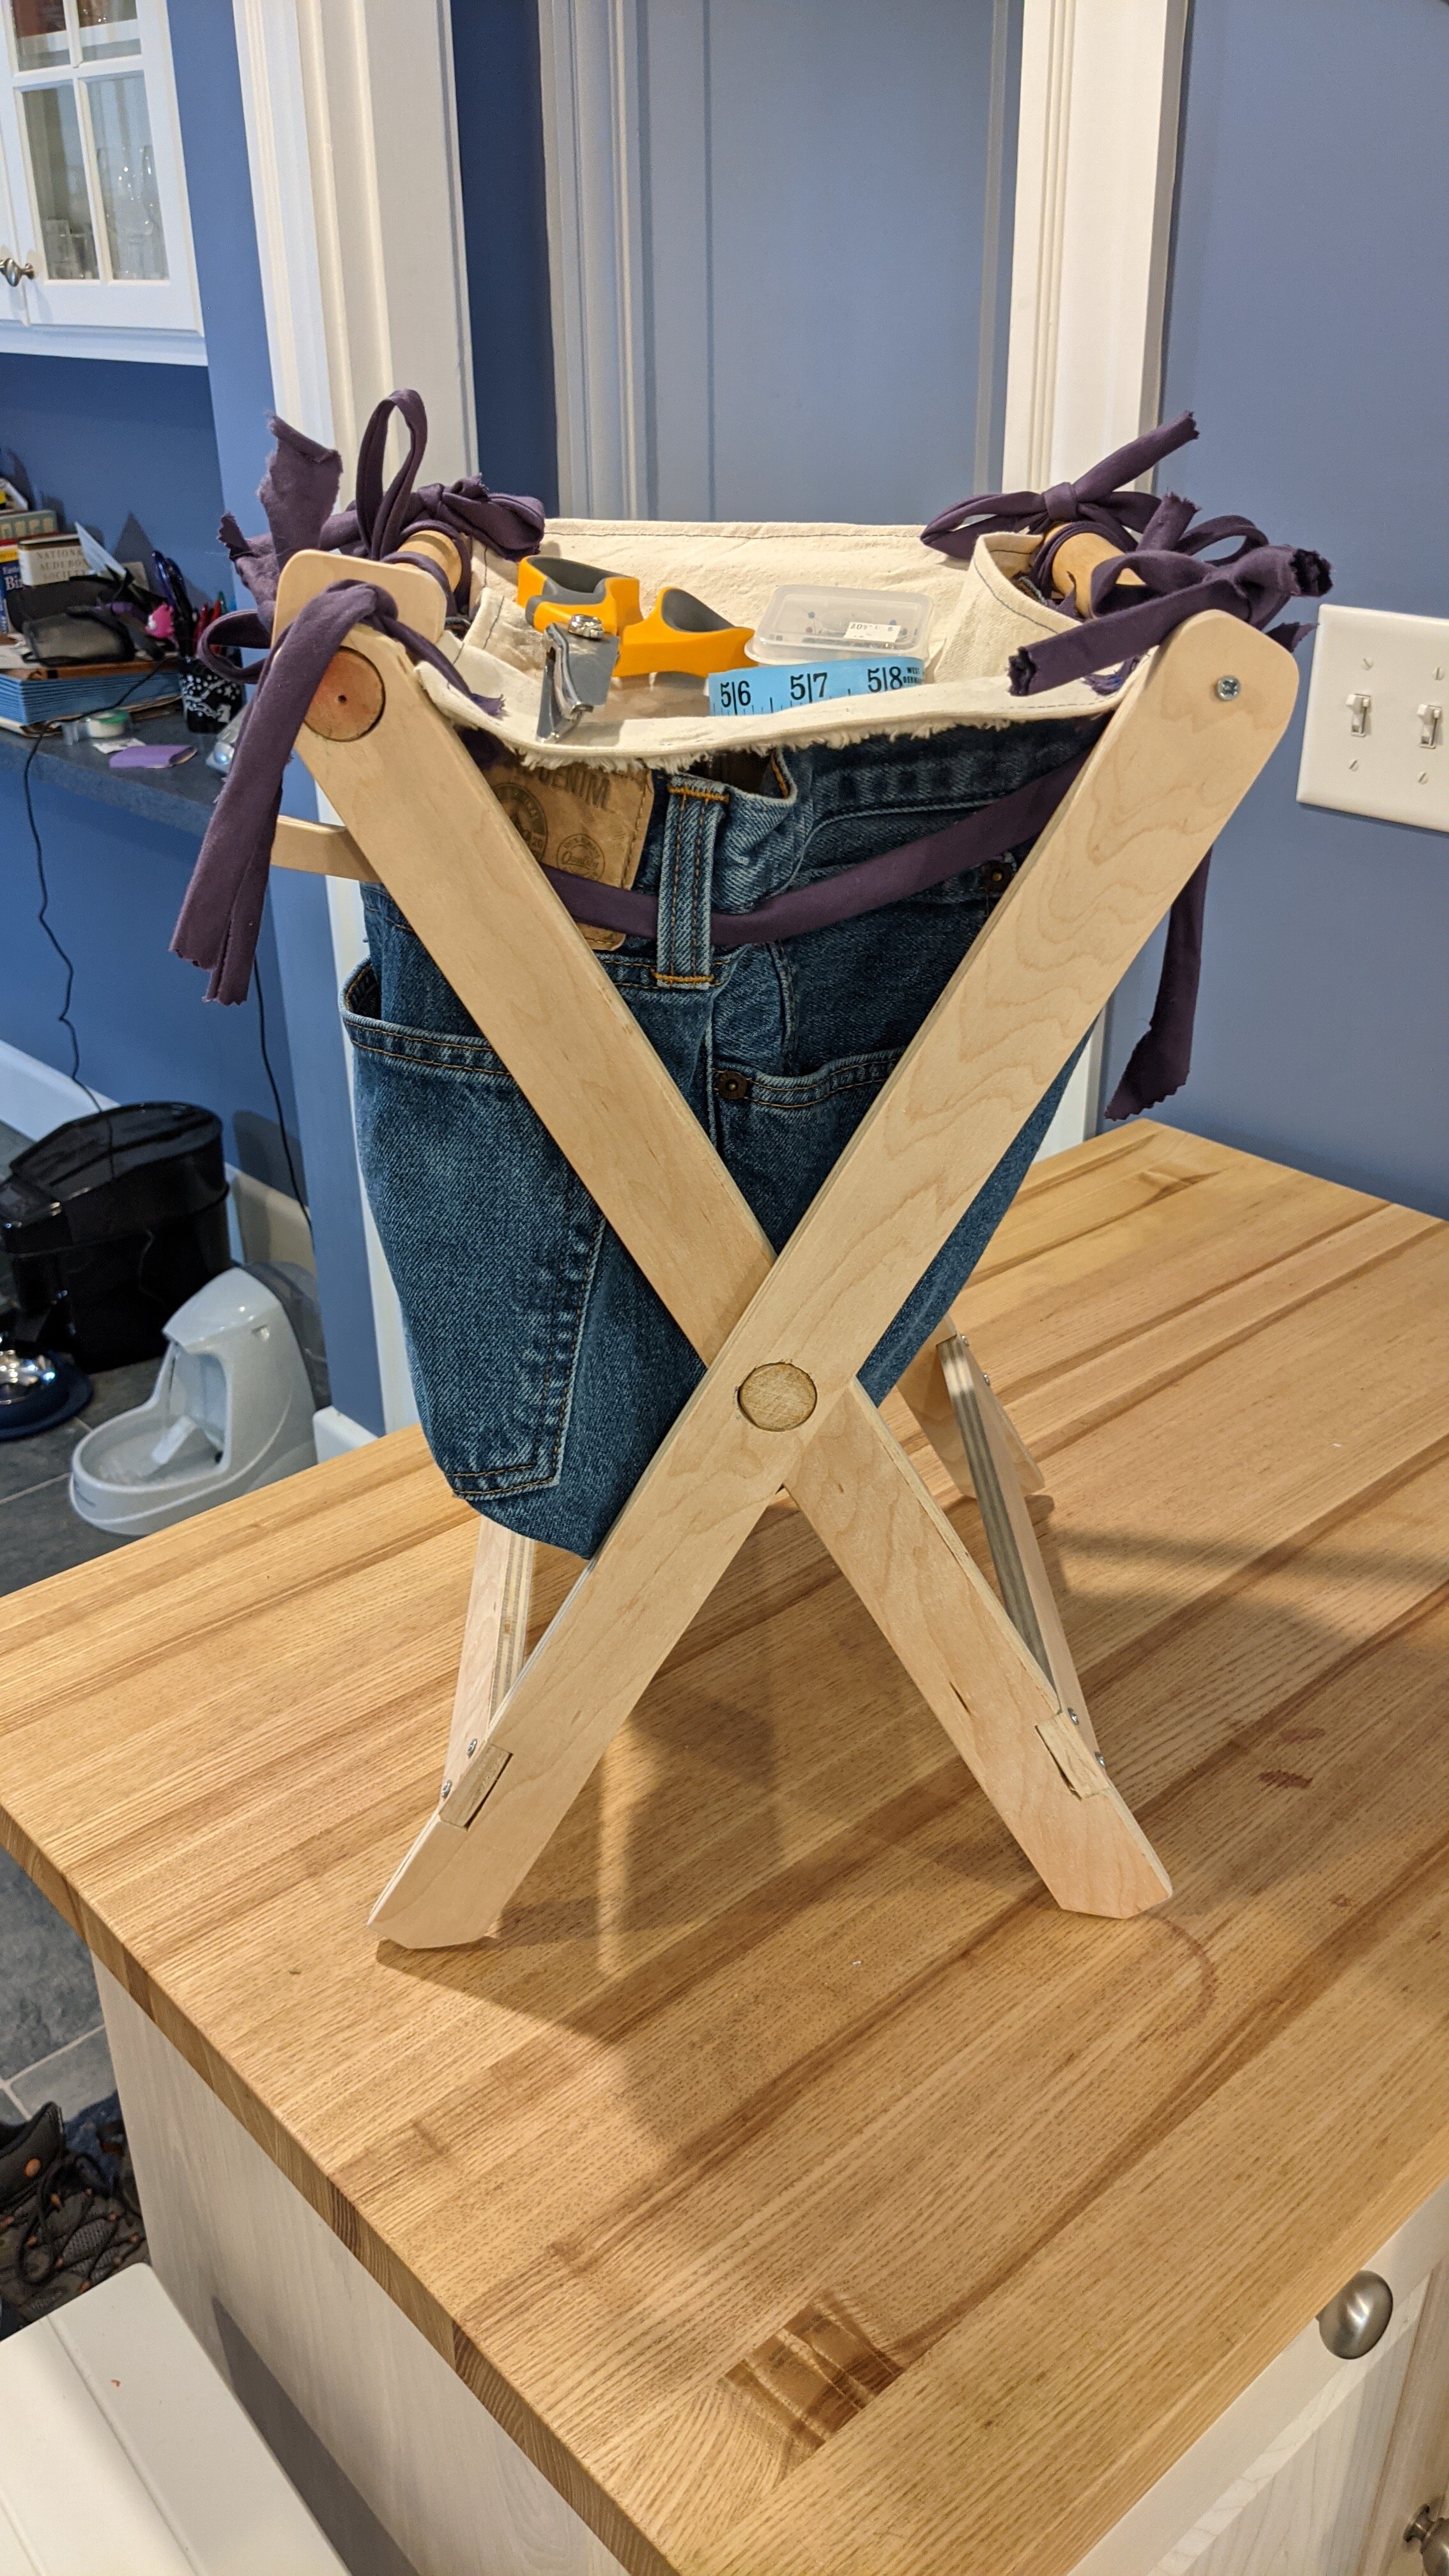
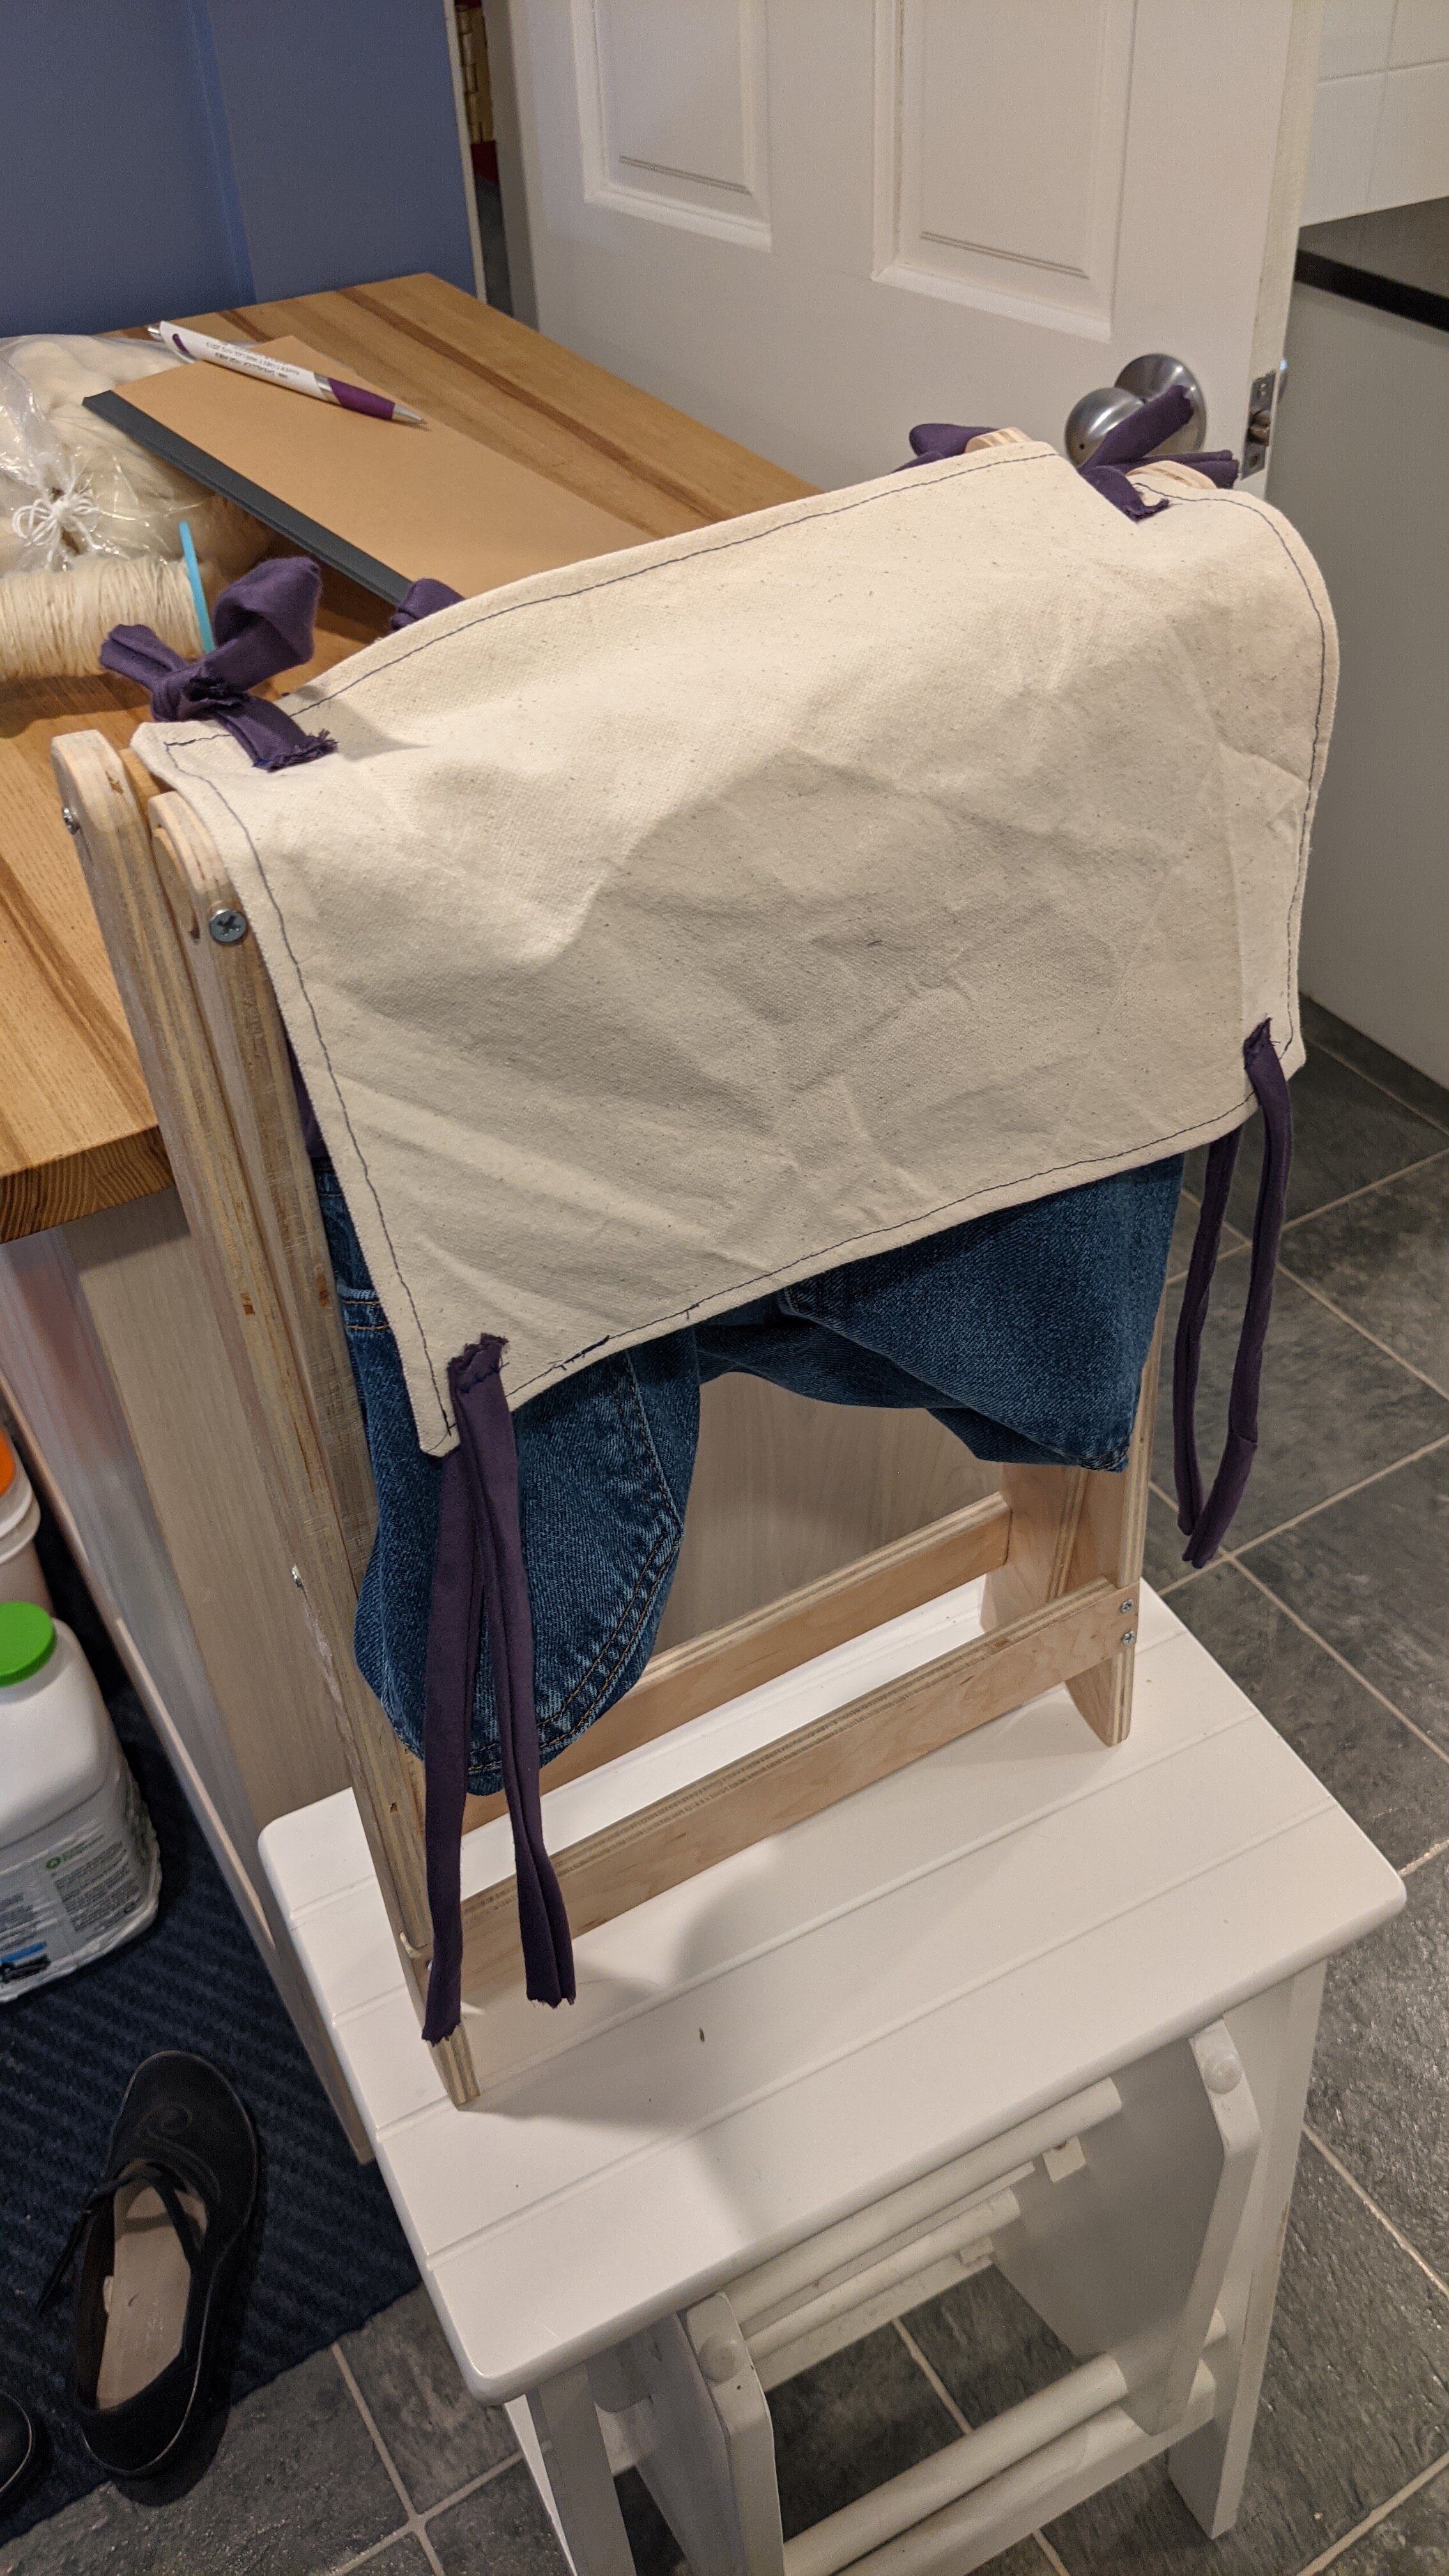
After finishing the bed project I took some time off and caught up on my comic book reading and other non-workshop activities. My beautiful and talented wife in that same time-frame went to weaving school and came back with a lot of new knowledge. One of the tools that she discovered at the school was a warp tensioning device like you see in the image above. When it is in use during the initial setting of the warp on the loom, the warp is passed over and under the rods before it passes over the beam, this helps even out the tension and make it consistent as the warp is wound up. She described it to me and showed me some pictures of them and I figured I could make one pretty easily.

View fullsize warp tension device.png
View fullsize PXL_20240914_172932939.jpg
View fullsize PXL_20240914_172944849.jpg

I had some maple that was 1 1/16” x 9 1/2” x 24” which had some bark inclusion and milling chatter marks on one side that was perfect for making the parts for the clamping mechanism. I made a pretty detailed drawing because the clamping mechanism needed to fit the back beam of the loom fairly precisely and I wanted the center of the rods to be in line with the top of the beam.

I had to order 3/4” poplar dowels which took a few days to come, but they were nice and smooth and straight which was excellent.

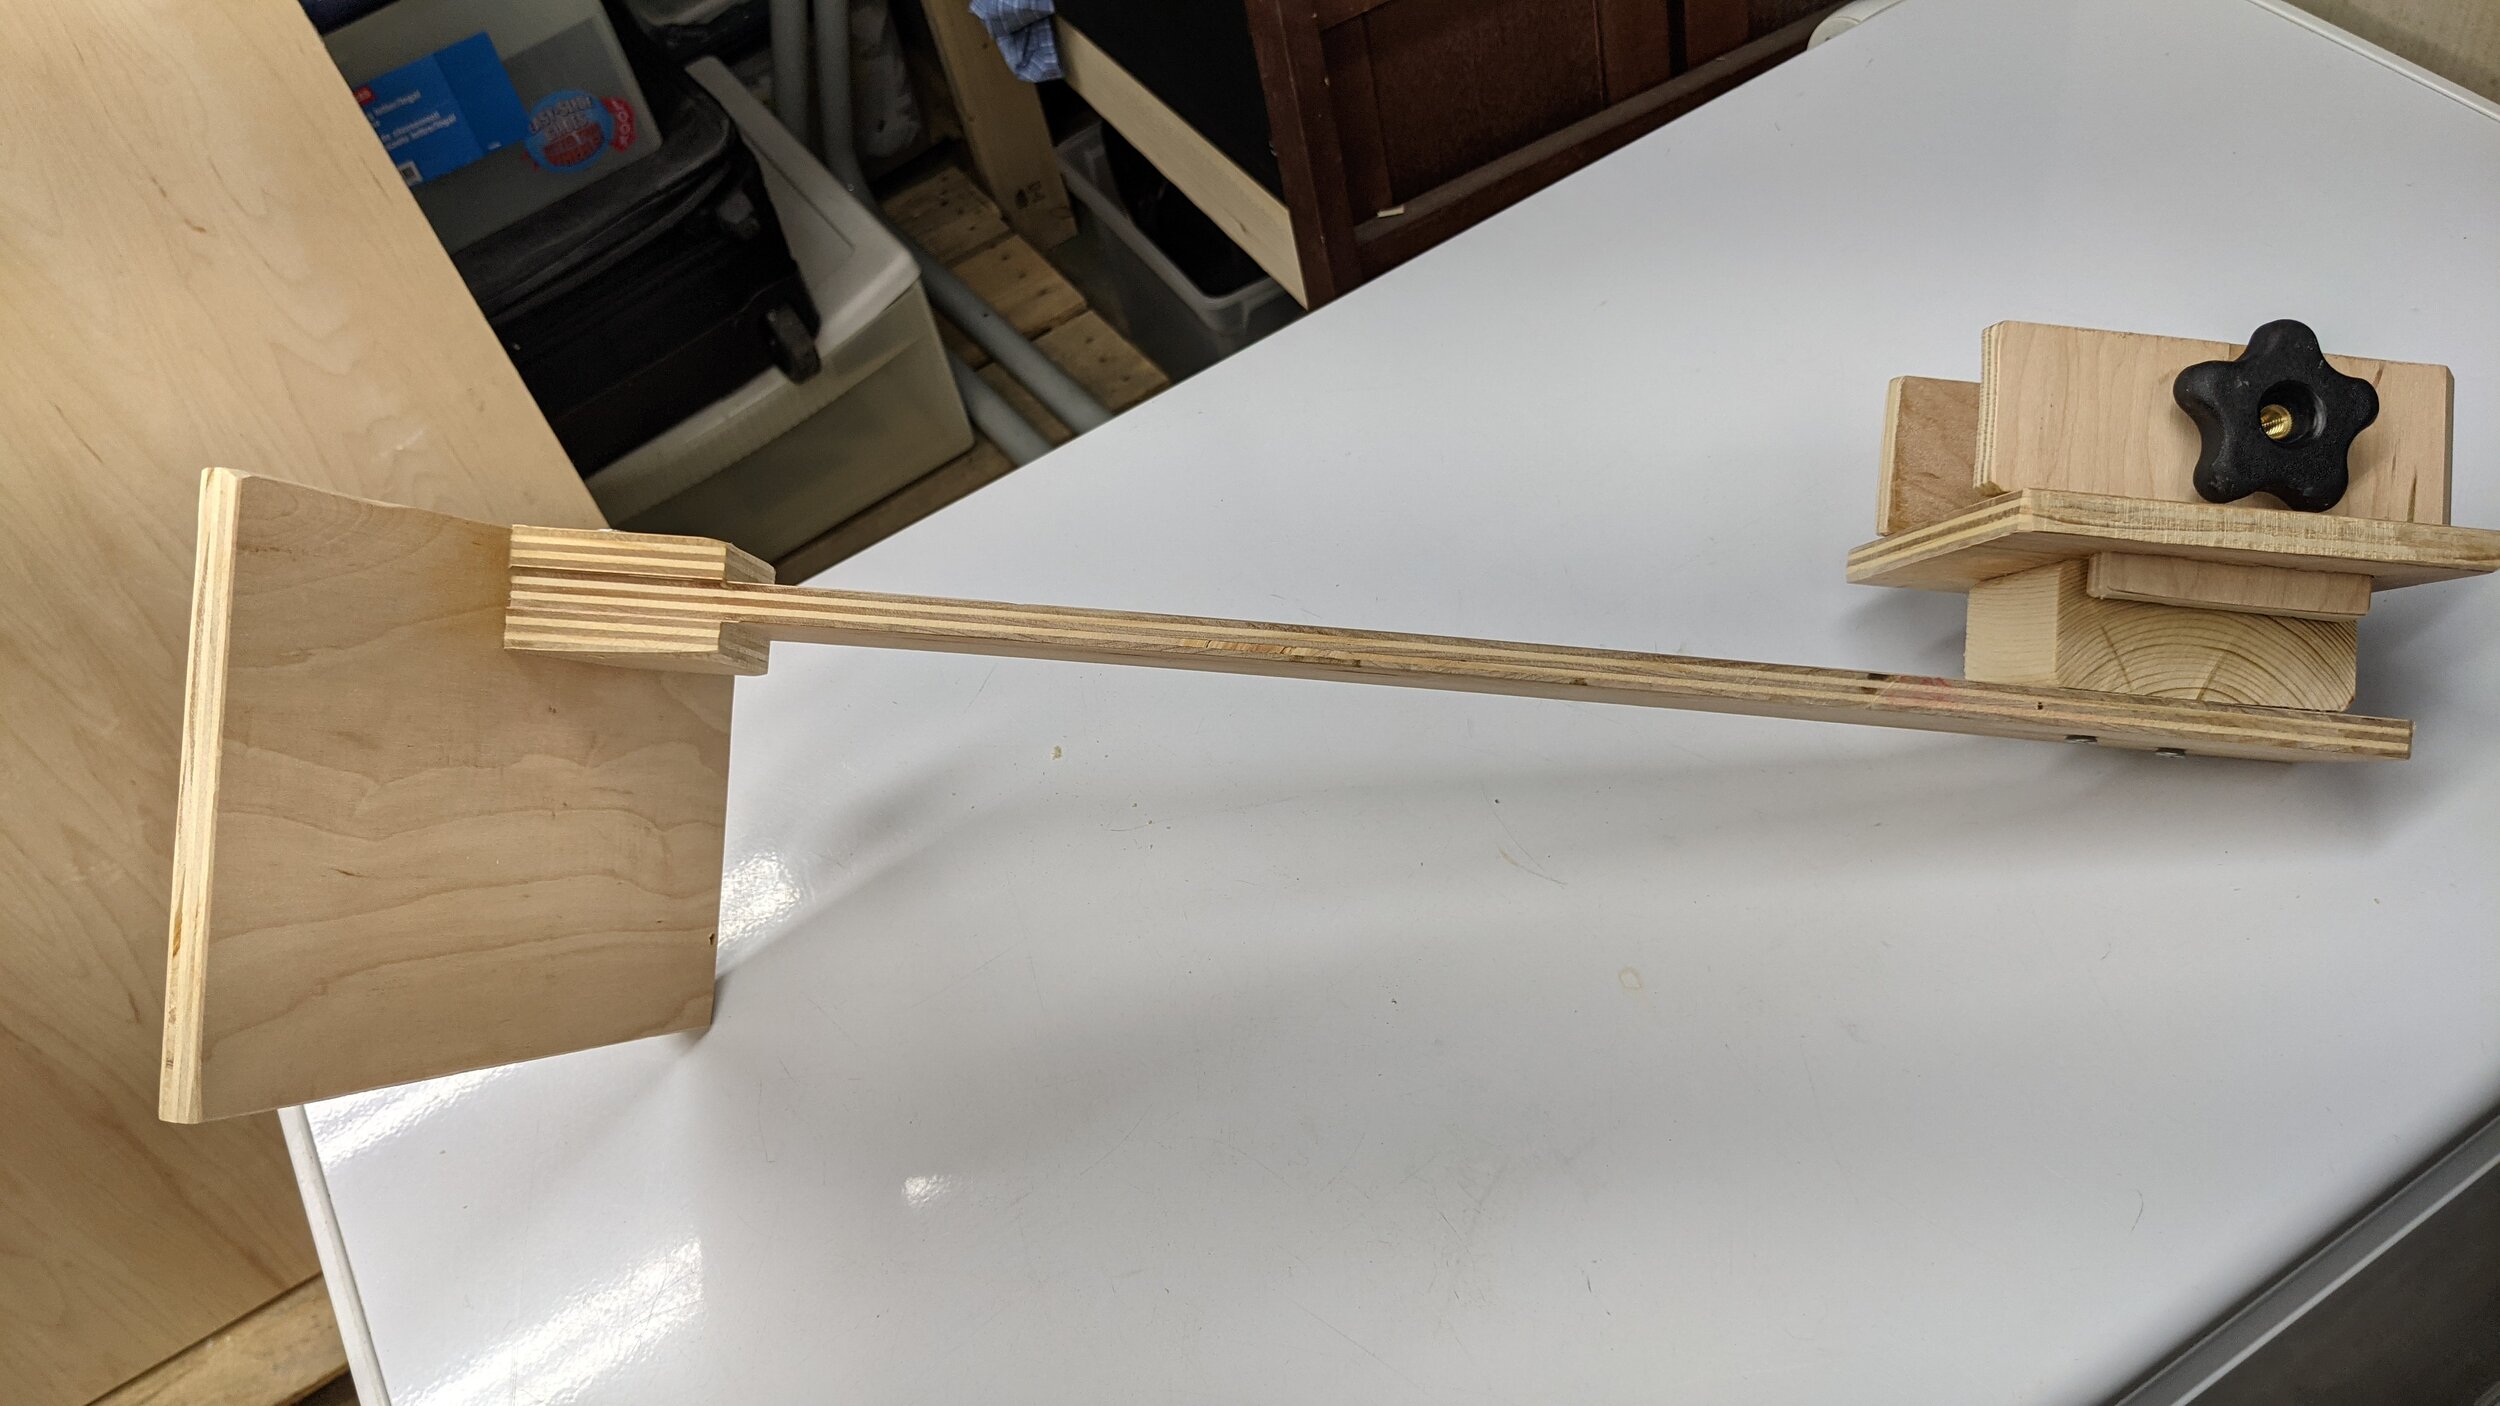
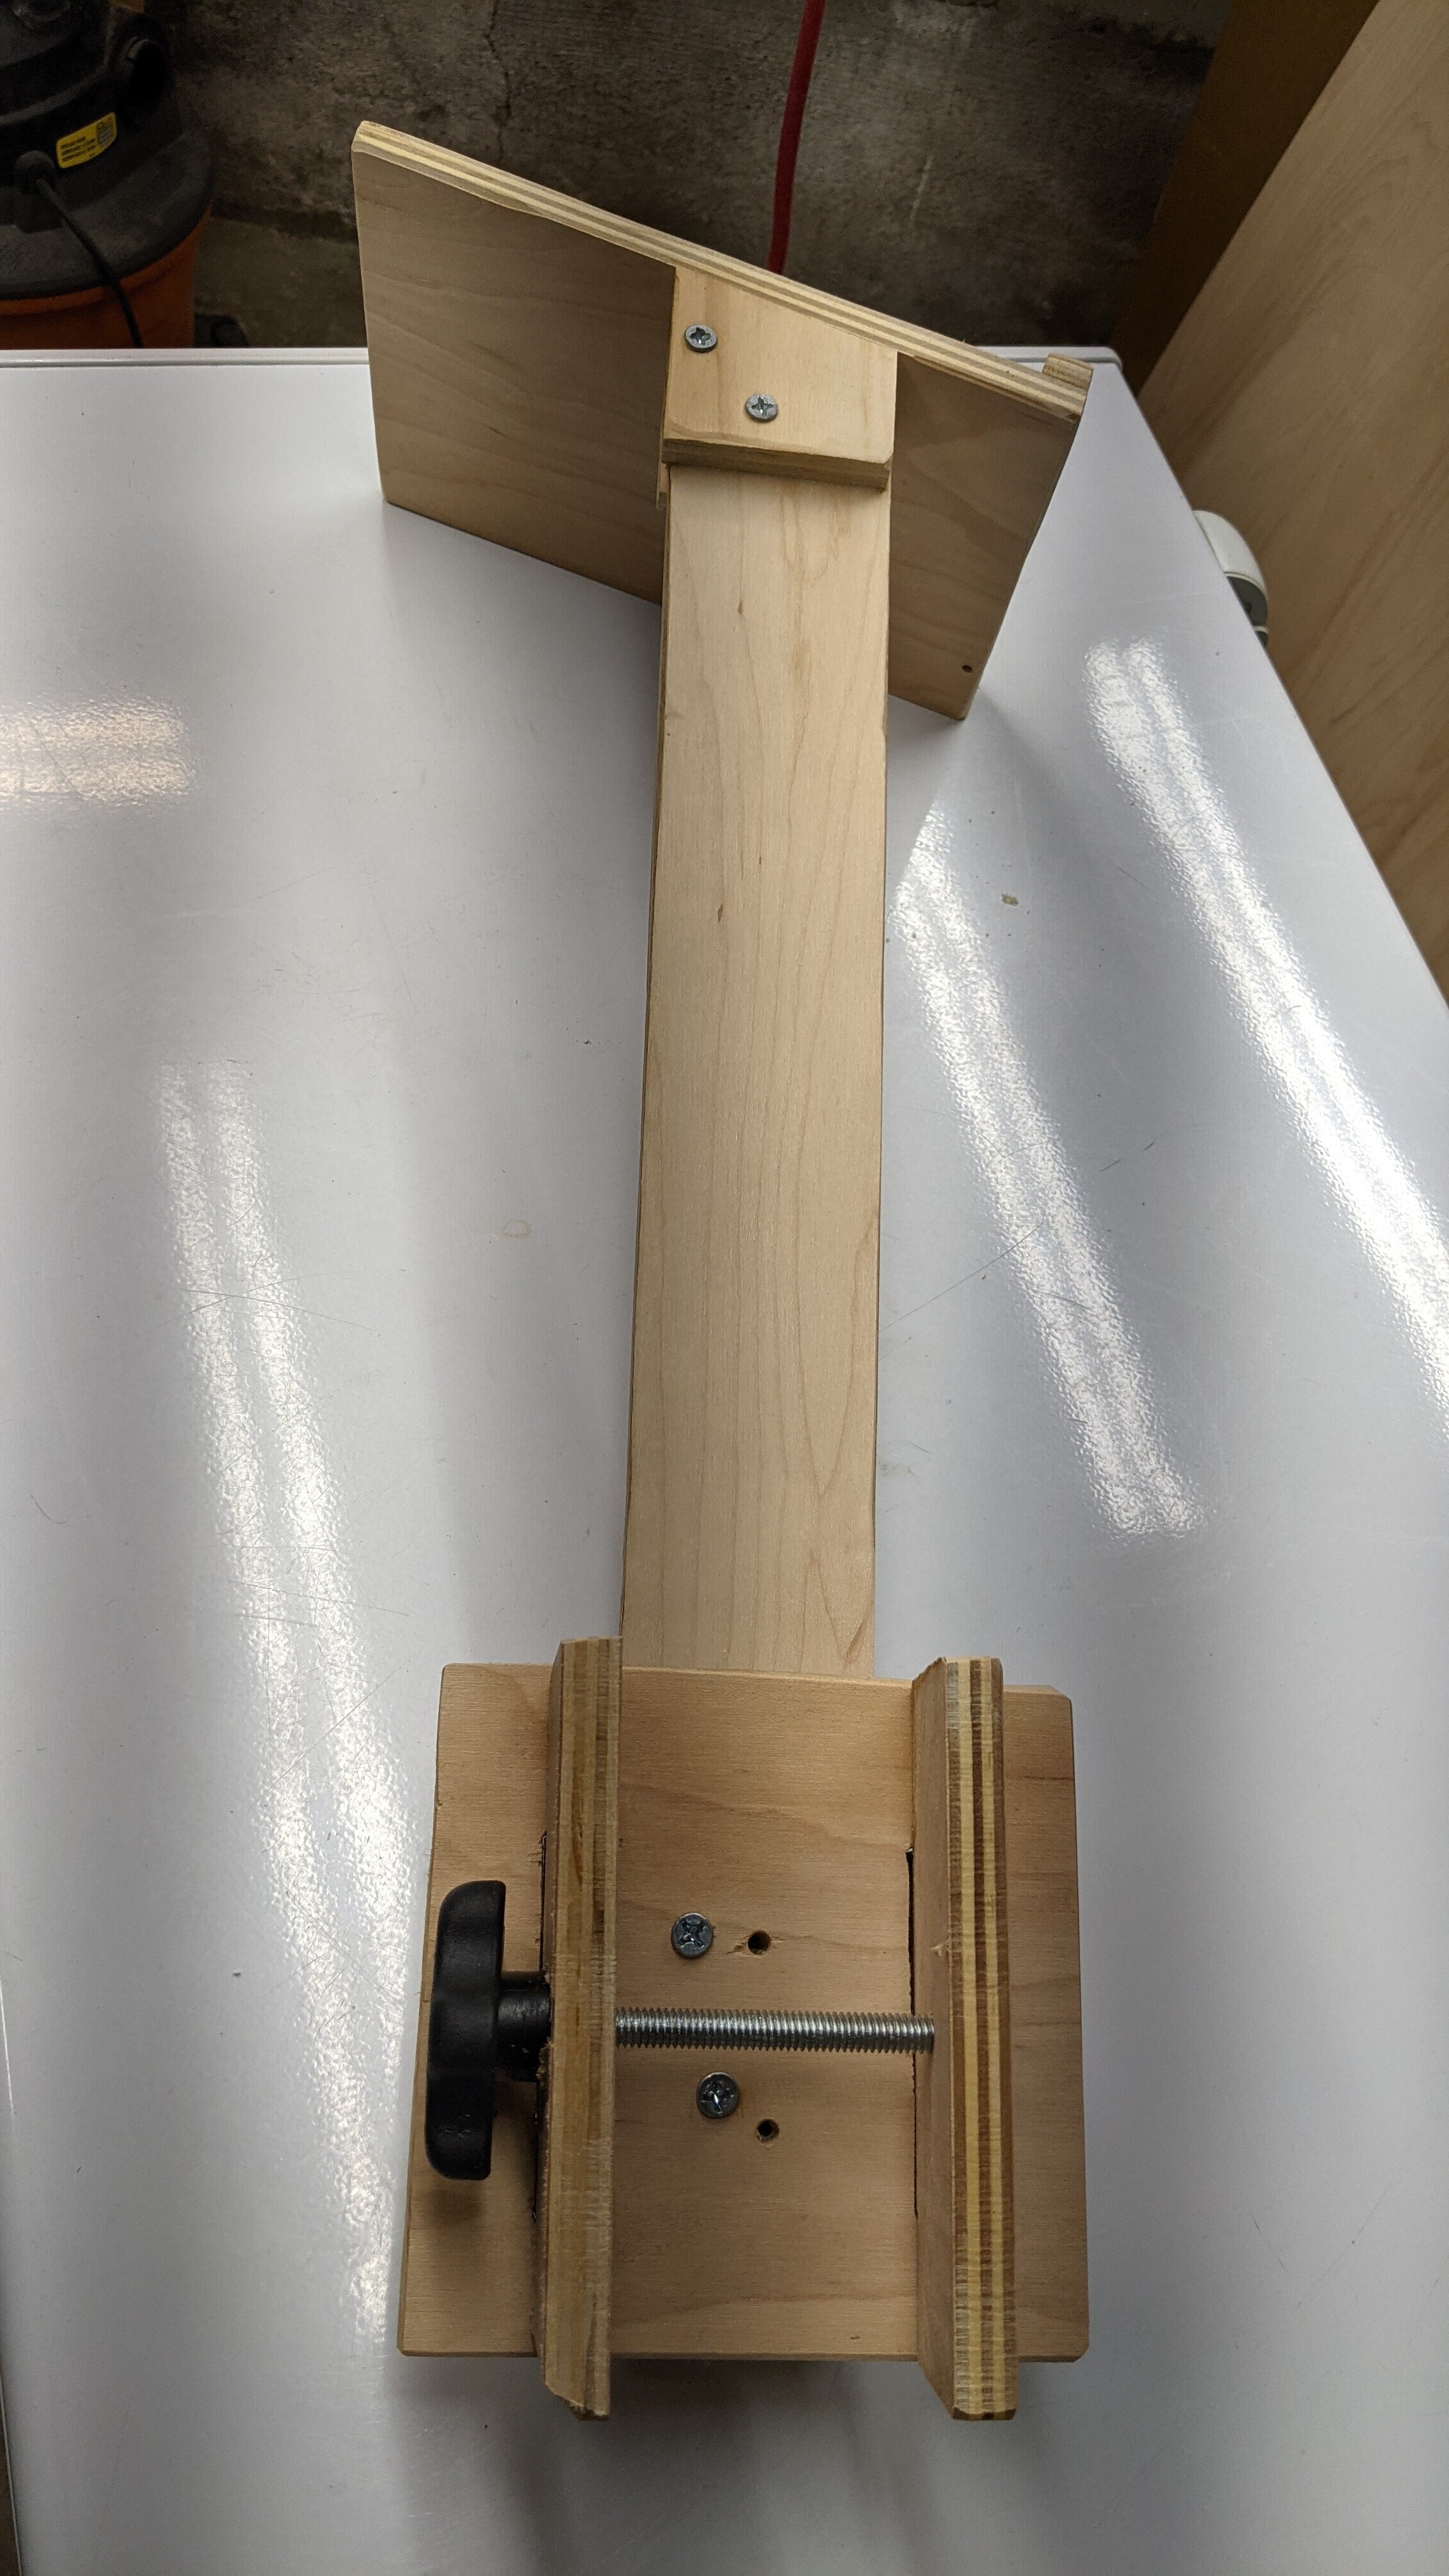
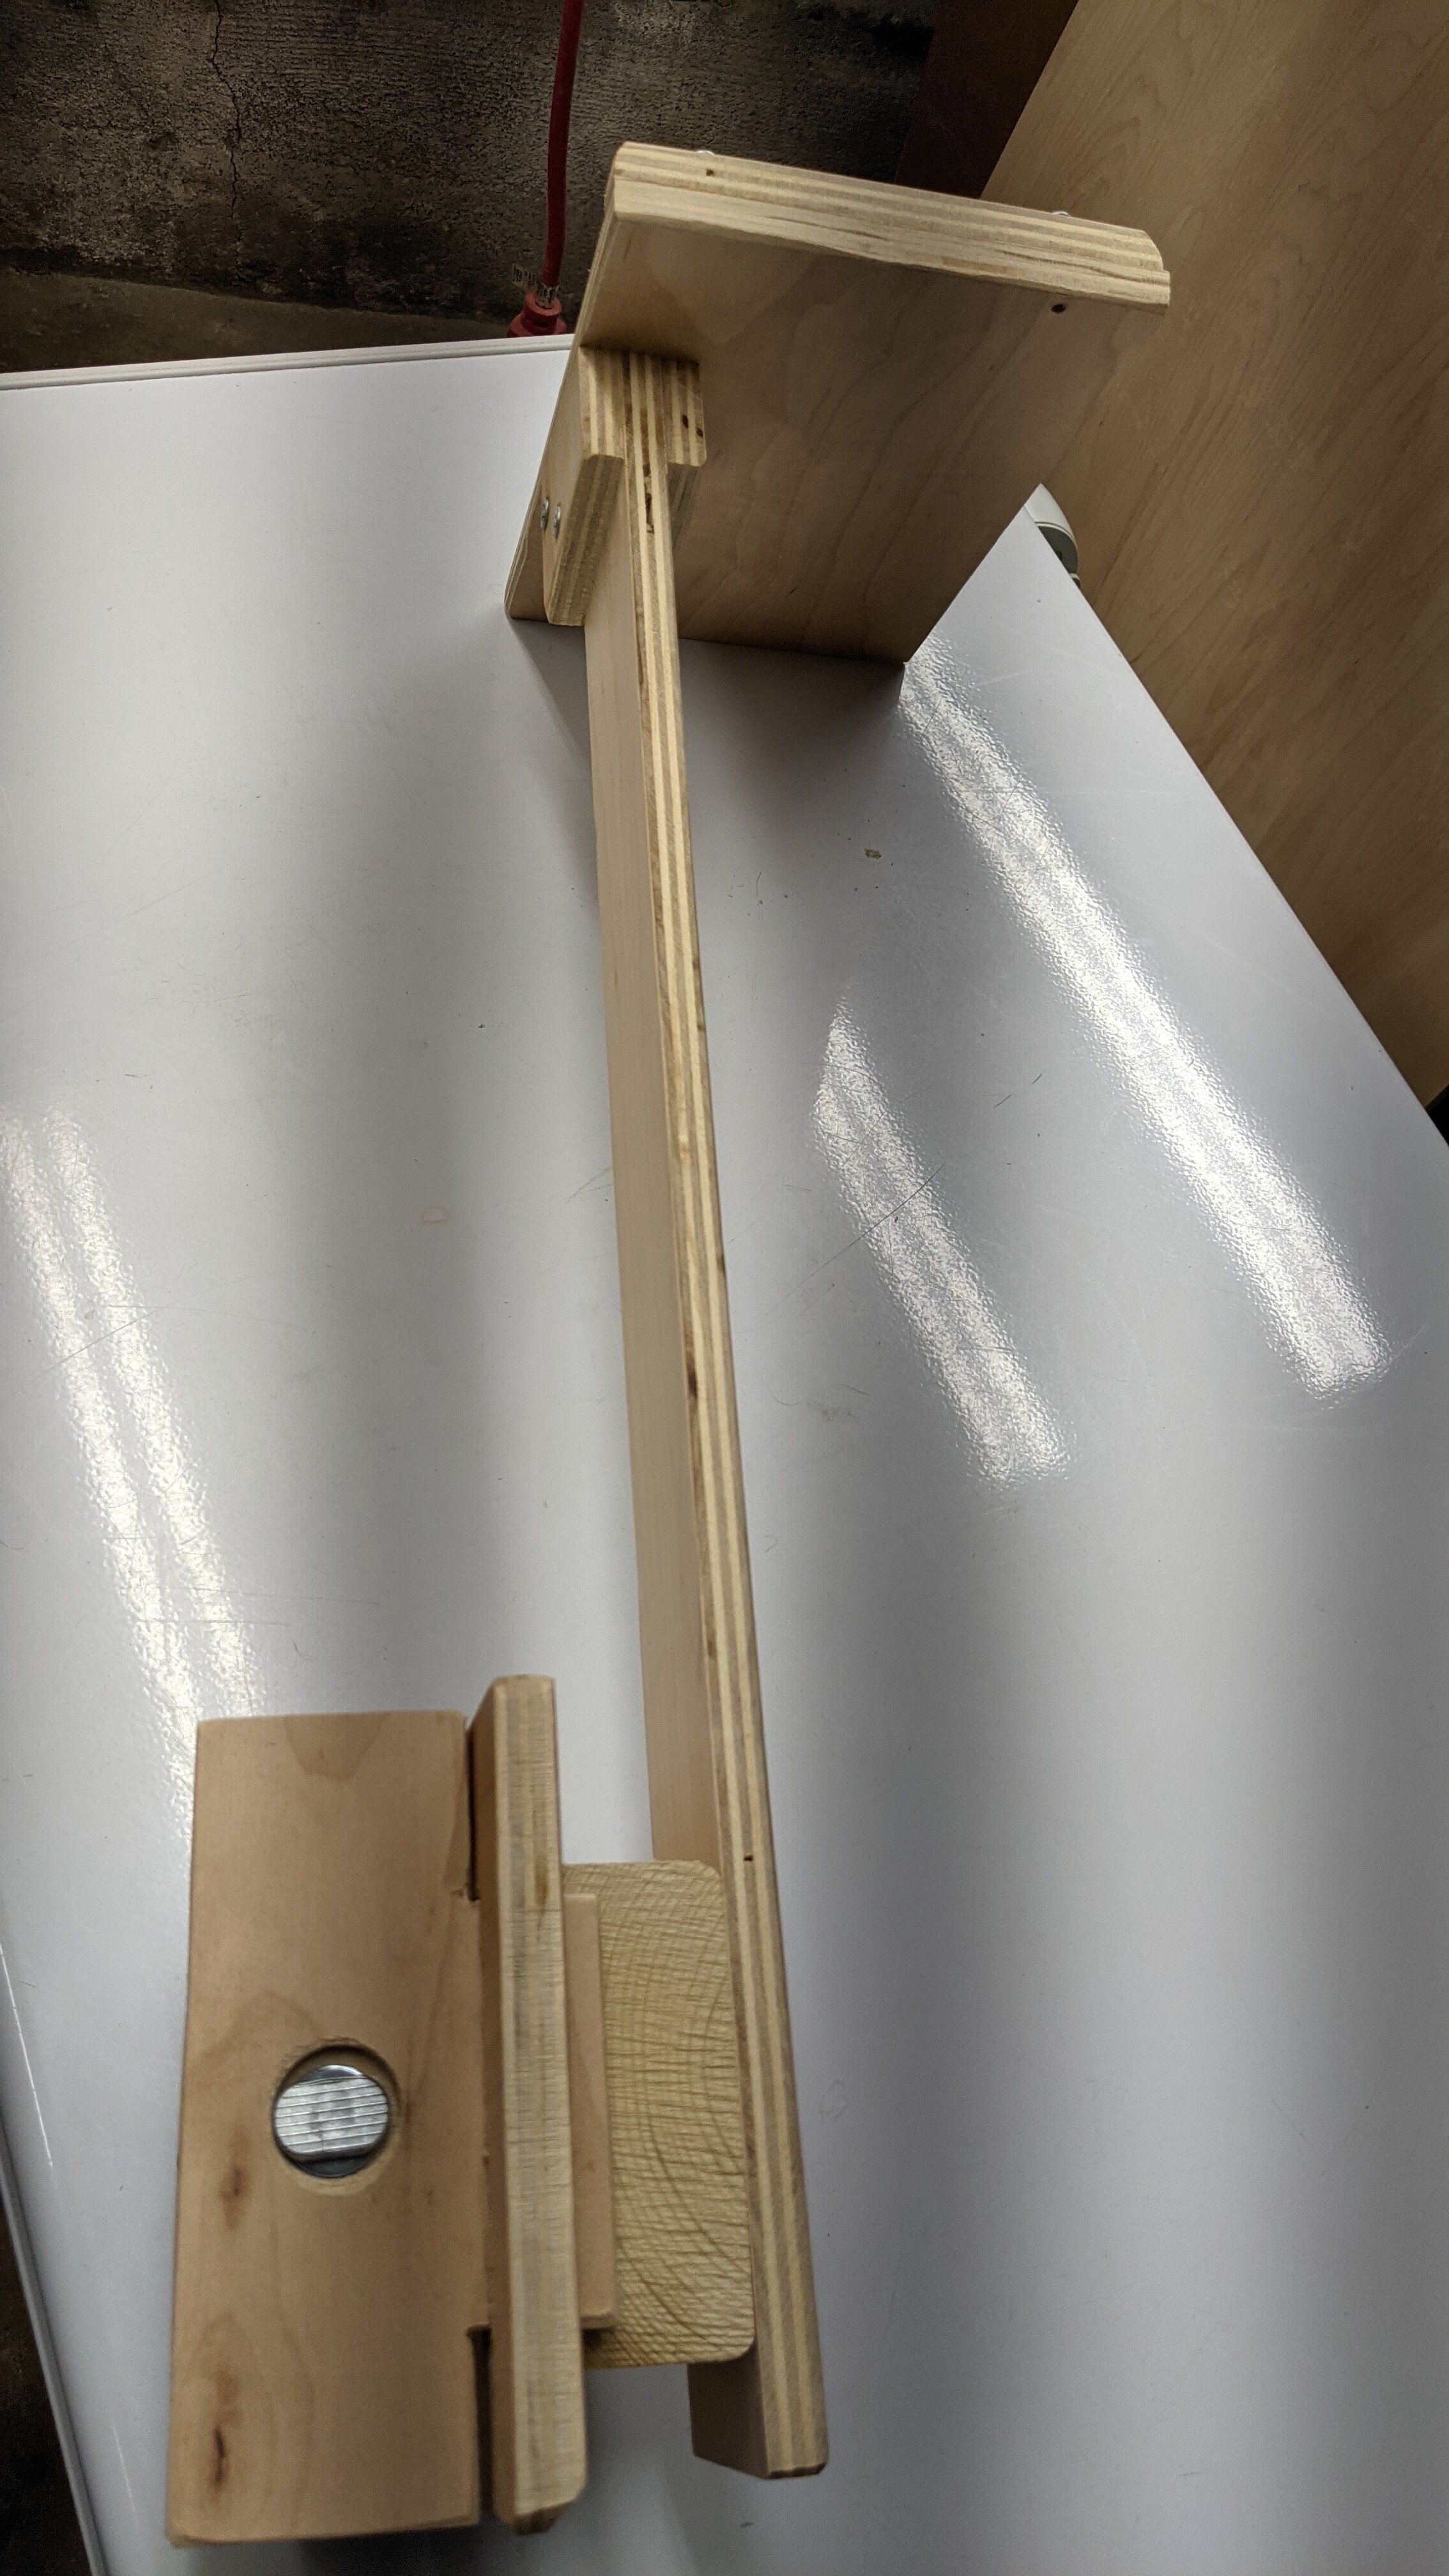
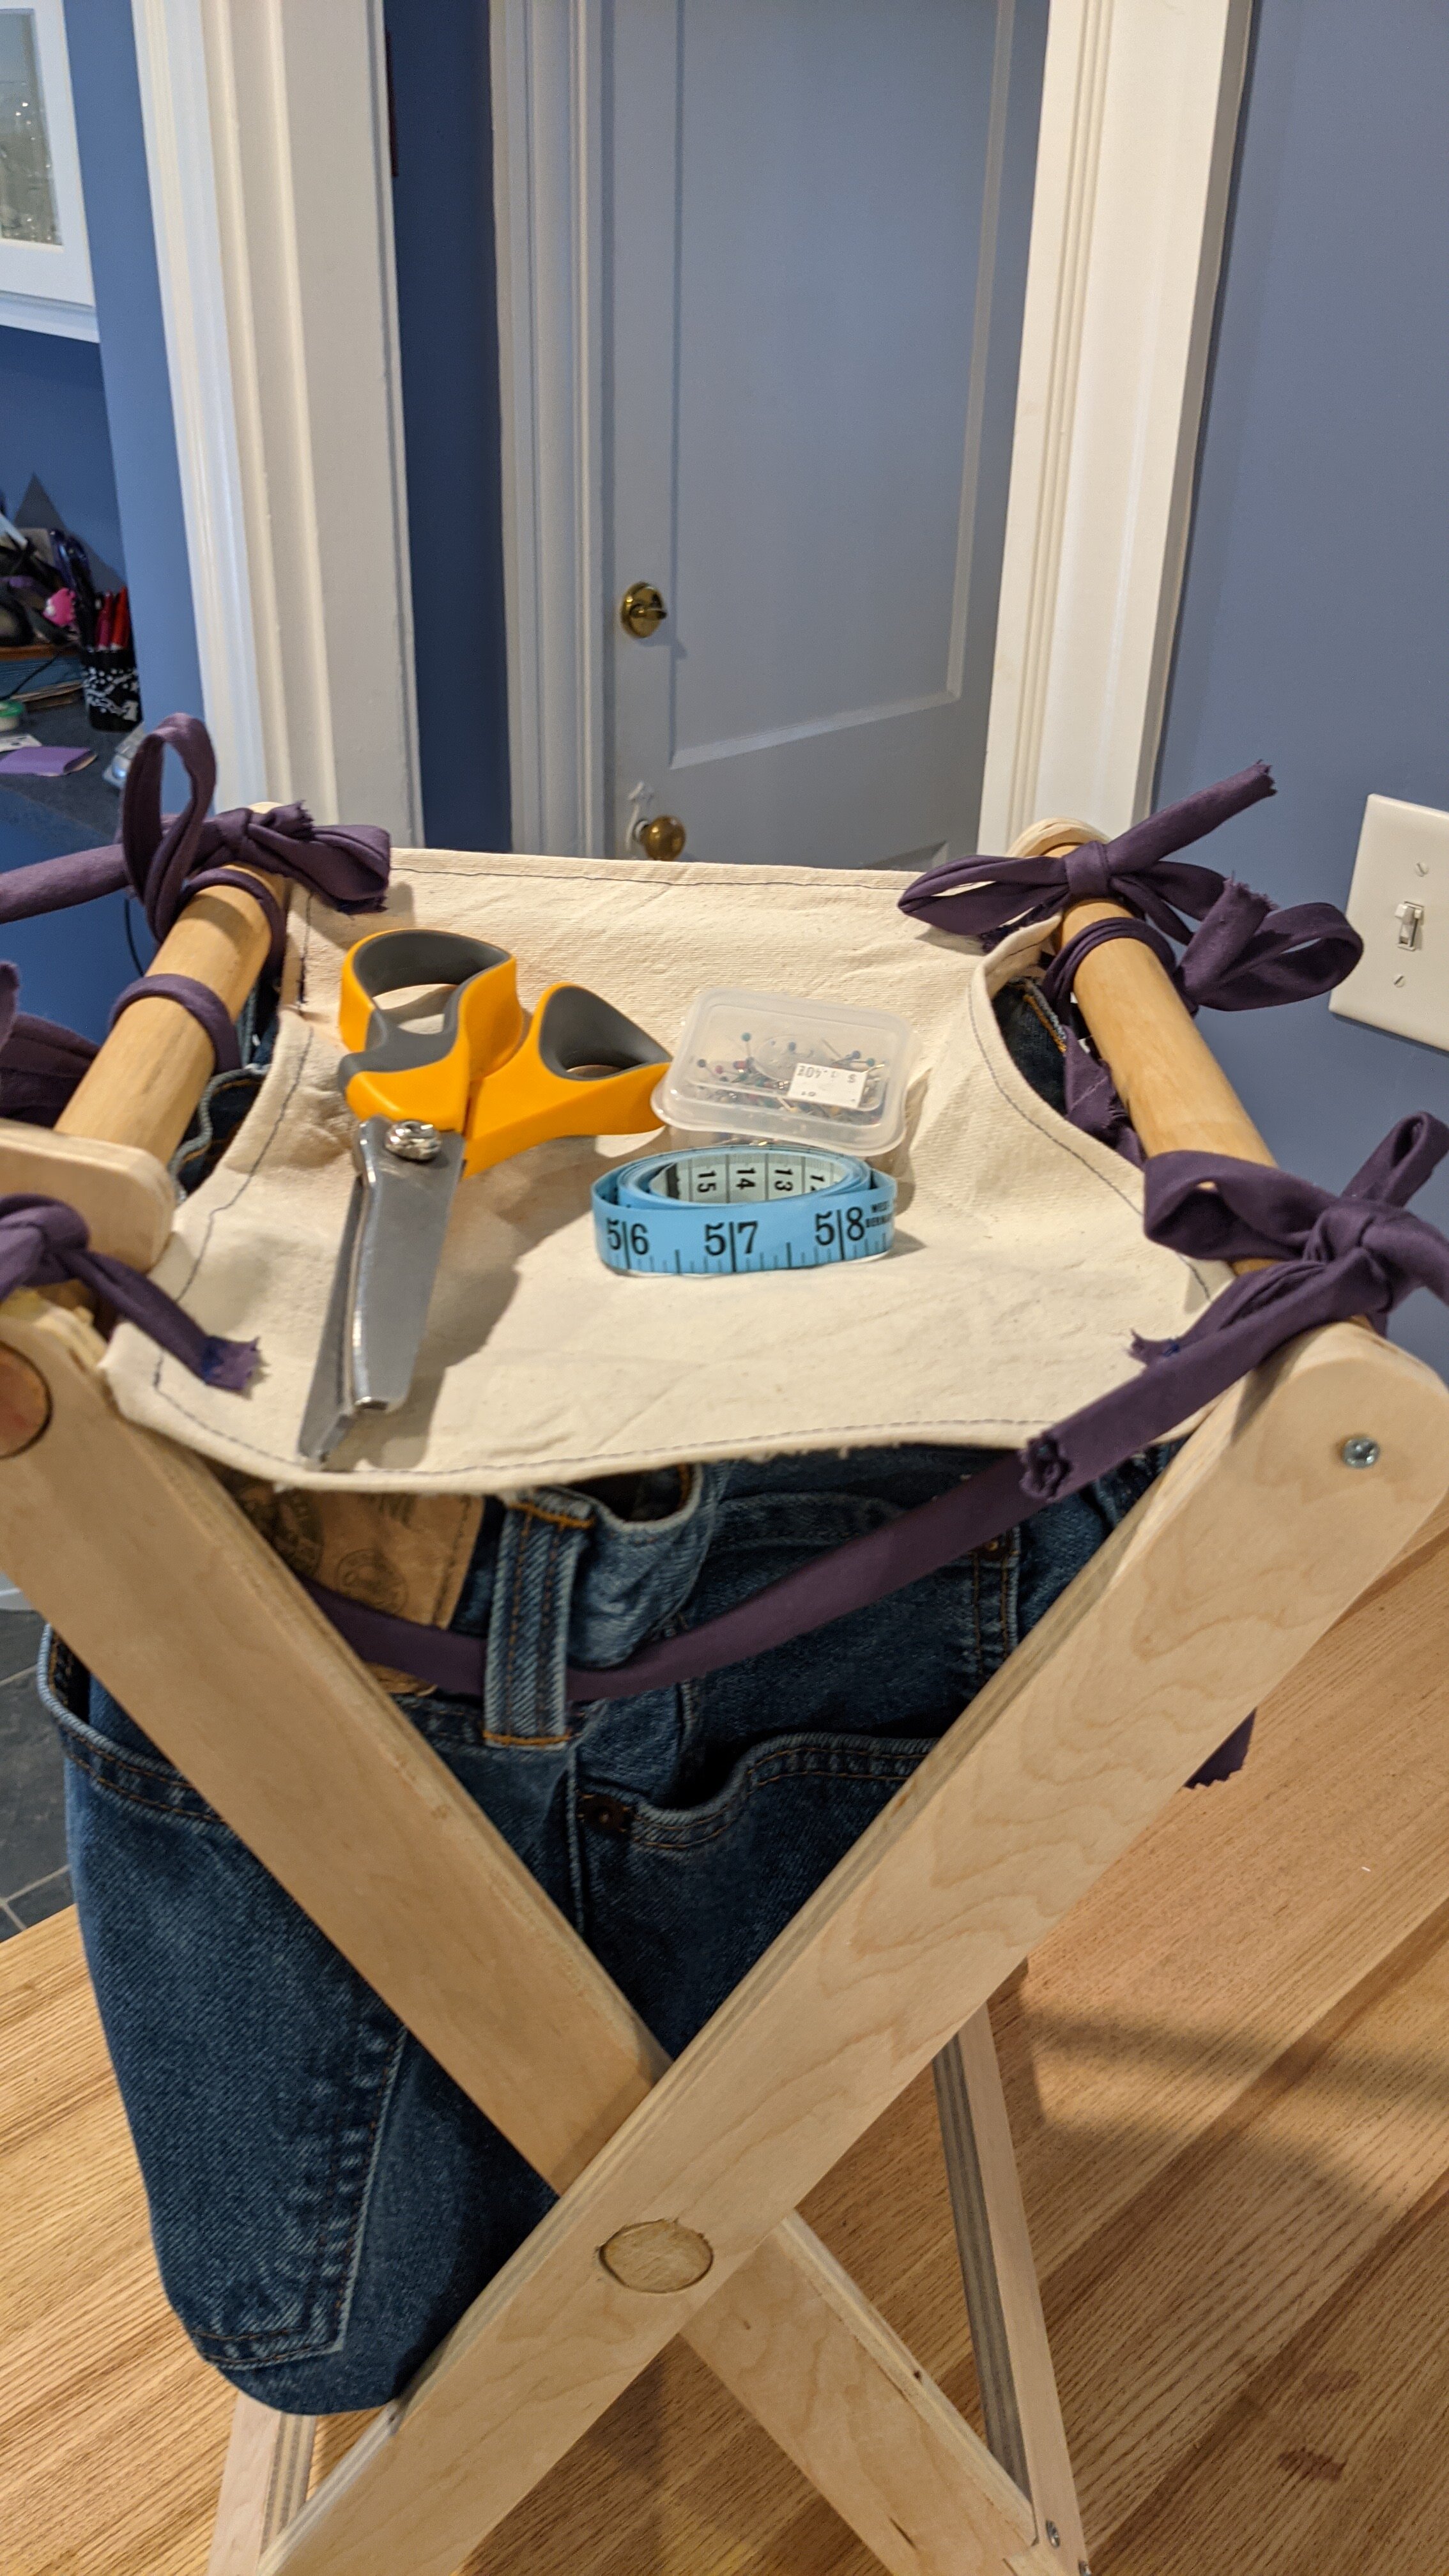
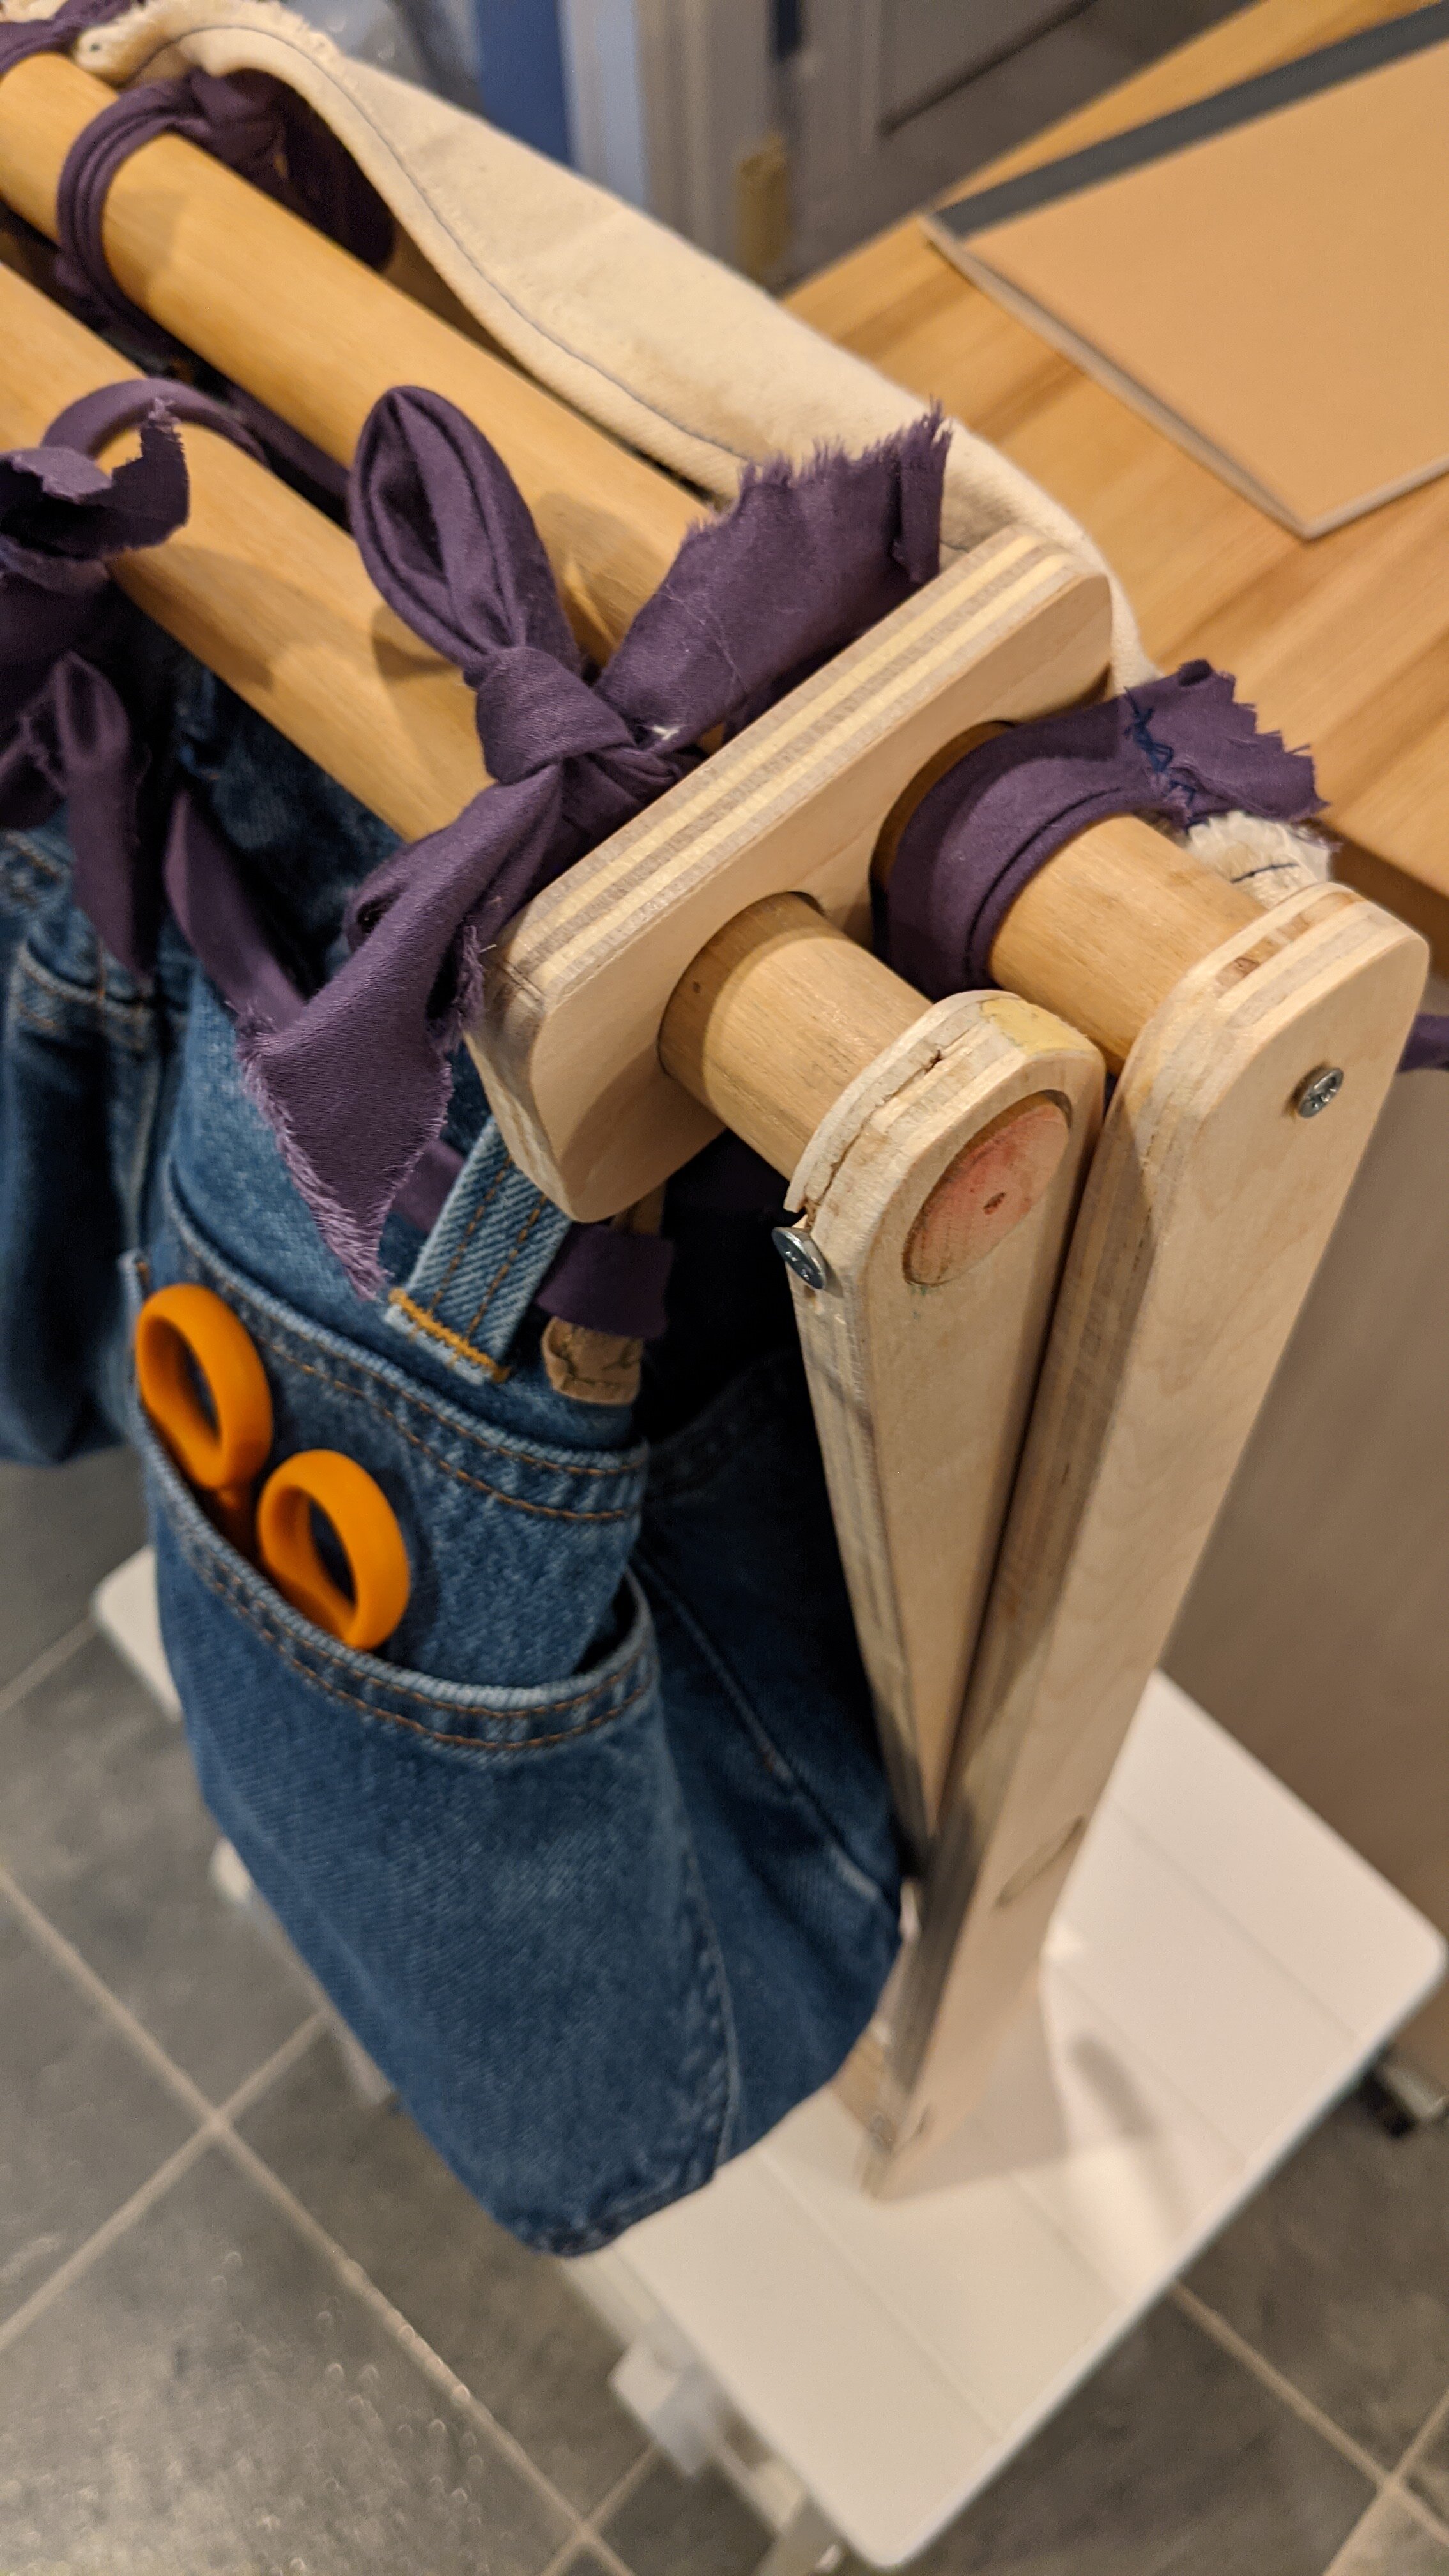
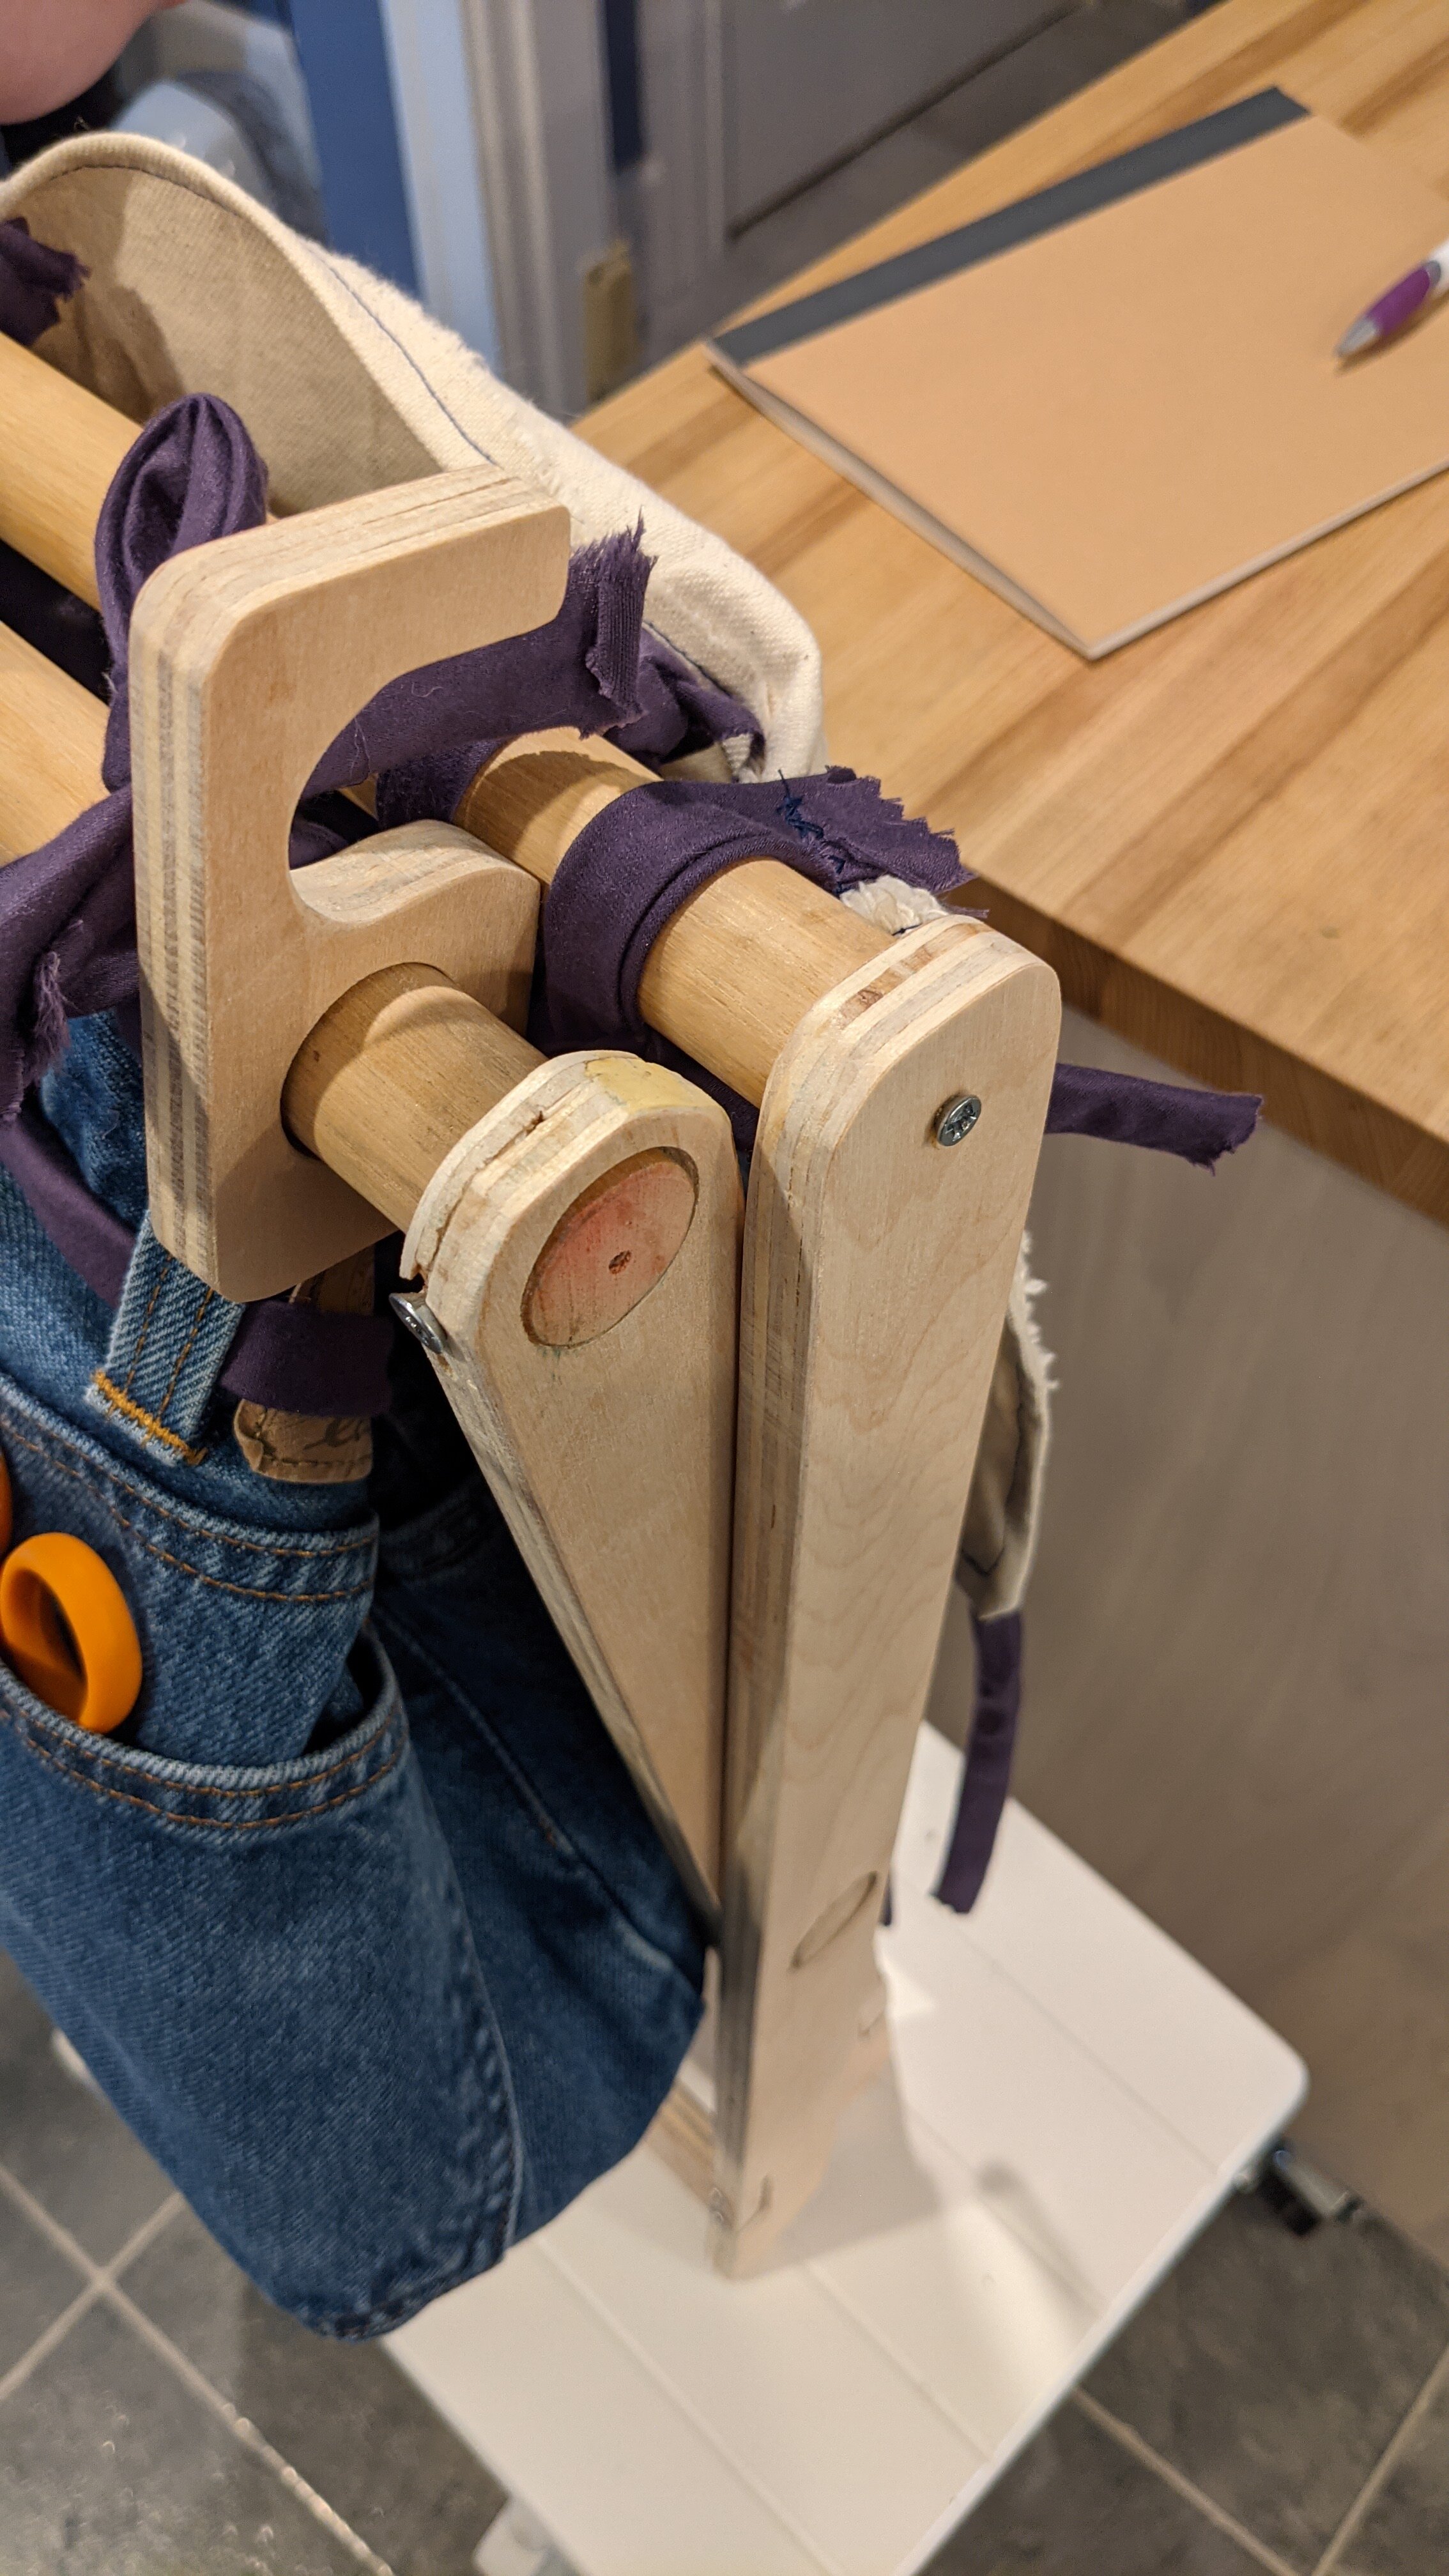
The front part of clamp opens with a hinge in the front to grasp the four rods and then there is screw knob that screws down into a threaded insert in the body to clamp down on the rods. The kerf from cutting the front so it would hinge provides the difference that allows it to clamp firmly on the rods. I installed the hinge on the end with a chunk of rod clamped in the furthest hole so that the hinge would be installed to close fully without putting stress on it.

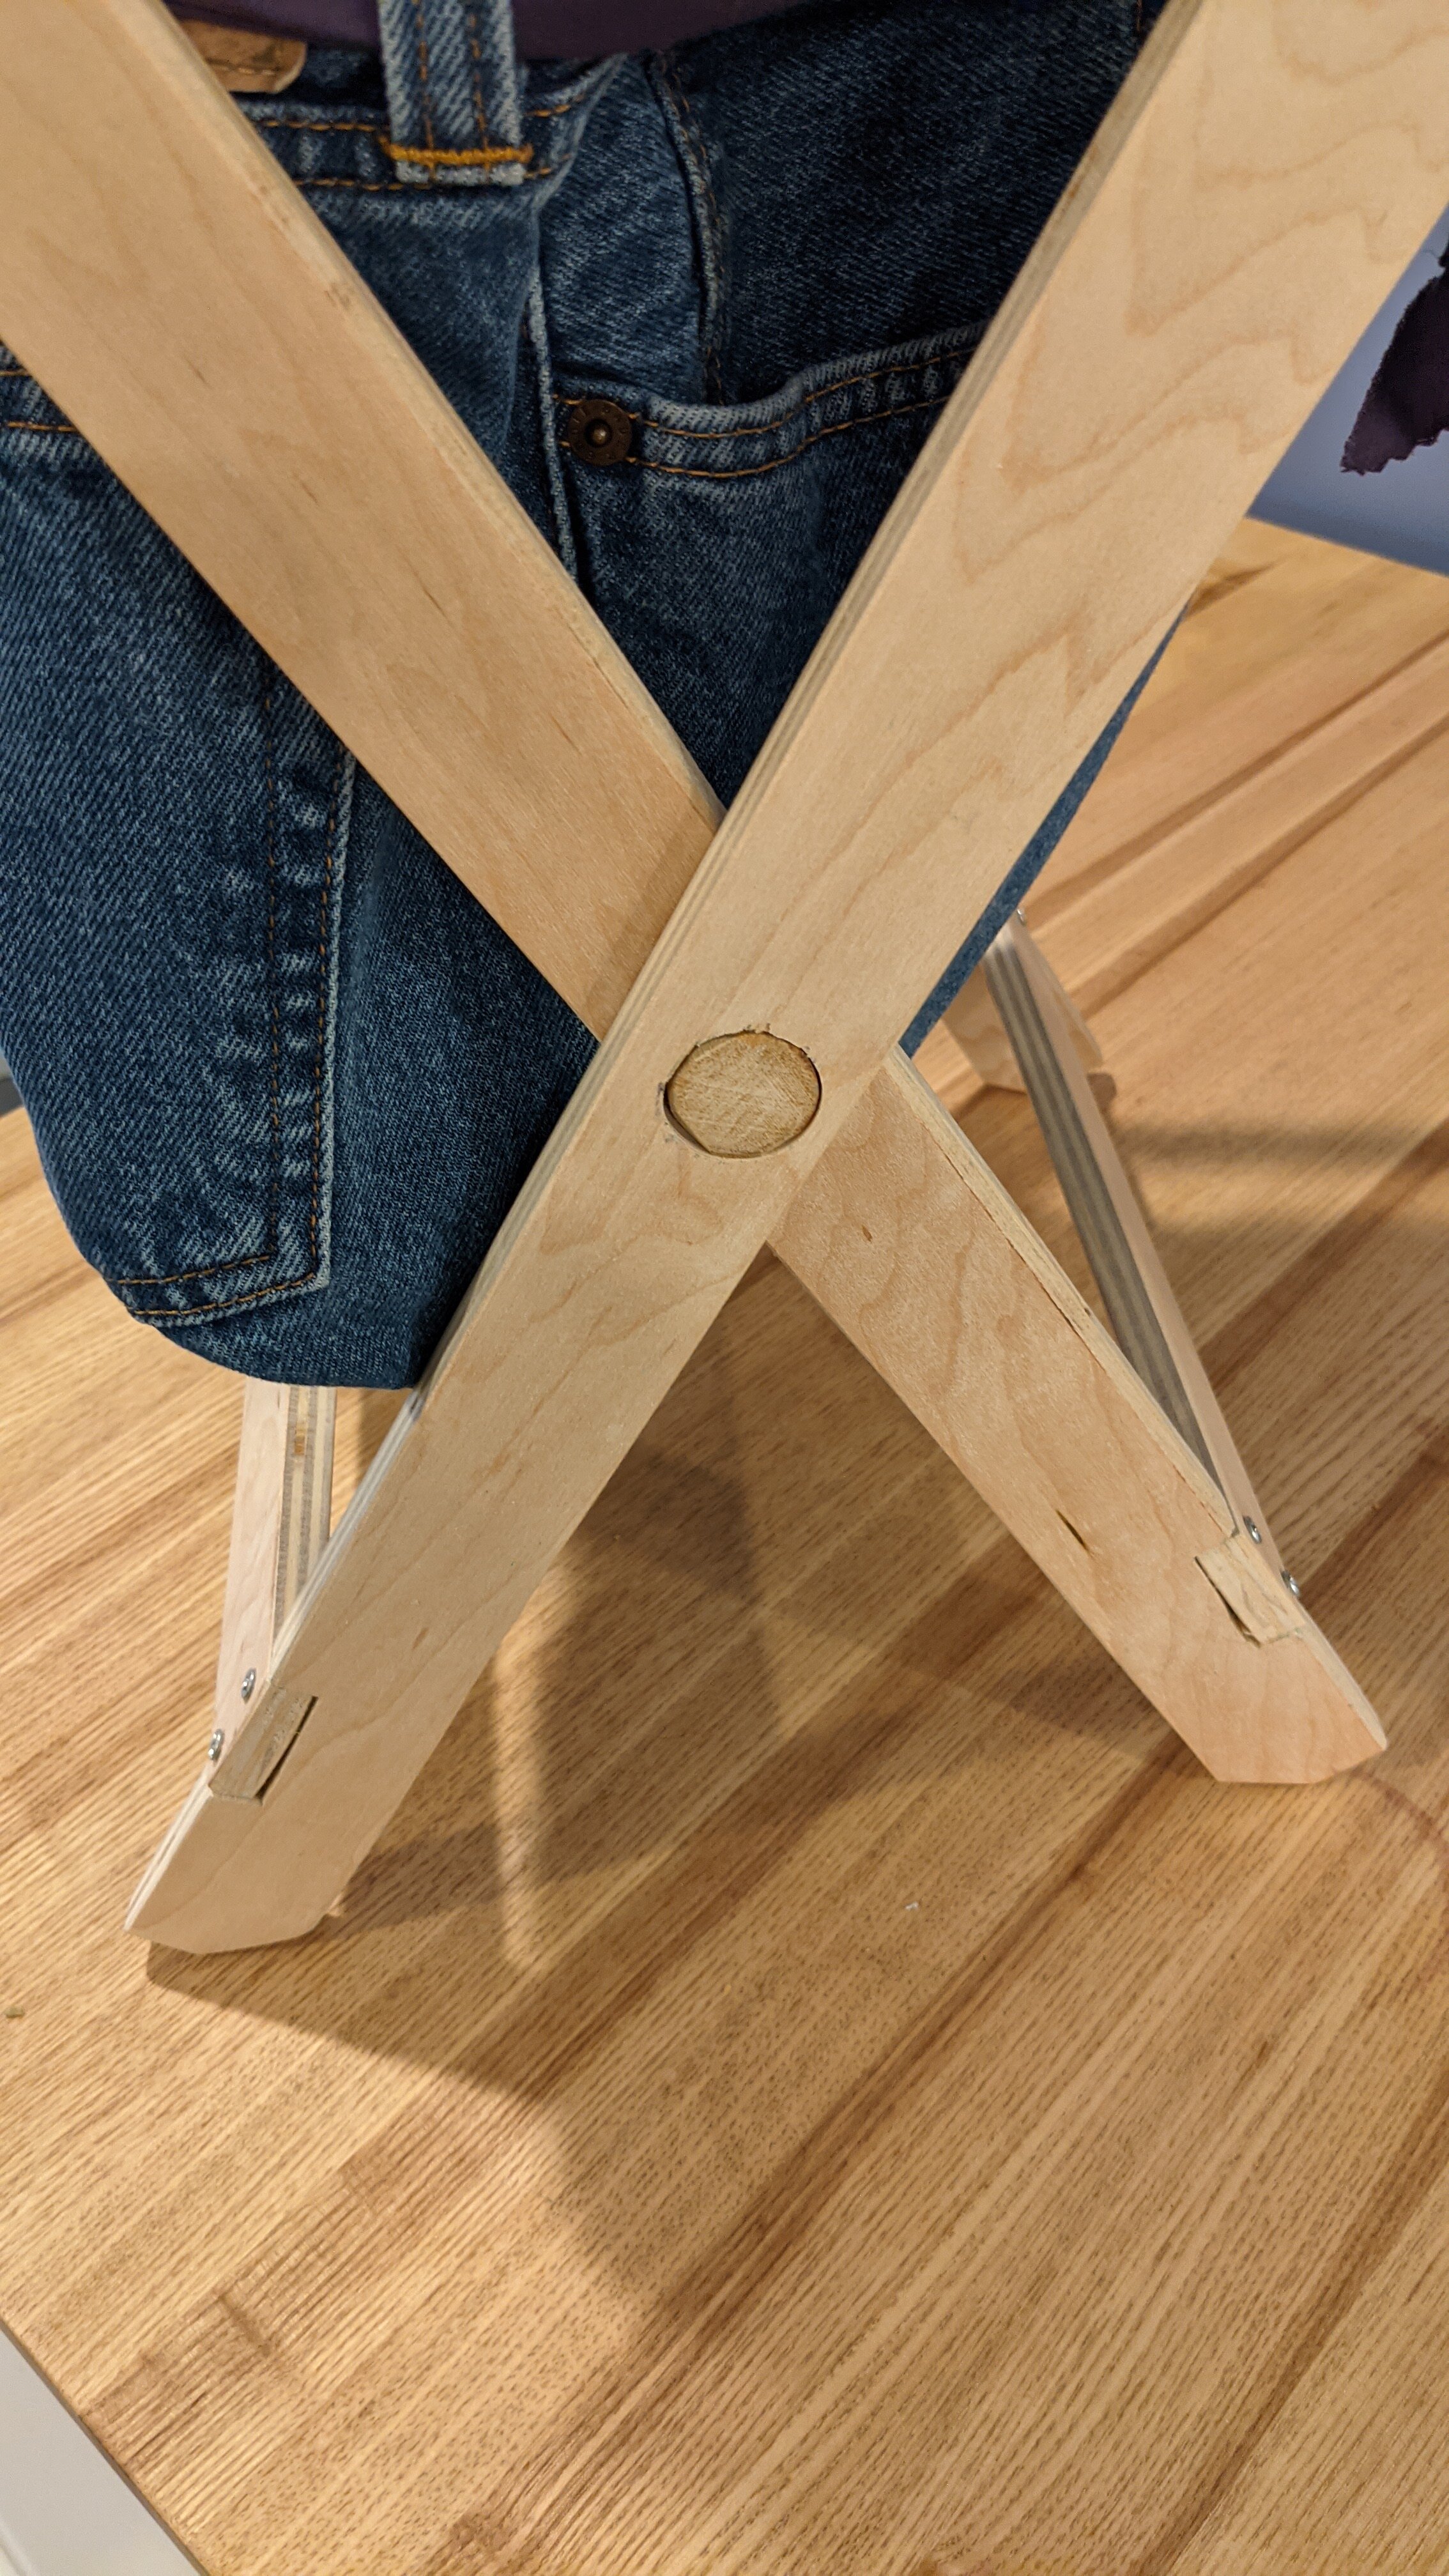
I created a bar clamp from two 1 1/16” x 1 1/16” x 5 1/2” pieces of maple with clearance through holes drilled at the ends. I couldn’t find long enough bolts at the hardware store so I got some 1/4 20 stainless all-thread rod and cut my own bolts. I used 1/4 20 wing nuts and some 1/4 20 bolts to secure them and make them hand-tightenable. I screwed the clamps to the outside of the bar holders at the matching angle to the 45 degree shoulder I cut on the bar end of each of them. The angle matches the angle of the back beam on the loom and registers everything firmly and at the right height.

I sanded everything to 320 grit and then I waxed it all with a coat of paste wax.

My beautiful and talented wife was planning to send a gift to one of her friends. It inspired me to offer to make a presentation box for the gift and so I volunteered. I had happened to have purchased some curly maple from WoodCraft when it was on sale for 70% off. I decided to make the front and the back of the box out of that material and the sides out of some Sapele left over from the bed project.

I wanted to make the panels book matched and 1/4” thick. The stock that I bought was 3/4” thick so I had to make a resawing jig for my 10” RIKON band saw. I don’t think most people would try to resaw anything with such a small and underpowered band saw but I figured I’d give it a try. I have a 1/2” 3 tooth per inch blade on my band saw and it is surprisingly rigid and cuts pretty well. I did manage to stall the band saw several times but by patiently finding the slow feed rate required I was able to cut two book matched panels 4 1/2” wide.

I edge glued them together and the resulting panel required some flattening with the sander but in the end it came out very nice. The figure on the front panel has a great “face” image of something like a snake or an alien. I got both the front and the back of the box out of one glue up. I flattened and sanded to 320 grit both sides since I wanted to finish both the outside and the inside of the box.

I have to say I thought the milling on the original blanks was pretty rough when I got them but I later realized with the curly grain going every direction it probably doesn’t plane very well.

I cut the grooves for the front and back of the box and then cut miters for the sides. I also cut a small bevel on the inside and outside of both sides of the box. I put hard wax oil finish on the panels and then installed them in box and glued it up with tape to hold and align the miters. I made sure the box was square and flat by doing the assembly on my cast-iron table saw table.

Once the glue was set I cut the box open on the table saw, sanded the new edges and then put hard wax oil finish on the outside and inside of the box.

I mounted the hardware and after a couple of days I put some paste wax on the box to add some additional sheen.

View fullsize PXL_20240902_123258670.jpg
View fullsize PXL_20240902_123310851.jpg
View fullsize PXL_20240902_123327278.jpg
View fullsize PXL_20240902_123358823.jpg

The final project was a new version of a weaving tool that I’d made before. My beautiful and talented wife has been using the tapestry/rug loom that I made for her to weave rag rugs. These are rugs that are made with strips or tubes of scrap fabric from old clothes, sheets, drapes, etc…

In order to keep the warp the same width while you’re weaving using such a heavy material for the weft, one uses a device called a temple. The temple is a stretcher placed across the warp that pulls on the edges setting the warp to a specified width. Previously I had built a temple that used spring clips to grab the warp, see below:

View fullsize PXL_20240914_170940345.jpg
View fullsize PXL_20240914_170947365.jpg

The device has adjustable length by sliding the center bar out and the pins secure it at a specific setting. This one worked ok but the clips were hard to secure onto bulky fabric while holding everything in place. So I agreed to make a different style that uses pointed metal teeth on the underside to grab the fabric and stretch it to the right distance.

I made it out of the same western red cedar that I made the one above and instead of using metal pins I used some 3/8” oak dowel rod to make the pins for this one, the knob head for the pins is just 1” maple rod segment drilled for 3/8” fit and then glued on and rounded.

I made the teeth out of some heavy gauge stainless steel finish nails I sharpened by spinning in the drill against the sanding disk. I cut the teeth to length using my reciprocating saw and a metal cutting blade. I glued them in using CA glue.

I sanded everything to 320 grit and then put a coat of paste wax on everything.

View fullsize PXL_20240914_165633354.jpg
View fullsize PXL_20240914_165646069.jpg
View fullsize PXL_20240914_165748765.jpg
View fullsize PXL_20240914_165707030.jpg

That’s it for now, I’m working on designing a new project and I’ll share my progress soon.

In Journal Tags building, weaving, journal, gift box
Comment

Building Project: Blanket Rack

April 23, 2022

I live in the northeastern United States and we have all the seasons with all the temperature variations and weather that come with that. I wouldn’t have it any other way. We tend to keep the house cool in the evenings all year round and if we’re watching TV or reading we have blankets to adjust our personal temperature. In the last few years my beautiful and talented wife has taken up weaving as well as spinning and dying wool and other fibers. She wove both of the blankets in the picture above and she spun and dyed all the wool for the one in the foreground.

One small problem with blankets is that they tend to slither onto the floor if you’re not using them. So, I decided to build a blanket rack to hold them and to display them in the off season. I did some research on various styles of blanket rack and decided on this design which is a hybrid of things I liked about several that I saw. I made a scale drawing before I got started…

As usual the drawing is more of a guide than a blueprint… The material is two layers of 1/2” sanded pine plywood that I had left over from another project. I glued up the blanks rough side to rough side to make 1” pine plywood that had two sanded knot free sides. The glue-up came out great and I have become smart enough to make the blanks larger in all dimensions so I could true the edges up on the table or miter saw.

A hero tool on this build was the sanding station with a 50 grit belt on it, I was able to tape the two ends together and rough cut the curve at the top on the band saw and then just sand curve to the final shape with the sanding station.

The second hero was my new Bosch Colt 1 HP Variable-Speed Palm Router which saved the cutting of the openings in the ends. I had originally tried to use a jigsaw, but the blade immediately wandered, bent and mangled the cut… I ended up cutting them out with the Palm Router and multiple passes with a 1/4” straight cutting bit. I had to cut out the mangled section, glue in a replacement piece from an offcut of the material and then fill and sand it… I also rounded over all of the edges with the Palm Router and that did a fantastic job as well. I really like this router, it is much easier to control than the big beast that I got for the router table.

I got some practice fixing/hiding my fuck-ups and I’m happy with where it came out, I was able to patch fill and sand the mistake so that unless you know where to look you can’t really detect it. I painted the stand with a latex super primer and a semi-gloss white latex finish coat. All in all the rack works well and I’m happy with how it looks.

View fullsize PXL_20220423_120709682.jpg
View fullsize PXL_20220421_163641135.jpg
View fullsize PXL_20220423_120654941.MP.jpg
In Journal Tags building, blanket rack, weaving, spinning
Comment
PXL_20210405_212625758.MP.jpg

Building Project: Weaving note desk

April 5, 2021

My lovely wife Dana took up weaving a little more than two years ago. She is making more and more complex fabrics on her rigid heddle loom. She often needs notes available to follow the complex pattern and she asked me if I would make an add-on for her loom that would hold them in a convenient position. The constraints were to not be permanently attached to the loom and to not be in the way of any of the weaving or the mechanism of the loom.

I came up with a design where would clamp the desk to the leg of the loom stand and have a standoff that kept it away from the knobs and such on the side of the loom. I measured her usual working angle and matched that with the desk surface, about twenty degrees. I created a clamp out of three pieces of plywood and a t-bolt and knob, two of the pieces slot into the front piece and then the t-bold goes through them and pulls them together against the leg. The front plate provides a mounting surface for the standoff and the upright of the desk. I tripled up the plywood ( maple cabinet grade plywood I had left over from another project ) and created a mounting block at the top. I cut that at twenty degrees and screwed the desk surface to it. I added a bottom edge stop to the desk to allow for a tablet to be placed on it in addition to paper notes.

I made a chipboard template of the clamp parts and cut them on the bandsaw, the slots I cut with the forstner bit and a coping saw and finished the fitting with a wood rasp. I used screws to attach everything in case I needed to make additional adjustments in the future. I sanded all the edges and surfaces and put some paste wax on everything to protect it.

It got a test run tonight and it worked great!

PXL_20210405_212302910.jpg
PXL_20210405_212309775.jpg
PXL_20210405_212316673.jpg
PXL_20210405_212323420.jpg
PXL_20210405_212327368.jpg
PXL_20210405_212609662.jpg
PXL_20210405_212620412.jpg
PXL_20210405_212625758.MP.jpg


In Journal Tags projects, building, weaving
Comment
PXL_20210316_221121608.jpg

Building Project: Weaving work bag stand

March 17, 2021

My lovely wife Dana has taken up weaving and now spinning. Both activities require having a bunch of small tools and supplies near at hand. Dana came up with the idea of a collapsible work bag/work table that could sit next to her when she was working and then be closed up for storage. She asked me to make it for her and using some measurements from things that she was already improvising to do this I made a measured drawing to figure out the design.

spinningbag.png

I had some nice 1/2” cabinet grade maple plywood scraps from the cabinet project so I was able to create a chipboard template for the legs and trace them onto the scrap. I had a nice length of 1” dowel that was long enough to make the handles and pivots. I had also just bought a set of Forstner bits and had a 1” one already.

I cut out the legs on the band saw and they came out perfectly. I cleaned up the notches for the stretcher and drilled the through holes and partial holes for the handles and pivots. I clamped my belt sander in the vice and used it to do the rough sanding and knock off the edges, I’m still learning finesse with power sanders but it is getting better. I did the finish sanding with my palm sander and applied a nice wax finish to all of the wood. I assembled the frame with small screws and wood glue. I’m thinking I need a brad nailer because even the smallest screws are a risk for splitting thin material like this especially into the end grain.

Dana made a cool bag out of the top of a pair of recycled jeans from the collection of fabric she keeps for projects. She also made a canvas platform to provide a removable table top for holding tools handy. I created a simple hook on the band saw that rotates on the handle and keeps the bag closed when it is stored.

All in all I think it came out pretty well.

PXL_20210316_221026127.jpg PXL_20210316_221031035.jpg PXL_20210316_221053464.jpg PXL_20210316_221224721.jpg PXL_20210316_221345221.jpg PXL_20210316_221410210.jpg PXL_20210316_221656856.jpg
In Journal Tags projects, building, weaving, spinning
Comment

Latest & Greatest

Blog RSS
Featured
May 2, 2025
Cruise around Japan
May 2, 2025
May 2, 2025
Apr 2, 2025
One day builds...
Apr 2, 2025
Apr 2, 2025
Mar 31, 2025
Modern Wing-back Chair
Mar 31, 2025
Mar 31, 2025
Mar 16, 2025
Retired five years, an update...
Mar 16, 2025
Mar 16, 2025
Jan 29, 2025
The Clock
Jan 29, 2025
Jan 29, 2025
Jan 28, 2025
Reykjavik Iceland and Helsinki Finland Trip ( December 2024 )
Jan 28, 2025
Jan 28, 2025
Jan 28, 2025
San Francisco trip to Bay Area Maker Faire ( October 2024 )
Jan 28, 2025
Jan 28, 2025
Sep 15, 2024
Some small projects...
Sep 15, 2024
Sep 15, 2024
Aug 13, 2024
Re-purposing Skills
Aug 13, 2024
Aug 13, 2024
Aug 12, 2024
Screech Owl House
Aug 12, 2024
Aug 12, 2024

Tags

  • building
  • journal
  • projects
  • python
  • software

All content on this site is Copyright 2007-2024 by James Goodwin unless otherwise noted.